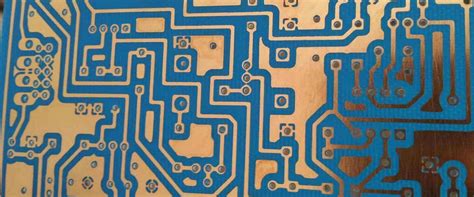
Introduction to PCB Photoresist
Printed Circuit Boards (PCBs) are essential components in modern electronics. They provide a reliable and efficient way to connect electronic components and create complex circuits. One crucial step in the PCB manufacturing process is applying photoresist, a light-sensitive material that helps transfer the desired circuit pattern onto the copper layer of the PCB. In this article, we will delve into the process of spraying photoresist on PCBs, discussing the necessary equipment, techniques, and best practices to achieve optimal results.
Understanding Photoresist and Its Role in PCB Fabrication
What is Photoresist?
Photoresist is a light-sensitive material that is applied to the copper layer of a PCB during the fabrication process. It is composed of a polymer resin, a photosensitive compound, and a solvent. When exposed to light, the photoresist undergoes a chemical change, either becoming more soluble (positive photoresist) or less soluble (negative photoresist) in a developer solution.
Types of Photoresist
There are two main types of photoresist used in PCB fabrication:
-
Positive Photoresist: When exposed to light, the exposed areas become more soluble in the developer solution and are removed during development, leaving behind the desired circuit pattern.
-
Negative Photoresist: When exposed to light, the exposed areas become less soluble in the developer solution and remain on the PCB after development, while the unexposed areas are removed.
The Role of Photoresist in PCB Fabrication
Photoresist plays a crucial role in transferring the desired circuit pattern onto the copper layer of the PCB. The process involves the following steps:
- Cleaning the PCB
- Applying photoresist
- Exposing the photoresist to light through a photomask
- Developing the photoresist
- Etching the exposed copper
- Stripping the remaining photoresist
By precisely controlling the exposure and development of the photoresist, the desired circuit pattern can be accurately transferred to the PCB.

Preparing the PCB for Photoresist Application
Cleaning the PCB
Before applying photoresist, it is essential to ensure that the PCB is clean and free from contaminants. Any dirt, grease, or oxidation on the copper surface can lead to poor adhesion of the photoresist and result in defects in the final circuit pattern. To clean the PCB, follow these steps:
- Use a lint-free cloth or swab to remove any dust or debris from the surface.
- Clean the PCB with a suitable solvent, such as isopropyl alcohol or acetone, to remove any grease or oils.
- If the PCB has been stored for an extended period, it may have developed an oxide layer on the copper surface. Remove this layer using a mild abrasive, such as fine steel wool or a specialized PCB Cleaning solution.
- Rinse the PCB with deionized water and dry it thoroughly using compressed air or a lint-free cloth.
Handling and Storage of PCBs
To maintain the cleanliness of the PCB and prevent contamination, it is crucial to handle the boards with care and store them properly. Consider the following guidelines:
- Always handle PCBs by the edges to avoid touching the copper surface.
- Wear clean, lint-free gloves when handling PCBs to prevent the transfer of oils and contaminants from your skin.
- Store PCBs in a clean, dry environment, preferably in sealed containers or bags to minimize exposure to dust and moisture.
- Avoid exposing PCBs to extreme temperatures or humidity, as this can cause warping or oxidation of the copper surface.

Equipment and Materials Required for Spraying Photoresist
To successfully spray photoresist on a PCB, you will need the following equipment and materials:
Photoresist
Choose a suitable photoresist based on your specific requirements, such as the desired resolution, compatibility with the etching process, and ease of use. There are both liquid and dry film photoresists available, each with its advantages and disadvantages.
Photoresist Sprayer
A photoresist sprayer is a specialized tool designed to apply an even and consistent layer of photoresist onto the PCB. These sprayers typically use compressed air to atomize the liquid photoresist and create a fine mist that covers the PCB surface. When selecting a photoresist sprayer, consider factors such as the nozzle size, adjustable pressure settings, and compatibility with your chosen photoresist.
Compressed Air Source
To operate the photoresist sprayer, you will need a clean, dry source of compressed air. This can be provided by an air compressor or a compressed air canister. Ensure that the air is filtered to remove any moisture, oil, or particulates that could contaminate the photoresist or affect the spraying process.
Protective Equipment
When working with photoresist, it is essential to protect yourself from potential health hazards. Wear appropriate personal protective equipment (PPE), including:
- Safety glasses or goggles to protect your eyes from photoresist splashes or mist.
- A respirator or mask to avoid inhaling photoresist fumes or particles.
- Nitrile or chemical-resistant gloves to prevent skin contact with the photoresist.
- A lab coat or apron to protect your clothing from photoresist stains or splashes.
Ventilated Work Area
Spraying photoresist should be carried out in a well-ventilated area to minimize exposure to fumes and ensure proper drying of the photoresist. A fume hood or a dedicated spray booth with an exhaust system is ideal for this purpose. If a fume hood is not available, ensure that the work area has adequate ventilation and air circulation.

Setting Up the Spraying Environment
Preparing the Work Area
Before beginning the photoresist spraying process, prepare your work area to ensure a clean and controlled environment:
- Clean the work surface thoroughly to remove any dust, debris, or contaminants that could affect the photoresist application.
- Set up your photoresist sprayer, compressed air source, and any necessary accessories, such as a spray booth or fume extractor.
- Ensure that the work area is well-lit to allow for accurate inspection of the PCB and photoresist coverage.
Adjusting the Photoresist Sprayer
To achieve the best results when spraying photoresist, it is essential to adjust your sprayer settings according to the manufacturer’s recommendations and your specific requirements. Consider the following factors:
- Nozzle size: Select a nozzle size that is appropriate for your photoresist and desired layer thickness. A smaller nozzle will produce a finer mist and a thinner layer, while a larger nozzle will result in a thicker layer and faster coverage.
- Air pressure: Adjust the air pressure to control the atomization and flow rate of the photoresist. Higher air pressure will create a finer mist and a more even coverage, but may also lead to overspray and waste. Lower air pressure will produce a thicker layer but may result in a less consistent coverage.
- Spray distance: Maintain a consistent distance between the sprayer nozzle and the PCB surface to ensure even coverage and minimize overspray. A distance of 15-20 cm (6-8 inches) is typically recommended, but this may vary depending on your specific sprayer and photoresist.
Test Spraying on a Sample PCB
Before spraying photoresist on your actual PCB, it is advisable to perform a test spray on a sample board to verify your sprayer settings and technique. This will allow you to make any necessary adjustments and ensure optimal results.
- Prepare a sample PCB with the same copper layer thickness and surface finish as your actual PCB.
- Set up your sprayer and adjust the settings as described above.
- Spray a layer of photoresist onto the sample PCB, using the same technique and motion that you plan to use for your actual board.
- Inspect the sample PCB for even coverage, thickness, and any defects or irregularities.
- If necessary, adjust your sprayer settings or technique and repeat the test spray until you achieve satisfactory results.
Spraying Photoresist on the PCB
Applying the Photoresist
Once you have prepared your PCB, set up your spraying environment, and adjusted your sprayer settings, you are ready to apply the photoresist to your actual PCB. Follow these steps:
- Place the cleaned and dried PCB on a flat, stable surface in your work area.
- Begin spraying the photoresist onto the PCB, starting at one edge and moving the sprayer in a consistent, overlapping pattern to cover the entire surface.
- Maintain a steady speed and distance from the PCB to ensure even coverage and thickness.
- Apply multiple thin layers of photoresist, rather than a single thick layer, to achieve the desired thickness and minimize the risk of defects or irregularities.
- Allow each layer to dry partially before applying the next layer, following the manufacturer’s recommended drying time.
Inspecting the Photoresist Coverage
After applying the photoresist, carefully inspect the PCB to ensure complete and even coverage. Look for any missed spots, thin areas, or defects in the photoresist layer. If necessary, apply additional thin layers of photoresist to correct any issues.
Drying the Photoresist
Once you have achieved satisfactory photoresist coverage, allow the PCB to dry completely according to the manufacturer’s recommended drying time and conditions. This may involve air drying, oven drying, or a combination of both. Proper drying is essential to ensure good adhesion of the photoresist to the copper surface and to prevent any defects or contamination during the subsequent processing steps.
Tips and Troubleshooting for Spraying Photoresist
Maintaining Cleanliness
Cleanliness is crucial throughout the photoresist spraying process to avoid defects and ensure optimal results. Follow these tips to maintain a clean environment:
- Keep your work area clean and free from dust, debris, and contaminants.
- Use clean, lint-free wipes or swabs to handle and clean your PCBs, sprayer, and accessories.
- Wear clean, protective gloves when handling PCBs and avoid touching the copper surface or photoresist layer directly.
- Clean your photoresist sprayer thoroughly after each use, following the manufacturer’s recommended cleaning procedure and using the appropriate cleaning solvents.
Troubleshooting Common Issues
Despite careful preparation and execution, issues may arise during the photoresist spraying process. Here are some common problems and potential solutions:
- Uneven coverage: Ensure that your sprayer settings are adjusted correctly, maintain a consistent distance and speed when spraying, and apply multiple thin layers of photoresist.
- Thin or missed spots: Apply additional thin layers of photoresist to correct any thin or missed areas, allowing each layer to dry partially before applying the next.
- Runs or drips: Avoid over-applying the photoresist, maintain a consistent spraying distance and speed, and allow each layer to dry partially before applying the next.
- Bubbles or pinholes: Ensure that your photoresist is mixed thoroughly and free from air bubbles, and apply the photoresist in a well-ventilated area to prevent solvent bubbles from forming.
- Poor adhesion: Ensure that your PCB is clean and free from contaminants, use a compatible photoresist and follow the manufacturer’s recommended application and drying procedures.
Storing and Handling Photoresist
To maintain the quality and performance of your photoresist, follow these guidelines for storage and handling:
- Store photoresist in a cool, dry place, away from direct sunlight and heat sources.
- Keep photoresist containers tightly sealed when not in use to prevent evaporation and contamination.
- Follow the manufacturer’s recommended storage temperature and shelf life for your specific photoresist.
- Avoid exposing photoresist to excessive vibration or shock during storage and handling.
- Dispose of expired or contaminated photoresist according to the manufacturer’s guidelines and local regulations.
Conclusion
Spraying photoresist on a PCB is a critical step in the PCB fabrication process, requiring careful preparation, execution, and attention to detail. By understanding the role of photoresist, selecting the appropriate equipment and materials, setting up a clean and controlled spraying environment, and following best practices for application and troubleshooting, you can achieve high-quality results and ensure the success of your PCB projects.
Frequently Asked Questions (FAQ)
-
What is the difference between positive and negative photoresist?
Positive photoresist becomes more soluble in developer when exposed to light, while negative photoresist becomes less soluble when exposed. Positive photoresist is more commonly used in PCB fabrication due to its higher resolution and ease of processing. -
Can I use a regular spray paint gun to apply photoresist?
No, it is not recommended to use a regular spray paint gun for applying photoresist. Photoresist sprayers are specifically designed to atomize the liquid photoresist and provide a consistent, even coverage. Using a regular spray paint gun may result in uneven coverage, defects, or contamination of the photoresist. -
How do I determine the appropriate thickness of the photoresist layer?
The appropriate thickness of the photoresist layer depends on factors such as the desired resolution, etching process, and copper layer thickness. Consult the photoresist manufacturer’s guidelines and your specific PCB design requirements to determine the optimal thickness. Typically, a thickness of 1-2 mils (25-50 microns) is used for most PCB Applications. -
What should I do if I notice defects or irregularities in the photoresist layer after spraying?
If you notice defects or irregularities in the photoresist layer, such as thin spots, bubbles, or runs, you can try to correct them by applying additional thin layers of photoresist, allowing each layer to dry partially before applying the next. If the defects are severe or cannot be corrected, you may need to strip the photoresist and start the process again. -
How do I dispose of used or expired photoresist?
Dispose of used or expired photoresist according to the manufacturer’s guidelines and local regulations. Photoresist is considered a hazardous waste and should not be poured down the drain or thrown in the regular trash. Contact your local waste management authority for guidance on proper disposal procedures for photoresist and related materials.
| Step | Description | Equipment/Materials | Key Considerations |
|---|---|---|---|
| 1 | Clean the PCB | – Lint-free cloth or swab – Isopropyl alcohol or acetone – Mild abrasive (if needed) – Deionized water |
– Remove dust, debris, grease, and oxidation – Handle PCBs by the edges – Wear clean, lint-free gloves |
| 2 | Set up the spraying environment | – Photoresist sprayer – Compressed air source – Protective equipment (safety glasses, respirator, gloves, lab coat) – Well-ventilated work area |
– Ensure a clean and controlled environment – Adjust sprayer settings according to manufacturer’s recommendations – Test spray on a sample PCB |
| 3 | Apply the photoresist | – Prepared PCB – Photoresist – Photoresist sprayer |
– Place PCB on a flat, stable surface – Spray in a consistent, overlapping pattern – Apply multiple thin layers – Allow each layer to dry partially before applying the next |
| 4 | Inspect and dry the photoresist | – Visual inspection | – Ensure complete and even coverage – Look for missed spots, thin areas, or defects – Allow PCB to dry completely according to manufacturer’s recommendations |
By following these steps and considering the key factors, you can successfully spray photoresist on your PCB and achieve optimal results for your PCB fabrication project.


Leave a Reply