What is PCB Soldering?
PCB soldering is the process of joining electronic components to a printed circuit board using a low-temperature molten metal alloy called solder. The solder forms a strong electrical and mechanical bond between the component leads and the copper pads on the PCB. Soldering allows for the reliable and efficient assembly of complex electronic circuits.
Types of Soldering
There are two main types of soldering used in PCB Assembly:
-
Through-hole soldering: This method involves inserting component leads through holes drilled in the PCB and soldering them to pads on the opposite side of the board. Through-hole soldering is suitable for larger components and is often used in high-reliability applications.
-
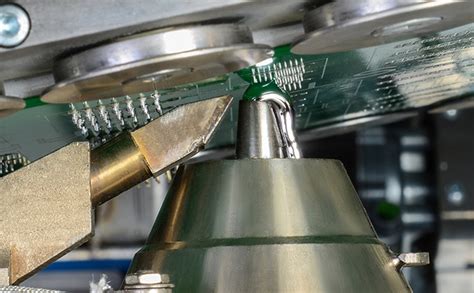
Surface-mount soldering: Surface-mount technology (SMT) involves soldering components directly onto pads on the surface of the PCB. SMT components are smaller and allow for higher-density PCB designs. Surface-mount soldering requires more precise techniques and equipment compared to through-hole soldering.
Tools and Materials for PCB Soldering
Before you begin soldering, it’s essential to have the right tools and materials. Here’s what you’ll need:
Soldering Iron
A soldering iron is the most crucial tool for PCB soldering. It consists of a heated metal tip that melts the solder, allowing it to flow onto the joint. When choosing a soldering iron, consider the following factors:
- Wattage: A soldering iron with a wattage between 20W and 50W is suitable for most PCB soldering tasks.
- Temperature control: Adjustable temperature control allows you to set the optimal temperature for the type of solder and components you’re working with.
- Tip size and shape: Select a tip that matches the size of the components and pads you’ll be soldering. Common tip shapes include conical, chisel, and fine point.
Soldering Station
A soldering station is a more advanced setup that includes a soldering iron, a Temperature Controller, and a stand for the iron. Soldering stations offer more precise temperature control and often have additional features like digital displays and interchangeable tips.
Solder
Solder is a metal alloy that typically consists of tin, lead, and sometimes other metals like silver or copper. When heated, solder melts and flows, creating a strong bond between the component leads and PCB pads. There are two main types of solder used in PCB soldering:
-
Leaded solder: Leaded solder contains a mixture of tin and lead, typically in a ratio of 60/40 or 63/37. Leaded solder has a lower melting point and is easier to work with, but it is being phased out due to environmental and health concerns.
-
Lead-free solder: Lead-free solder is made from a mixture of tin, copper, and sometimes silver. It has a slightly higher melting point compared to leaded solder and requires more precise temperature control. Lead-free solder is becoming the standard in PCB assembly due to RoHS (Restriction of Hazardous Substances) regulations.
When selecting solder, also consider the diameter of the solder wire. A diameter between 0.5mm and 0.8mm is suitable for most PCB soldering tasks.
Flux
Flux is a chemical compound that helps to remove oxides from the surfaces being soldered and promotes the flow of molten solder. There are two main types of flux:
-
Rosin flux: Rosin flux is a non-corrosive, non-conductive flux that is suitable for most PCB soldering applications. It is available in different activity levels, such as no-clean (mild), RMA (rosin mildly activated), and RA (rosin activated).
-
Water-soluble flux: Water-soluble flux is a more aggressive type of flux that requires cleaning after soldering. It is used in applications where a higher level of oxide removal is necessary.
Flux can be applied separately or can be embedded in the solder wire (flux-cored solder).
Other Tools and Accessories
In addition to the essential soldering tools, there are several other items that can make your PCB soldering experience easier and more efficient:
- Solder wick: Also known as desoldering braid, solder wick is a copper braid used to remove excess solder from joints or to correct soldering mistakes.
- Solder sucker: A solder sucker, or desoldering pump, is a spring-loaded tool that uses suction to remove molten solder from a joint.
- Tweezers: Precision tweezers are useful for handling small components and positioning them on the PCB.
- Magnifying glass or microscope: A magnifying tool can help you inspect solder joints and identify any defects or issues.
- Soldering iron stand: A stand keeps your soldering iron safely in place when not in use and helps to prevent accidental burns or damage to your work surface.
- Fume extractor: Soldering can produce harmful fumes, so a fume extractor helps to remove these fumes from your work area, protecting your health.

Preparing for PCB Soldering
Before you start soldering, it’s important to properly prepare your work area and the PCB.
Setting Up Your Work Area
- Choose a well-ventilated area with good lighting.
- Ensure your work surface is heat-resistant and clean.
- Set up your soldering iron or soldering station, ensuring it is properly grounded.
- Keep your tools and materials organized and within reach.
Cleaning the PCB
- Inspect the PCB for any dirt, grease, or oxidation on the copper pads.
- If necessary, clean the PCB with isopropyl alcohol and a lint-free cloth.
- Allow the PCB to dry completely before proceeding.
Tinning the Soldering Iron Tip
Tinning is the process of applying a thin layer of solder to the soldering iron tip to improve heat transfer and prevent oxidation.
- Heat your soldering iron to the appropriate temperature for the type of solder you’re using.
- Clean the tip with a damp sponge or brass wool.
- Apply a small amount of solder to the tip, ensuring it is evenly coated.
- Wipe off any excess solder on the damp sponge or brass wool.

PCB Soldering Techniques
Now that you have your tools and materials prepared, it’s time to start soldering. Here are the basic steps for both through-hole and surface-mount soldering.
Through-hole Soldering
- Insert the component leads through the designated holes in the PCB.
- Bend the leads slightly outward to hold the component in place.
- Heat the component lead and the PCB pad simultaneously with the soldering iron for 2-3 seconds.
- Apply solder to the joint, allowing it to melt and flow around the lead and pad.
- Remove the soldering iron and let the joint cool for a few seconds.
- Trim the excess component lead with wire cutters, leaving a small amount protruding above the solder joint.
Surface-mount Soldering
- Apply a small amount of solder paste to the PCB pads using a solder stencil or a fine-tipped syringe.
- Place the surface-mount component onto the pads, ensuring proper alignment.
- Heat the component and pads with the soldering iron, allowing the solder paste to melt and flow.
- Remove the soldering iron and let the joint cool for a few seconds.
- Inspect the joint to ensure a proper connection has been made.

Soldering Tips and Best Practices
To achieve the best results when soldering PCBs, follow these tips and best practices:
-
Use the right temperature: Set your soldering iron to the appropriate temperature for the type of solder and components you’re working with. Typically, a temperature between 300°C and 400°C is suitable for most PCB soldering tasks.
-
Keep the soldering iron tip clean: Regularly clean the soldering iron tip with a damp sponge or brass wool to remove oxidation and ensure optimal heat transfer.
-
Use the correct amount of solder: Apply just enough solder to create a strong joint. Too little solder can result in a weak connection, while too much solder can cause bridging between adjacent pads.
-
Avoid overheating components: Excessive heat can damage sensitive components. Apply heat only for the time necessary to melt the solder and create a proper joint.
-
Maintain a steady hand: Keep your hands steady while soldering to ensure accurate placement of components and solder.
-
Inspect your work: After soldering, visually inspect each joint for defects such as bridging, cold joints, or Insufficient Solder. Use a magnifying glass or microscope if necessary.
-
Practice proper cleaning: If using water-soluble flux, clean the PCB with distilled water and a soft brush after soldering. For no-clean flux, cleaning is typically not required.
-
Ensure proper ventilation: Solder fumes can be harmful, so work in a well-ventilated area or use a fume extractor to minimize exposure.
Common PCB Soldering Problems and Solutions
Even with the best techniques and practices, you may encounter issues when soldering PCBs. Here are some common problems and their solutions:
Cold Joints
A cold joint occurs when the solder does not melt completely, resulting in a dull, grainy appearance and a weak connection.
Solution: Reheat the joint with the soldering iron, ensuring the solder melts completely and flows around the joint. If necessary, add a small amount of fresh solder.
Bridging
Bridging happens when excess solder creates an unintended connection between adjacent pads or traces.
Solution: Use a solder wick or solder sucker to remove the excess solder. If the bridge is small, you can also use the soldering iron to drag the excess solder away from the bridge.
Insufficient Solder
Insufficient solder can lead to a weak or intermittent connection.
Solution: Reheat the joint and apply a small amount of additional solder, ensuring it flows around the entire joint.
Overheated Components
Overheating can cause damage to sensitive components, such as ICs or electrolytic capacitors.
Solution: If a component is damaged, it must be replaced. To prevent overheating, use the appropriate temperature and limit the time the soldering iron is in contact with the component.
Frequently Asked Questions (FAQ)
-
What is the difference between leaded and lead-free solder?
Leaded solder contains a mixture of tin and lead, while lead-free solder is made from a combination of tin, copper, and sometimes silver. Lead-free solder has a higher melting point and requires more precise temperature control compared to leaded solder. Due to environmental and health concerns, lead-free solder is becoming the standard in PCB assembly. -
How do I choose the right soldering iron tip size and shape?
The size and shape of the soldering iron tip should match the size of the components and pads you’ll be soldering. For smaller components and fine-pitch work, use a fine-tipped iron. For larger components and general-purpose soldering, a chisel or conical tip is suitable. It’s a good idea to have a variety of tip sizes and shapes to accommodate different soldering tasks. -
Can I reuse solder wick or should I dispose of it after each use?
Solder wick can be reused until it becomes saturated with solder and loses its effectiveness at absorbing additional solder. Once the wick appears dull and no longer absorbs solder easily, it should be discarded and replaced with a new piece. -
How often should I clean my soldering iron tip?
Clean your soldering iron tip before each use, or whenever you notice a buildup of oxidation or residue. A clean tip ensures optimal heat transfer and helps to prevent defects in your solder joints. -
What should I do if I accidentally create a solder bridge?
If you create a solder bridge, use a solder wick or solder sucker to remove the excess solder. Place the solder wick over the bridge and heat it with the soldering iron, allowing the wick to absorb the molten solder. Alternatively, use a solder sucker to remove the excess solder while it is still molten. If the bridge is small, you can also use the soldering iron to drag the excess solder away from the bridge.
Conclusion
PCB soldering is a crucial skill for anyone working with electronics. By understanding the tools, materials, and techniques involved in soldering, you can create strong, reliable connections and bring your electronic projects to life. Remember to always prioritize safety, use the appropriate tools and materials, and practice proper soldering techniques. With patience and practice, you’ll be able to master the art of PCB soldering and take your electronics skills to the next level.
| Soldering Type | Pros | Cons |
|---|---|---|
| Through-hole | – Suitable for larger components – Stronger mechanical connection – Easier for beginners |
– Requires drilling holes in the PCB – Takes up more space on the board – Slower assembly process |
| Surface-mount | – Allows for higher component density – Faster assembly process – Smaller PCB size |
– Requires more precise soldering techniques – Components can be more difficult to handle – Higher initial setup costs |


Leave a Reply