What is Solder?
Before we dive into the techniques for removing solder, let’s first understand what solder is. Solder is a metal alloy that is used to join two or more metal surfaces together. It is typically composed of tin and lead, although lead-free solder alloys are becoming increasingly common due to environmental and health concerns.
Solder has a lower melting point than the metals it is used to join, which allows it to flow and create a strong bond when heated. When the solder cools and solidifies, it forms a permanent electrical and mechanical connection between the joined components.
Why Remove Solder?
There are several reasons why you might need to remove solder from a joint or component:
-
Salvaging components: If you have an old circuit board that you no longer need, you may want to remove the components to use them in other projects. Removing the solder allows you to safely extract the components without damaging them.
-
Fixing mistakes: Even experienced solderers make mistakes sometimes. If you accidentally bridge two pins or create a poor joint, you’ll need to remove the solder and start over.
-
Replacing components: If a component on your circuit board is damaged or faulty, you’ll need to remove it and replace it with a new one. This requires removing the solder from the old component’s pins.
-
Modifying circuits: Sometimes, you may need to modify an existing circuit by adding or removing components. Removing solder allows you to make these changes without damaging the board or other components.
Now that we understand what solder is and why we might need to remove it, let’s explore the top 8 techniques for Solder Removal.

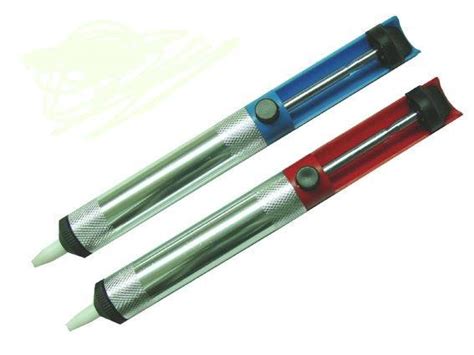
1. Desoldering Pump (Solder Sucker)
A desoldering pump, also known as a solder sucker, is a simple and effective tool for removing solder from through-hole components. It consists of a spring-loaded plunger inside a cylinder with a nozzle at one end.
How to Use a Desoldering Pump
- Heat the solder joint with a soldering iron until the solder melts.
- Position the nozzle of the desoldering pump close to the molten solder.
- Press the button on the desoldering pump to release the plunger and create suction.
- The molten solder will be sucked into the cylinder, leaving the joint clean.
Advantages
- Inexpensive and widely available
- Easy to use
- Effective for through-hole components
Disadvantages
- Not suitable for surface-mount components
- May require multiple attempts to remove all the solder
- The nozzle can get clogged with solder over time

2. Desoldering Braid (Solder Wick)
Desoldering braid, also known as solder wick, is a copper braid that is used to absorb molten solder from a joint. It is particularly useful for removing solder from surface-mount components and tight spaces where a desoldering pump may not be effective.
How to Use Desoldering Braid
- Place the desoldering braid on top of the solder joint.
- Heat the braid with a soldering iron, allowing the molten solder to be absorbed into the copper strands.
- Once the solder is absorbed, remove the braid and the soldering iron.
- If necessary, repeat the process until all the solder is removed.
Advantages
- Effective for surface-mount components and tight spaces
- Leaves a clean and flat surface
- Available in different widths for various applications
Disadvantages
- Requires more time and effort compared to a desoldering pump
- The braid can become saturated with solder and needs to be replaced
- May leave behind small amounts of solder residue

3. Desoldering Tweezers
Desoldering tweezers are a specialized tool designed for removing surface-mount components. They consist of two heated tips that can be used to simultaneously melt the solder on both sides of a component, allowing it to be easily lifted off the board.
How to Use Desoldering Tweezers
- Set the temperature of the desoldering tweezers according to the solder type and component size.
- Position the tips of the tweezers on opposite sides of the component.
- Allow the tips to heat the solder until it melts.
- Gently lift the component off the board using the tweezers.
Advantages
- Ideal for removing surface-mount components
- Provides even heating on both sides of the component
- Reduces the risk of damaging the component or board
Disadvantages
- More expensive than other desoldering tools
- Requires a specialized power supply
- May have a learning curve for proper use
4. Desoldering Station
A desoldering station is a comprehensive tool that combines a soldering iron, desoldering pump, and hot air gun in one unit. It offers precise temperature control and is suitable for a wide range of desoldering tasks.
How to Use a Desoldering Station
- Set the temperature of the desoldering iron according to the solder type and component size.
- Use the desoldering iron to heat the solder joint until the solder melts.
- Activate the built-in desoldering pump to remove the molten solder.
- For surface-mount components, use the hot air gun to evenly heat the component and melt the solder.
Advantages
- Versatile tool for various desoldering tasks
- Precise temperature control for optimal results
- Built-in desoldering pump and hot air gun for convenience
Disadvantages
- Most expensive option among desoldering tools
- Requires a dedicated workspace and power supply
- May be overkill for simple desoldering tasks
5. Soldering Iron and Flux
In some cases, you can remove solder using just a soldering iron and flux. This method is particularly useful for cleaning up excess solder or removing small amounts of solder from a joint.
How to Use a Soldering Iron and Flux
- Apply a small amount of flux to the solder joint.
- Heat the solder with the soldering iron until it melts.
- Use the tip of the soldering iron to push the molten solder away from the joint or component.
- Wipe the tip of the soldering iron on a damp sponge to remove the excess solder.
Advantages
- Simple and straightforward method
- Requires only a soldering iron and flux
- Useful for cleaning up excess solder
Disadvantages
- Not effective for removing large amounts of solder
- May require multiple passes to remove all the solder
- Risk of damaging the board or component if not done carefully
6. Chip Quik
Chip Quik is a specialized low-melting-point alloy that is used to remove surface-mount components. It works by mixing with the existing solder, lowering its melting point, and allowing the component to be easily removed.
How to Use Chip Quik
- Apply a small amount of Chip Quik to the solder joints of the component.
- Heat the Chip Quik with a soldering iron until it melts and mixes with the existing solder.
- Use tweezers to gently lift the component off the board while the solder is still molten.
- Clean up any remaining Chip Quik and solder residue with a desoldering braid or soldering iron.
Advantages
- Effective for removing surface-mount components
- Lowers the melting point of the solder, making removal easier
- Reduces the risk of damaging the board or component
Disadvantages
- Requires a separate low-melting-point alloy
- May leave residue that needs to be cleaned up
- Not suitable for through-hole components
7. Hot Air Rework Station
A hot air rework station is a versatile tool that uses a focused stream of hot air to melt solder and remove components. It is particularly useful for removing surface-mount components and can be used in conjunction with other desoldering tools.
How to Use a Hot Air Rework Station
- Set the temperature and airflow of the hot air rework station according to the component size and solder type.
- Position the nozzle of the hot air gun over the component, making sure not to touch the board or component directly.
- Apply hot air to the component until the solder melts.
- Use tweezers to gently lift the component off the board.
Advantages
- Ideal for removing surface-mount components
- Provides even heating and reduces the risk of damage
- Can be used in conjunction with other desoldering tools
Disadvantages
- Expensive compared to other desoldering tools
- Requires a dedicated workspace and power supply
- May have a learning curve for proper use
8. Soldering Iron with a Hollow Tip
A soldering iron with a hollow tip, also known as a desoldering iron, combines the functions of a soldering iron and a desoldering pump in one tool. The hollow tip allows molten solder to be sucked into the iron, leaving the joint clean.
How to Use a Soldering Iron with a Hollow Tip
- Heat the solder joint with the hollow tip until the solder melts.
- Activate the suction function of the desoldering iron to remove the molten solder.
- Release the suction and remove the iron from the joint.
- Repeat if necessary until all the solder is removed.
Advantages
- Combines the functions of a soldering iron and desoldering pump
- Efficient for removing solder from through-hole components
- Reduces the need for multiple tools
Disadvantages
- More expensive than a standard soldering iron
- The hollow tip can become clogged with solder over time
- May not be as effective for surface-mount components
Choosing the Right Solder Removal Technique
With so many solder removal techniques available, it can be challenging to choose the right one for your specific needs. Consider the following factors when selecting a solder removal method:
- Component type: Are you working with through-hole or surface-mount components? Some techniques are better suited for one type or the other.
- Solder quantity: The amount of solder you need to remove will influence your choice of technique. For example, a desoldering pump may be sufficient for small amounts of solder, while a desoldering station may be necessary for larger quantities.
- Board complexity: The complexity of your circuit board will also play a role in your decision. If you’re working with a densely populated board or delicate components, you may need a more precise technique like a hot air rework station.
- Budget: Consider your budget when choosing a solder removal technique. Some methods, like desoldering braid and pumps, are relatively inexpensive, while others, like desoldering stations and hot air rework stations, can be quite costly.
Safety Precautions
When removing solder, it’s essential to follow proper safety precautions to protect yourself and your equipment. Here are some important safety tips:
- Wear protective eyewear: Molten solder can splatter and cause eye injuries. Always wear safety glasses or goggles when working with solder.
- Use a well-ventilated area: Solder fumes can be harmful if inhaled. Work in a well-ventilated area or use a fume extractor to minimize exposure.
- Handle hot tools with care: Soldering irons, desoldering pumps, and hot air guns can cause burns. Always use a heat-resistant mat or stand to hold your tools when not in use, and be careful not to touch the hot tips.
- Dispose of solder waste properly: Solder waste, including used desoldering braid and solder debris, should be disposed of in accordance with local regulations. Some solder alloys may contain lead, which is a hazardous material.
FAQ
-
What is the best solder removal technique for beginners?
For beginners, a desoldering pump (solder sucker) is often the easiest and most affordable option. It is simple to use and effective for removing solder from through-hole components. -
Can I remove solder without special tools?
While it is possible to remove solder using just a soldering iron and flux, it can be challenging and time-consuming. Investing in dedicated desoldering tools will make the process much easier and more efficient. -
How do I prevent damage to my circuit board when removing solder?
To minimize the risk of damage, use the appropriate tools and techniques for your specific situation. Avoid applying excessive heat or force, and be gentle when removing components. If you’re unsure, practice on a scrap board first. -
What should I do if my desoldering pump or braid becomes clogged with solder?
If your desoldering pump becomes clogged, you can usually clear it by opening the cylinder and removing the solidified solder. For desoldering braid, simply cut off the saturated portion and use a fresh section. -
Can I reuse components after desoldering them?
In most cases, components can be reused after desoldering, provided they are not damaged during the removal process. However, some components, like electrolytic capacitors, may be sensitive to heat and should be replaced if possible.
Conclusion
Removing solder is an essential skill for anyone working with electronics, and there are many techniques available to suit different needs and budgets. Whether you choose a simple desoldering pump or a sophisticated hot air rework station, the key is to select the right tool for the job and follow proper safety precautions.
By mastering these solder removal techniques, you’ll be able to salvage components, fix mistakes, and modify circuits with confidence. Remember to practice on scrap boards and start with simpler methods before moving on to more advanced techniques.
| Solder Removal Technique | Advantages | Disadvantages | Best For |
|---|---|---|---|
| Desoldering Pump | – Inexpensive – Easy to use – Effective for through-hole components |
– Not suitable for surface-mount components – May require multiple attempts – Nozzle can get clogged |
– Beginners – Through-hole components – Small amounts of solder |
| Desoldering Braid | – Effective for surface-mount components and tight spaces – Leaves a clean and flat surface – Available in different widths |
– Requires more time and effort – Braid can become saturated with solder – May leave behind small amounts of solder residue |
– Surface-mount components – Tight spaces – Cleaning up residual solder |
| Desoldering Tweezers | – Ideal for removing surface-mount components – Provides even heating on both sides of the component – Reduces the risk of damaging the component or board |
– More expensive than other desoldering tools – Requires a specialized power supply – May have a learning curve for proper use |
– Surface-mount components – Delicate components – Precision work |
| Desoldering Station | – Versatile tool for various desoldering tasks – Precise temperature control for optimal results – Built-in desoldering pump and hot air gun for convenience |
– Most expensive option among desoldering tools – Requires a dedicated workspace and power supply – May be overkill for simple desoldering tasks |
– Professional use – Complex boards – Large amounts of solder |
| Hot Air Rework Station | – Ideal for removing surface-mount components – Provides even heating and reduces the risk of damage – Can be used in conjunction with other desoldering tools |
– Expensive compared to other desoldering tools – Requires a dedicated workspace and power supply – May have a learning curve for proper use |
– Surface-mount components – Delicate components – Precision work |
With the right tools and techniques, removing solder can be a straightforward and efficient process. By investing in quality desoldering equipment and following best practices, you’ll be well-equipped to tackle any solder removal task that comes your way.


Leave a Reply