Introduction to Solder Paste
Solder paste is a crucial component in the electronics assembly process, especially for Surface-mount technology (SMT). It is a mixture of tiny solder particles suspended in a flux medium, which helps to establish electrical and mechanical connections between electronic components and printed circuit boards (PCBs). Choosing the right solder paste, storing it properly, and using it effectively are essential for achieving reliable and high-quality solder joints.
In this comprehensive guide, we will dive into the key aspects of selecting, storing, and using solder paste for assembly. We will cover the following topics:
- Types of solder paste and their properties
- Factors to consider when choosing solder paste
- Proper storage conditions for solder paste
- Preparing and applying solder paste
- Reflow Soldering process
- Troubleshooting common issues with solder paste
- Frequently asked questions (FAQ)
By the end of this article, you will have a solid understanding of how to optimize your solder paste usage for successful electronics assembly.
Types of Solder Paste and Their Properties
Solder paste comes in various types, each with its own unique properties and advantages. The two main categories of solder paste are:
- Lead-based solder paste
- Lead-free solder paste
Lead-based Solder Paste
Lead-based solder paste typically contains a mixture of tin (Sn) and lead (Pb), with the most common alloy being Sn63Pb37 (63% tin and 37% lead). Lead-based solder paste has been widely used in the electronics industry for decades due to its low melting point, excellent wetting properties, and good thermal and electrical conductivity.
However, due to environmental and health concerns, the use of lead-based solder paste has been restricted by various regulations, such as the Restriction of Hazardous Substances (RoHS) directive in the European Union.
Lead-free Solder Paste
Lead-free solder paste has gained popularity in recent years as a more environmentally friendly alternative to lead-based solder paste. The most common lead-free alloys include:
- Sn96.5Ag3.0Cu0.5 (SAC305)
- Sn99.3Cu0.7 (SnCu0.7)
- Sn96.5Ag3.5 (SnAg3.5)
Lead-free solder paste generally has a higher melting point compared to lead-based solder paste, which can present challenges in the reflow soldering process. Additionally, lead-free solder paste may have different wetting properties and require adjustments to the soldering process parameters.

Factors to Consider When Choosing Solder Paste
When selecting solder paste for your assembly process, there are several key factors to consider:
1. Alloy Composition
The alloy composition of the solder paste determines its melting point, wetting properties, and mechanical strength. Choose an alloy that is compatible with your components, PCB Surface Finish, and soldering process requirements.
2. Particle Size
Solder paste is classified by its particle size, which is typically expressed as a mesh size or Type number. The particle size affects the printing resolution, solder joint formation, and the ability to handle fine-pitch components. Common particle sizes include:
| Type | Mesh Size | Particle Size Range (μm) |
|---|---|---|
| 3 | -325/+500 | 25-45 |
| 4 | -400/+635 | 20-38 |
| 5 | -500/+635 | 15-25 |
| 6 | -635 | 5-15 |
Choose a particle size that is appropriate for your component sizes and pitches, as well as your stencil thickness and aperture sizes.
3. Flux Type
The flux in solder paste serves to remove oxides from the metal surfaces, promote wetting, and protect the solder joint from oxidation during the reflow process. There are three main types of flux:
- Rosin (RO): Mild activity, suitable for clean environments and easy-to-solder surfaces
- Resin (RE): Higher activity than rosin, suitable for moderately oxidized surfaces
- Organic (OR): Highly active, suitable for heavily oxidized or difficult-to-solder surfaces
Select a flux type that matches your substrate and component surface conditions, as well as your cleaning requirements post-soldering.
4. Solder Paste Viscosity
Solder paste viscosity refers to its resistance to flow under stress. The viscosity of solder paste affects its printing and dispensing characteristics, as well as its ability to hold components in place during the reflow process. Solder paste viscosity is typically expressed in centipoise (cP) or pascal-seconds (Pa·s).
Choose a solder paste viscosity that is compatible with your printing or dispensing equipment, stencil design, and component placement requirements.

Proper Storage Conditions for Solder Paste
Proper storage of solder paste is crucial for maintaining its quality and performance. Solder paste is sensitive to temperature, humidity, and time, and incorrect storage can lead to degradation of its properties.
Temperature
Solder paste should be stored at a controlled temperature, typically between 0°C and 10°C (32°F and 50°F). Higher temperatures can cause the solder particles to oxidize and the flux to separate from the solder particles, while lower temperatures can cause the solder paste to thicken and become difficult to print or dispense.
Humidity
Solder paste should be stored in a low-humidity environment, ideally below 30% relative humidity (RH). Excessive humidity can cause the solder paste to absorb moisture, leading to splattering and spattering during the reflow process, as well as reduced shelf life.
Shelf Life
The shelf life of solder paste depends on its formulation and storage conditions. Typically, solder paste has a shelf life of 6 to 12 months when stored at the recommended temperature and humidity levels. Always check the manufacturer’s specifications for the specific shelf life of your solder paste.
Storage Containers
Solder paste should be stored in airtight containers to prevent moisture absorption and oxidation. Syringes, jars, and cartridges are common storage containers for solder paste. Ensure that the containers are properly sealed and labeled with the date of opening and the expiration date.

Preparing and Applying Solder Paste
Proper preparation and application of solder paste are essential for achieving consistent and reliable solder joints. The main methods for applying solder paste are stencil printing and dispensing.
Stencil Printing
Stencil printing is the most common method for applying solder paste in SMT assembly. It involves using a stencil with apertures that match the pads on the PCB, and forcing solder paste through the apertures onto the pads using a squeegee.
To ensure successful stencil printing, consider the following factors:
- Stencil design: The stencil thickness, aperture sizes, and shapes should be optimized for your component sizes and pitches, as well as your solder paste particle size.
- Printer setup: Adjust the printer parameters, such as squeegee pressure, speed, and angle, to achieve consistent solder paste deposits.
- Stencil cleaning: Regularly clean the stencil to prevent solder paste buildup and contamination, which can affect print quality.
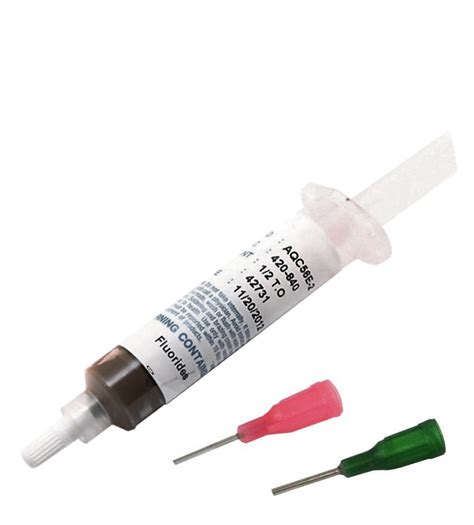
Dispensing
Dispensing is an alternative method for applying solder paste, particularly for low-volume production or rework. It involves using a syringe or cartridge to dispense solder paste directly onto the pads or components.
When dispensing solder paste, consider the following factors:
- Needle size: Choose a needle size that is appropriate for your pad sizes and solder paste particle size.
- Dispensing parameters: Adjust the dispensing pressure, time, and height to achieve consistent solder paste deposits.
- Dispense pattern: Optimize the dispense pattern to ensure adequate coverage of the pads and prevent solder paste bridging.
Reflow Soldering Process
After applying solder paste and placing components, the PCB Assembly undergoes the reflow soldering process to form permanent solder joints. The reflow process involves heating the assembly in a controlled manner to melt the solder paste and allow it to wet the surfaces of the pads and component leads.
A typical reflow profile consists of four stages:
- Preheat: The assembly is gradually heated to evaporate the solvent in the flux and activate the flux to remove oxides from the surfaces.
- Soak: The assembly is held at a stable temperature to ensure even heating and further activate the flux.
- Reflow: The temperature is rapidly increased to melt the solder particles and allow them to wet the surfaces and form solder joints.
- Cooling: The assembly is cooled at a controlled rate to allow the solder joints to solidify and prevent thermal shock to the components.
To optimize the reflow soldering process, consider the following factors:
- Reflow profile: Develop a reflow profile that is compatible with your solder paste, components, and PCB. Follow the manufacturer’s recommendations for peak temperature, time above liquidus (TAL), and ramp rates.
- Oven settings: Adjust the oven settings, such as zone temperatures and conveyor speed, to achieve the desired reflow profile.
- Atmosphere control: Use nitrogen or other inert atmospheres in the reflow oven to reduce oxidation and improve solder joint quality.
Troubleshooting Common Issues with Solder Paste
Despite careful selection, storage, and application of solder paste, issues can still arise during the assembly process. Some common problems and their potential causes include:
- Solder bridges: Excessive solder paste deposition, incorrect stencil design, or component misalignment can cause solder bridges between pads.
- Solder balls: Contamination, excessive flux, or incorrect reflow profile can lead to the formation of small solder balls around the solder joints.
- Incomplete wetting: Insufficient flux activity, oxidized surfaces, or incorrect reflow profile can result in incomplete wetting of the pads and component leads.
- Voiding: Entrapped flux, moisture, or air can cause voids within the solder joints, reducing their mechanical and electrical integrity.
To troubleshoot these issues, consider the following actions:
- Review and optimize the Solder paste printing or dispensing process
- Check the reflow profile and oven settings
- Ensure proper storage and handling of solder paste
- Verify the compatibility of solder paste with the components and PCB surface finish
- Implement appropriate cleaning processes post-soldering
Frequently Asked Questions (FAQ)
-
Q: What is the shelf life of solder paste, and how can I extend it?
A: The shelf life of solder paste typically ranges from 6 to 12 months when stored at the recommended temperature (0°C to 10°C) and humidity (below 30% RH) levels. To extend the shelf life, ensure proper storage conditions, use airtight containers, and avoid excessive exposure to air and moisture. -
Q: Can I mix different types or brands of solder paste?
A: Mixing different types or brands of solder paste is not recommended, as they may have different alloy compositions, flux chemistries, and rheological properties. Mixing solder pastes can lead to inconsistent performance and solder joint quality issues. -
Q: How do I determine the right solder paste particle size for my application?
A: The choice of solder paste particle size depends on factors such as component sizes, pitches, stencil thickness, and aperture sizes. As a general rule, use a smaller particle size for fine-pitch components and thinner stencils, and a larger particle size for larger components and thicker stencils. Consult with your solder paste supplier or stencil manufacturer for specific recommendations. -
Q: What is the difference between no-clean and water-soluble solder paste?
A: No-clean solder paste contains a flux that leaves a benign residue after soldering, which does not require removal by cleaning. Water-soluble solder paste, on the other hand, contains a flux that requires removal by cleaning with water or other aqueous solutions after soldering. The choice between no-clean and water-soluble solder paste depends on factors such as the cleanliness requirements of the application, the compatibility with the cleaning process, and the environmental regulations. -
Q: How do I handle solder paste that has exceeded its shelf life?
A: If solder paste has exceeded its shelf life, it may have degraded properties such as reduced flux activity, increased viscosity, and solder particle oxidation. It is generally not recommended to use expired solder paste, as it can lead to soldering defects and reliability issues. If you must use expired solder paste, perform thorough testing and validation to ensure that it still meets your performance requirements.
Conclusion
Solder paste is a critical component in the electronics assembly process, and choosing, storing, and using it correctly is essential for achieving high-quality and reliable solder joints. By understanding the types of solder paste, their properties, and the factors to consider when selecting them, you can optimize your solder paste usage for your specific application.
Proper storage and handling of solder paste are equally important to maintain its quality and performance. Follow the recommended storage conditions, use airtight containers, and adhere to the shelf life guidelines to ensure consistent results.
When preparing and applying solder paste, choose the appropriate method (stencil printing or dispensing) based on your production requirements, and optimize the process parameters to achieve consistent solder paste deposits.
Finally, develop a robust reflow soldering process that is compatible with your solder paste, components, and PCB, and monitor the process closely to prevent common issues such as solder bridges, balls, incomplete wetting, and voiding.
By following the guidelines and best practices outlined in this article, you can effectively choose, store, and use solder paste for your assembly process, resulting in high-quality and reliable electronic products.


Leave a Reply