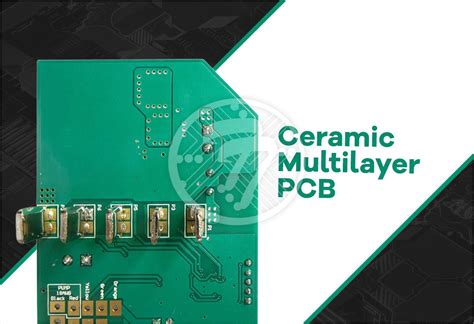
Introduction to Ceramic PCB Manufacturing
Ceramic printed circuit boards (PCBs) are a specialized type of PCB that offer unique properties and benefits compared to traditional FR-4 PCBs. CeramIC PCBs are known for their excellent Thermal Conductivity, high-temperature resistance, and superior electrical insulation. These characteristics make them ideal for applications in harsh environments, high-power electronics, and RF/microwave devices.
In this article, we will explore the seven key processes involved in ceramic PCB Manufacturing, providing a comprehensive guide on how to make ceramic PCBs.
The Advantages of Ceramic PCBs
Before diving into the manufacturing processes, let’s discuss the advantages of using ceramic PCBs:
- High-temperature resistance: Ceramic materials can withstand temperatures up to 1000°C, making them suitable for high-temperature applications.
- Excellent thermal conductivity: Ceramic substrates effectively dissipate heat, preventing thermal stress on components.
- Superior electrical insulation: Ceramic materials offer high dielectric strength and low dielectric loss, ensuring optimal signal integrity.
- Dimensional stability: Ceramic PCBs maintain their shape and size under varying environmental conditions, minimizing warping and shrinkage.
- Corrosion resistance: Ceramic substrates are resistant to corrosion, making them suitable for use in harsh environments.

The 7 Ceramic PCB Manufacturing Processes
1. Material Selection
The first step in ceramic PCB manufacturing is selecting the appropriate ceramic material. Common ceramic substrates used in PCB manufacturing include:
- Alumina (Al2O3)
- Aluminum Nitride (AlN)
- Beryllium Oxide (BeO)
- Low-Temperature Co-fired Ceramic (LTCC)
- High-Temperature Co-fired Ceramic (HTCC)
Each material has its own unique properties, such as thermal conductivity, dielectric constant, and mechanical strength. The choice of material depends on the specific application requirements.
2. Substrate Preparation
Once the ceramic material is selected, the substrate is prepared for the subsequent manufacturing processes. This involves:
- Cutting the ceramic substrate to the desired size and shape using diamond cutting tools.
- Grinding and polishing the substrate surface to achieve the required smoothness and flatness.
- Cleaning the substrate to remove any contaminants or debris.
3. Via Formation
Vias are small holes drilled through the ceramic substrate to establish electrical connections between different layers of the PCB. There are two main methods for creating vias in ceramic PCBs:
- Mechanical drilling: High-speed, diamond-tipped drill bits are used to create holes in the ceramic substrate.
- Laser drilling: A high-energy laser beam is used to ablate the ceramic material, creating precise and small-diameter vias.
After drilling, the vias are cleaned to remove any debris and prepare them for the next step.
4. Metallization
Metallization is the process of depositing conductive metal layers onto the ceramic substrate and into the vias to create the desired circuit patterns. There are several methods for metallizing ceramic PCBs:
- Thick-film screen printing: A conductive paste (usually containing silver or gold) is screen-printed onto the substrate surface and fired at high temperatures to form the conductive traces.
- Thin-film sputtering: A thin layer of metal (such as copper or gold) is deposited onto the substrate using a physical vapor deposition (PVD) process called sputtering.
- Electroless plating: A chemical process is used to deposit a thin layer of metal (usually copper) onto the substrate and via walls without the need for an external electrical current.
- Electroplating: An electrical current is used to deposit a thicker layer of metal (usually copper) onto the electroless-plated
layer to increase the conductivity and thickness of the traces.
5. Patterning
After metallization, the conductive layers need to be patterned to create the desired circuit layout. This is typically done using photolithography and etching processes:
- A photoresist layer is applied to the metallized substrate.
- The photoresist is exposed to UV light through a photomask containing the circuit pattern.
- The exposed photoresist is developed, leaving the desired pattern on the substrate.
- The unwanted metal areas are etched away using chemical or plasma etching techniques.
- The remaining photoresist is stripped, revealing the final circuit pattern.
6. Lamination and Bonding
In multi-layer ceramic PCBs, individual ceramic layers are stacked and bonded together to form a complete circuit board. This process involves:
- Aligning the layers using precision alignment fixtures.
- Applying a bonding material (such as glass frit or adhesive) between the layers.
- Laminating the layers together under high pressure and temperature to form a solid, cohesive structure.
7. Finishing and Quality Control
The final steps in ceramic PCB manufacturing involve finishing and quality control processes:
- Surface finish: A protective and conductive surface finish (such as gold or nickel) is applied to the exposed metal areas to prevent oxidation and improve solderability.
- Electrical testing: The PCB is tested for electrical continuity, insulation resistance, and other relevant parameters to ensure functionality and reliability.
- Visual inspection: The PCB is visually inspected for any defects, such as cracks, voids, or misalignments.
- Packaging: The finished ceramic PCB is packaged and shipped to the customer.

Ceramic PCB Manufacturing Process Comparison
| Process | Description | Advantages | Disadvantages |
|---|---|---|---|
| HTCC | Co-fired at temperatures above 1500°C | High-temperature resistance, hermetic sealing | Limited material options, high processing cost |
| LTCC | Co-fired at temperatures below 1000°C | Wide material selection, 3D structuring | Lower thermal conductivity compared to HTCC |
| Thick-film | Screen-printed conductive paste | Simple process, cost-effective for low volumes | Limited resolution, higher resistivity |
| Thin-film | PVD-deposited metal layers | High resolution, good electrical properties | Higher processing cost, limited thickness |

Frequently Asked Questions (FAQ)
-
Q: What are the main differences between ceramic PCBs and FR-4 PCBs?
A: Ceramic PCBs offer higher temperature resistance, better thermal conductivity, and superior electrical insulation compared to FR-4 PCBs. However, ceramic PCBs are more expensive and have a more complex manufacturing process. -
Q: Can ceramic PCBs be used for high-frequency applications?
A: Yes, ceramic PCBs are well-suited for high-frequency applications due to their low dielectric loss and stable dielectric constant. They are commonly used in RF and microwave devices. -
Q: Are ceramic PCBs suitable for high-power applications?
A: Yes, ceramic PCBs are excellent for high-power applications because of their high thermal conductivity and ability to dissipate heat efficiently. This helps prevent thermal stress on components and improves overall system reliability. -
Q: What are the common applications of ceramic PCBs?
A: Ceramic PCBs are commonly used in aerospace, automotive, military, and industrial applications where high-temperature resistance, thermal management, and electrical insulation are critical. They are also used in LED Lighting, high-power lasers, and RF/microwave devices. -
Q: How do I choose the right ceramic material for my PCB application?
A: The choice of ceramic material depends on your specific application requirements, such as operating temperature, thermal conductivity, dielectric properties, and mechanical strength. Consult with a ceramic PCB manufacturer or material expert to select the most suitable material for your needs.
Conclusion
Ceramic PCB manufacturing involves a series of complex processes that require specialized equipment, materials, and expertise. By understanding the seven key processes – material selection, substrate preparation, via formation, metallization, patterning, lamination and bonding, and finishing and quality control – you can better appreciate the intricacies involved in creating these high-performance circuit boards.
Ceramic PCBs offer unique advantages over traditional FR-4 PCBs, making them an ideal choice for applications that demand high-temperature resistance, excellent thermal conductivity, and superior electrical insulation. As technology continues to advance, the demand for ceramic PCBs is expected to grow, driving further innovations in ceramic PCB manufacturing processes and materials.


Leave a Reply