Essential Raspberry Pi Components
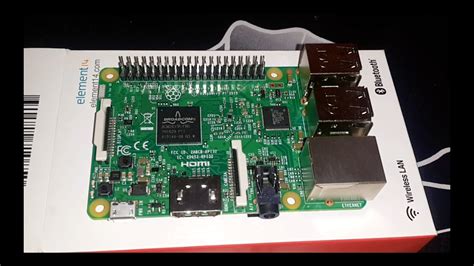
1. Raspberry Pi Board
The heart of your setup is the Raspberry Pi board itself. There are several models available, each with different specifications and capabilities. Here’s a table comparing the most popular Raspberry Pi models:
| Model | Processor | RAM | USB Ports | Ethernet | Wireless | GPIO Pins |
|---|---|---|---|---|---|---|
| Raspberry Pi 4B | Broadcom BCM2711 Quad-core Cortex-A72 (ARM v8) 64-bit SoC @ 1.5GHz | 2GB, 4GB, or 8GB LPDDR4 | 2 x USB 3.0, 2 x USB 2.0 | Gigabit Ethernet | 2.4 GHz and 5.0 GHz IEEE 802.11b/g/n/ac wireless LAN | 40 |
| Raspberry Pi 3B+ | Broadcom BCM2837B0 Quad-core Cortex-A53 (ARMv8) 64-bit SoC @ 1.4GHz | 1GB LPDDR2 | 4 x USB 2.0 | Gigabit Ethernet over USB 2.0 | 2.4GHz and 5GHz IEEE 802.11.b/g/n/ac wireless LAN | 40 |
| Raspberry Pi Zero W | Broadcom BCM2835 Single-core ARM1176JZF-S @ 1GHz | 512MB LPDDR2 | 1 x USB 2.0 (Micro-B) | N/A | 2.4 GHz IEEE 802.11b/g/n wireless LAN | 40 |
Choose the model that best suits your needs and budget. The Raspberry Pi 4B offers the most powerful performance, while the Raspberry Pi Zero W is a compact and affordable option for smaller projects.
2. Power Supply
To power your Raspberry Pi, you’ll need a reliable power supply. The recommended power supply varies depending on the Raspberry Pi model you choose:
- Raspberry Pi 4B: 5V/3A USB-C power supply
- Raspberry Pi 3B+: 5V/2.5A micro USB power supply
- Raspberry Pi Zero W: 5V/1A micro USB power supply
It’s crucial to use a power supply that provides stable and sufficient power to ensure optimal performance and prevent damage to your Raspberry Pi.
3. microSD Card
The Raspberry Pi uses a microSD card as its primary storage device. You’ll need to install an operating system, typically Raspberry Pi OS (formerly known as Raspbian), on the microSD card. The recommended minimum capacity for the microSD card is 8GB, but it’s advisable to use a larger capacity card (16GB or more) if you plan to store additional files or install multiple applications.
When choosing a microSD card, consider the following factors:
- Capacity: Ensure the card has sufficient storage for your needs.
- Speed: Look for a card with a high speed class (Class 10 or UHS-I) for better performance.
- Compatibility: Verify that the card is compatible with your Raspberry Pi model.
4. HDMI Cable
To connect your Raspberry Pi to a display, you’ll need an HDMI cable. The type of HDMI cable required depends on your Raspberry Pi model:
- Raspberry Pi 4B: Micro HDMI to HDMI cable
- Raspberry Pi 3B+ and earlier models: Standard HDMI to HDMI cable
Make sure to use a high-quality HDMI cable to ensure a stable and clear video connection.
5. USB Keyboard and Mouse
To interact with your Raspberry Pi, you’ll need a USB keyboard and mouse. Any standard USB keyboard and mouse should work with the Raspberry Pi. If you’re using a Raspberry Pi Zero W, you may need to use a USB OTG (On-The-Go) adapter to connect your peripherals due to the limited number of USB ports.
Optional Raspberry Pi Components
While the essential components mentioned above are sufficient to get started, there are several optional components that can enhance your Raspberry Pi experience:
1. Case
A case provides protection for your Raspberry Pi and helps keep the components secure. There are various types of cases available, ranging from simple plastic enclosures to more advanced cases with built-in cooling features.
2. Heatsink and Cooling Fan
If you plan to use your Raspberry Pi for resource-intensive tasks or in environments with high ambient temperatures, a heatsink and cooling fan can help dissipate heat and prevent thermal throttling. Heatsinks are passive cooling solutions that attach to the processor and other heat-generating components, while cooling fans actively circulate air to improve heat dissipation.
3. GPIO Accessories
The Raspberry Pi’s GPIO (General Purpose Input/Output) pins allow you to connect various sensors, actuators, and other electronic components. Some popular GPIO accessories include:
- Breadboard: A Prototyping Board that allows you to create temporary circuits without soldering.
- Jumper wires: Used to make connections between components on a breadboard or to the GPIO pins.
- LEDs: Light-emitting diodes that can be used for visual indicators or simple projects.
- Buttons and switches: Used for user input or to control circuits.
- Sensors: Temperature, humidity, motion, light, and other sensors can be connected to the GPIO pins for data collection and monitoring.
4. Camera Module
The Raspberry Pi Camera Module enables you to capture images and record videos with your Raspberry Pi. It connects directly to the CSI (Camera Serial Interface) port on the Raspberry Pi board. There are two versions of the camera module:
- Standard Camera Module: Offers a resolution of 8 megapixels.
- High Quality Camera Module: Provides a higher resolution of 12.3 megapixels and interchangeable lenses.
5. Display
While you can use an HDMI cable to connect your Raspberry Pi to an external display, there are also dedicated displays designed specifically for the Raspberry Pi. These displays connect directly to the GPIO pins and come in various sizes, ranging from small touchscreens to larger HDMI displays.

Frequently Asked Questions (FAQ)
-
Can I use any power supply with my Raspberry Pi?
It’s recommended to use the official Raspberry Pi power supply or a third-party power supply that meets the specified voltage and current requirements for your Raspberry Pi model. Using an incompatible or underpowered power supply can lead to unstable performance or damage to your Raspberry Pi. -
Do I need a heatsink and cooling fan for my Raspberry Pi?
In most cases, a heatsink and cooling fan are not necessary for normal usage. However, if you plan to overclock your Raspberry Pi or use it for intensive tasks that generate significant heat, adding a heatsink and cooling fan can help maintain optimal performance and prevent thermal throttling. -
Can I use a Raspberry Pi without a case?
While it’s possible to use a Raspberry Pi without a case, it’s highly recommended to use one. A case provides protection against dust, debris, and accidental short circuits. It also helps keep the components securely in place and can improve the overall aesthetics of your setup. -
What size microSD card should I use with my Raspberry Pi?
The minimum recommended capacity for a microSD card is 8GB, which is sufficient for installing the operating system and basic applications. However, if you plan to store media files, install multiple programs, or work on larger projects, it’s advisable to use a larger capacity card (16GB or more) to ensure sufficient storage space. -
Can I connect multiple accessories to the GPIO pins simultaneously?
Yes, you can connect multiple accessories to the GPIO pins simultaneously, as long as they don’t conflict with each other in terms of pin usage. It’s important to ensure that the accessories are compatible with the Raspberry Pi’s voltage levels (3.3V) and that you follow proper wiring and connection guidelines to avoid damaging your Raspberry Pi or the connected components.

Conclusion
The Raspberry Pi is an incredibly versatile and beginner-friendly platform for learning, creating, and exploring the world of technology. To get started with your Raspberry Pi, you’ll need the essential components, including the Raspberry Pi board, a power supply, a microSD card, an HDMI cable, and a USB keyboard and mouse. Additionally, there are various optional components, such as cases, heatsinks, cooling fans, GPIO accessories, camera modules, and displays, that can enhance your Raspberry Pi experience and enable you to build more advanced projects.
When choosing your Raspberry Pi components, consider your specific needs, budget, and the projects you plan to undertake. By selecting the right components and following best practices for setup and usage, you’ll be well on your way to unlocking the full potential of your Raspberry Pi and bringing your ideas to life.
Remember to explore the vast online resources, tutorials, and communities dedicated to the Raspberry Pi. These resources offer valuable guidance, inspiration, and support as you embark on your Raspberry Pi journey. Whether you’re a beginner learning to code, an educator teaching STEM subjects, or a maker creating innovative projects, the Raspberry Pi provides endless opportunities for growth and discovery.
So, grab your Raspberry Pi components, dive in, and start exploring the exciting world of single-board computing!


Leave a Reply