Introduction to Ultrasonic PCB Cleaner
An ultrasonic PCB cleaner is a device that uses high-frequency sound waves to clean printed circuit boards (PCBs) effectively. It is an essential tool for electronics manufacturers, hobbyists, and repair technicians who need to maintain the cleanliness and functionality of their PCBs. In this article, we will explore the benefits, working principles, and proper usage of an ultrasonic PCB cleaner.
Why Use an Ultrasonic PCB Cleaner?
PCBs are the backbone of modern electronics, and their cleanliness is crucial for their proper functioning. Contaminants such as flux residue, dust, and grease can cause short circuits, corrosion, and other issues that can lead to device failure. Traditional cleaning methods, such as manual scrubbing or using solvents, can be time-consuming, labor-intensive, and potentially damaging to the delicate components on the PCB.
An ultrasonic PCB cleaner offers several advantages over these methods:
-
Efficiency: Ultrasonic cleaning can remove contaminants from even the most hard-to-reach areas of a PCB, ensuring thorough cleaning in a short amount of time.
-
Gentle cleaning: The high-frequency sound waves used in ultrasonic cleaning are gentle on the PCB components, reducing the risk of damage compared to manual scrubbing or harsh solvents.
-
Environmentally friendly: Many ultrasonic cleaners use water-based solutions, which are less harmful to the environment than chemical solvents.
-
Cost-effective: Investing in an ultrasonic PCB cleaner can save time and money in the long run by reducing the need for manual labor and minimizing the risk of PCB Damage.

How Does an Ultrasonic PCB Cleaner Work?
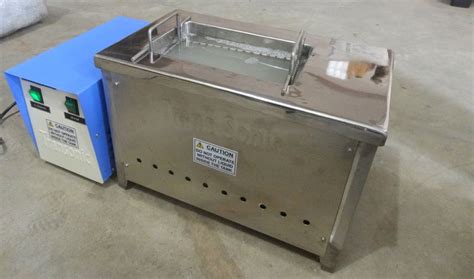
An ultrasonic PCB cleaner consists of a tank filled with a cleaning solution and one or more ultrasonic transducers. The transducers generate high-frequency sound waves, typically in the range of 20-400 kHz, which create millions of microscopic bubbles in the cleaning solution. These bubbles rapidly form and collapse in a process called cavitation, which produces intense localized pressure and temperature changes.
When a PCB is submerged in the cleaning solution, the cavitation process helps to:
- Dislodge contaminants from the PCB surface
- Break down and dissolve soluble contaminants
- Penetrate into small crevices and gaps where manual cleaning may be difficult
The combination of cavitation and the cleaning solution effectively removes a wide range of contaminants from the PCB, leaving it clean and ready for further processing or use.

Choosing the Right Ultrasonic PCB Cleaner
When selecting an ultrasonic PCB cleaner, consider the following factors:
-
Tank size: Choose a cleaner with a tank large enough to accommodate your largest PCBs and multiple boards if needed.
-
Frequency: Higher frequencies (e.g., 100-400 kHz) are generally better for cleaning delicate components, while lower frequencies (e.g., 20-80 kHz) are more suitable for heavy-duty cleaning.
-
Power: Higher power output results in more intense cavitation, which can lead to faster and more thorough cleaning.
-
Heating: Some ultrasonic cleaners come with built-in heaters to maintain the optimal temperature of the cleaning solution, which can improve cleaning efficiency.
-
Drainage: Look for a cleaner with a convenient drainage system for easy maintenance and solution changes.
-
Accessories: Consider additional accessories such as baskets, racks, or specialized fixtures to hold your PCBs securely during the cleaning process.
Comparison of Popular Ultrasonic PCB Cleaners
| Brand | Model | Tank Size (L) | Frequency (kHz) | Power (W) | Heating | Price Range |
|---|---|---|---|---|---|---|
| Vevor | PS-30A | 30 | 40 | 600 | Yes | $500-$700 |
| Kendal | CP1200 | 6 | 42 | 180 | No | $100-$200 |
| iSonic | P4820-HPB-PB | 3.2 | 35/45 | 120 | Yes | $200-$300 |
| Crest | CP1100D | 5.25 | 42/58/132 | 500 | Yes | $800-$1000 |
| Elma | E60H | 5.75 | 37/80 | 600 | Yes | $1000-$1500 |

Preparing Your Ultrasonic PCB Cleaner for Use
Before using your ultrasonic PCB cleaner, follow these steps:
-
Clean the tank: Ensure that the tank is clean and free from any debris or residue from previous cleaning cycles.
-
Fill the tank: Add the appropriate amount of cleaning solution to the tank, following the manufacturer’s recommendations. Some common cleaning solutions include deionized water, isopropyl alcohol, or specialized PCB cleaning solutions.
-
Preheat the solution (if applicable): If your cleaner has a built-in heater, allow the solution to reach the optimal temperature for cleaning, typically around 50-60°C (122-140°F).
-
Prepare your PCBs: Remove any loose debris or dust from the PCBs using compressed air or a soft brush. If the PCBs have heavy contamination, consider pre-cleaning them with a solvent before ultrasonic cleaning.
Using Your Ultrasonic PCB Cleaner
Once your ultrasonic PCB cleaner is prepared, follow these steps to clean your PCBs:
-
Place the PCBs in the tank: Arrange the PCBs in the tank, ensuring that they are fully submerged in the cleaning solution. Use baskets, racks, or fixtures to keep the PCBs separated and prevent them from touching the tank walls or each other.
-
Set the cleaning time: Refer to the manufacturer’s guidelines or your own experience to determine the appropriate cleaning time. Typically, a cleaning cycle lasts between 5-30 minutes, depending on the level of contamination and the type of PCB.
-
Start the cleaning cycle: Turn on the ultrasonic cleaner and let it run for the designated time. You may notice a buzzing or humming sound, which is normal during operation.
-
Rinse the PCBs: After the cleaning cycle is complete, remove the PCBs from the tank and rinse them thoroughly with deionized water to remove any remaining cleaning solution.
-
Dry the PCBs: Use compressed air or a lint-free cloth to dry the PCBs completely. Ensure that no water droplets remain on the PCBs, as they can cause corrosion or short circuits.
Maintaining Your Ultrasonic PCB Cleaner
To ensure the longevity and optimal performance of your ultrasonic PCB cleaner, follow these maintenance tips:
-
Change the cleaning solution regularly: Over time, the cleaning solution will accumulate contaminants and lose its effectiveness. Change the solution according to the manufacturer’s recommendations or when you notice a decrease in cleaning performance.
-
Clean the tank: Periodically clean the tank to remove any built-up residue or debris. Use a soft cloth or sponge and a mild detergent to avoid damaging the tank’s surface.
-
Check the transducers: Inspect the ultrasonic transducers for any signs of damage or wear. If you notice a decrease in cleaning performance, it may be time to replace the transducers.
-
Store the cleaner properly: When not in use, store your ultrasonic PCB cleaner in a clean, dry place. If the cleaner has a built-in heater, allow the tank to cool down completely before storing it.
Frequently Asked Questions (FAQ)
1. Can I use tap water in my ultrasonic PCB cleaner?
It is not recommended to use tap water in your ultrasonic PCB cleaner, as it may contain minerals and impurities that can leave residue on your PCBs or damage the cleaner’s components. Use deionized water or a specially formulated cleaning solution for the best results.
2. How often should I change the cleaning solution?
The frequency of changing the cleaning solution depends on the level of contamination and the frequency of use. As a general rule, change the solution when you notice a decrease in cleaning performance or as recommended by the manufacturer, typically every 1-2 weeks for regular use.
3. Can I clean other electronic components in my ultrasonic PCB cleaner?
Yes, you can clean other electronic components such as connectors, switches, and small parts in your ultrasonic PCB cleaner. However, ensure that the components are compatible with the cleaning solution and can withstand the ultrasonic cleaning process.
4. How long should I run the cleaning cycle?
The duration of the cleaning cycle depends on the level of contamination and the type of PCB. Start with a shorter cycle (5-10 minutes) and inspect the PCBs. If necessary, increase the cleaning time in increments until the desired cleanliness is achieved. Avoid excessively long cleaning cycles, as they may damage the PCBs or the cleaner itself.
5. Can I use my ultrasonic PCB cleaner for other cleaning applications?
While ultrasonic PCB cleaners are primarily designed for cleaning electronic components, they can be used for other cleaning applications such as jewelry, dental instruments, or small mechanical parts. However, ensure that you use the appropriate cleaning solution and settings for each application to avoid damage to the items being cleaned or the cleaner itself.
Conclusion
An ultrasonic PCB cleaner is a valuable tool for anyone involved in electronics manufacturing, repair, or hobby projects. By using high-frequency sound waves and a suitable cleaning solution, an ultrasonic cleaner can effectively remove contaminants from PCBs, ensuring their proper function and longevity. When choosing and using an ultrasonic PCB cleaner, consider factors such as tank size, frequency, power, and heating capabilities, and follow the manufacturer’s guidelines for operation and maintenance. With proper care and use, an ultrasonic PCB cleaner can be a reliable and efficient addition to your electronics workshop.


Leave a Reply