Introduction to SMT and Laser Stencils
Surface Mount Technology (SMT) has revolutionized the Electronics Manufacturing industry by enabling the production of smaller, faster, and more reliable electronic devices. One of the critical components in the SMT Assembly process is the stencil, which is used to apply solder paste onto the printed circuit board (PCB) before component placement. SMT Stencils can be manufactured using various methods, but laser-cut stencils have gained popularity due to their precision, durability, and quick turnaround times.
In this article, we will explore the world of SMT stencils and laser stencils, discussing their importance in the electronics manufacturing process, their advantages and disadvantages, and how to choose the right stencil for your project.
What is an SMT Stencil?
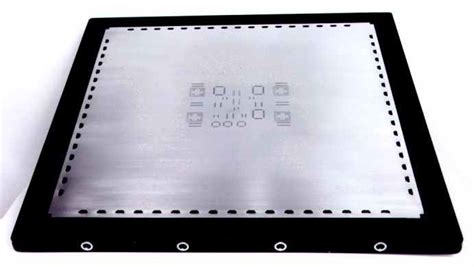
An SMT stencil is a thin metal sheet with apertures (openings) that correspond to the solder pad locations on a PCB. The stencil is placed on top of the PCB, and solder paste is applied using a squeegee or automated paste dispensing machine. The solder paste is forced through the apertures, depositing the correct amount of paste onto each pad. After the stencil is removed, the components are placed on the pasted pads, and the board is sent through a reflow oven to melt the solder and create a permanent connection.
SMT stencils are typically made from stainless steel, brass, or nickel, with thicknesses ranging from 0.1 mm to 0.2 mm (4 to 8 mils). The aperture size and shape are determined by the component footprint and the desired solder paste volume.
Advantages of SMT Stencils
- Precise solder paste deposition
- Consistent solder paste volume
- Increased production speed
- Reduced assembly errors
- Suitable for high-volume production
Disadvantages of SMT Stencils
- Initial cost of stencil fabrication
- Requires proper storage and handling to prevent damage
- Limited flexibility for design changes
- Stencil cleaning and maintenance required

Laser-Cut SMT Stencils
Laser-cut SMT stencils, also known as laser stencils, are created using a high-precision laser cutting machine. The laser beam vaporizes the stencil material, creating clean and accurate apertures. Laser stencils offer several advantages over traditional chemically etched or electroformed stencils.
Advantages of Laser Stencils
- High precision and accuracy
- Quick turnaround times
- Smooth aperture walls for improved paste release
- Durable and long-lasting
- Suitable for fine-pitch components and small apertures
Disadvantages of Laser Stencils
- Higher cost compared to chemically etched stencils
- Limited material options (mainly stainless steel)
- Slight taper in aperture walls due to laser beam divergence

Choosing the Right SMT Stencil
When selecting an SMT stencil for your project, consider the following factors:
- Component pitch and size
- Solder paste type and particle size
- PCB Surface Finish
- Production volume
- Budget and lead time
For high-volume production and fine-pitch components, laser stencils are often the best choice due to their precision and durability. However, for lower-volume runs or less demanding applications, chemically etched or electroformed stencils may be more cost-effective.

Stencil Design Considerations
To ensure optimal solder paste deposition and component placement, consider the following when designing your SMT stencil:
-
Aperture size and shape: The aperture should be slightly larger than the pad to allow for proper paste release. Common aperture shapes include square, circular, and home plate.
-
Aperture aspect ratio: The ratio of aperture width to stencil thickness should be between 1.5:1 and 2.5:1 for optimal paste release.
-
Stencil thickness: Choose a stencil thickness that provides the desired solder paste volume while maintaining a suitable aspect ratio.
-
Fiducial marks: Include fiducial marks on the stencil to aid in alignment with the PCB.
-
Stencil frame: Select a frame size and type that is compatible with your printing equipment and provides adequate support for the stencil.
Stencil Printing Process
The stencil printing process involves the following steps:
-
Stencil alignment: The stencil is aligned with the PCB using fiducial marks or a vision system.
-
Solder paste application: Solder paste is applied to the stencil using a squeegee or automated dispensing machine.
-
Paste deposition: The solder paste is forced through the stencil apertures onto the PCB pads.
-
Stencil removal: The stencil is carefully lifted off the PCB, leaving the deposited solder paste on the pads.
-
Inspection: The printed PCB is inspected for solder paste consistency, alignment, and any defects.
Stencil Printing Parameters
To achieve optimal solder paste deposition, consider the following printing parameters:
| Parameter | Recommended Range |
|---|---|
| Squeegee pressure | 0.2 – 0.4 kg/cm (1.1 – 2.2 lbs/in) |
| Squeegee speed | 20 – 50 mm/s (0.8 – 2.0 in/s) |
| Separation speed | 1 – 3 mm/s (0.04 – 0.12 in/s) |
| Snap-off distance | 0 – 0.5 mm (0 – 20 mils) |
| Solder paste viscosity | 800 – 1200 kcps |
Stencil Maintenance and Cleaning
To ensure consistent solder paste deposition and extend the life of your SMT stencil, proper maintenance and cleaning are essential.
-
Clean the stencil after every print cycle using a lint-free wipe and isopropyl alcohol.
-
Periodically clean the stencil in an ultrasonic cleaner with a specially formulated stencil cleaning solution.
-
Inspect the stencil for any damage or wear, and replace it when necessary.
-
Store the stencil in a protective container when not in use to prevent damage and contamination.
Troubleshooting Stencil Printing Issues
Common stencil printing issues and their solutions:
| Issue | Solution |
|---|---|
| Insufficient Solder paste | Increase stencil thickness or aperture size |
| Excessive solder paste | Decrease stencil thickness or aperture size |
| Solder paste bridging | Adjust aperture size, shape, or spacing; reduce paste viscosity |
| Poor paste release | Clean stencil; adjust aperture aspect ratio; increase separation speed |
| Misaligned prints | Check stencil alignment; adjust fiducial marks; recalibrate vision system |
Frequently Asked Questions (FAQ)
-
Q: What is the difference between SMT stencils and laser stencils?
A: SMT stencils are a general term for stencils used in surface mount technology, while laser stencils specifically refer to SMT stencils that are manufactured using a laser cutting process. Laser stencils offer higher precision and durability compared to other manufacturing methods. -
Q: How long do SMT stencils typically last?
A: The lifespan of an SMT stencil depends on factors such as material, thickness, usage, and maintenance. On average, a well-maintained stencil can last for 20,000 to 50,000 print cycles before needing replacement. -
Q: Can I use the same stencil for different PCB designs?
A: No, each PCB design requires a specific stencil with apertures that match the solder pad layout. Using the wrong stencil can result in poor solder paste deposition and component placement issues. -
Q: How do I choose the right solder paste for my SMT stencil?
A: When selecting a solder paste, consider factors such as the component size, pitch, and metallurgy, as well as the stencil aperture size and aspect ratio. Consult with your solder paste manufacturer or stencil supplier for recommendations based on your specific application. -
Q: What is the typical turnaround time for a laser-cut SMT stencil?
A: Laser stencil turnaround times can vary depending on the supplier and design complexity, but they are generally faster than chemically etched or electroformed stencils. Many suppliers offer standard turnaround times of 24 to 48 hours for laser stencils.
Conclusion
SMT stencils, particularly laser-cut stencils, play a crucial role in the electronics manufacturing process by ensuring precise and consistent solder paste deposition. By understanding the advantages, limitations, and design considerations of SMT stencils, you can select the best stencil solution for your project and optimize your stencil printing process for high-quality results.
When choosing between SMT stencil manufacturing methods, laser stencils offer the benefits of high precision, durability, and quick turnaround times, making them an excellent choice for many applications. However, it is essential to consider factors such as production volume, component requirements, and budget when making your decision.
By following proper stencil design guidelines, printing parameters, and maintenance practices, you can achieve reliable and efficient SMT assembly, ultimately leading to better product quality and customer satisfaction.


Leave a Reply