Introduction to Raspberry Pi Camera
The Raspberry Pi is a popular single-board computer that has revolutionized the world of DIY electronics and computing. One of the most exciting features of the Raspberry Pi is its ability to connect to a camera module, allowing users to capture images and record videos. The Raspberry Pi camera module uses a special interface called the Camera Serial Interface (CSI) to communicate with the Raspberry Pi board. In order to connect the camera module to the Raspberry Pi, you need to understand the Raspberry Pi Camera Pinout.
What is the Raspberry Pi Camera Pinout?
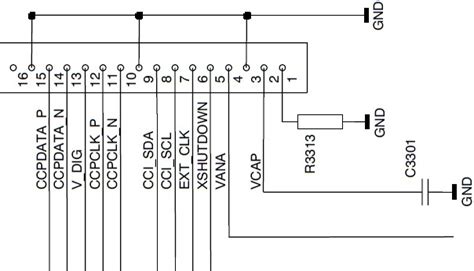
The Raspberry Pi camera pinout refers to the arrangement of pins on the camera module that connects to the Raspberry Pi board. The pinout consists of a 15-pin ribbon cable connector that plugs into the CSI port on the Raspberry Pi board. The pinout is designed to provide power, ground, and data signals to the camera module, allowing it to communicate with the Raspberry Pi.
Raspberry Pi Camera Pinout Diagram
| Pin | Name | Description |
|---|---|---|
| 1 | 3V3 | 3.3V Power |
| 2 | SDA | I2C Serial Data |
| 3 | SCL | I2C Serial Clock |
| 4 | GND | Ground |
| 5 | CAM1_D0 | Camera Serial Interface 1 Data 0 |
| 6 | CAM1_D1 | Camera Serial Interface 1 Data 1 |
| 7 | GND | Ground |
| 8 | CAM1_CLK | Camera Serial Interface 1 Clock |
| 9 | GND | Ground |
| 10 | CAM1_D2 | Camera Serial Interface 1 Data 2 |
| 11 | CAM1_D3 | Camera Serial Interface 1 Data 3 |
| 12 | GND | Ground |
| 13 | CAM1_D4 | Camera Serial Interface 1 Data 4 |
| 14 | CAM1_D5 | Camera Serial Interface 1 Data 5 |
| 15 | GND | Ground |
Explanation of Raspberry Pi Camera Pinout
- 3V3: This pin provides 3.3V power to the camera module.
- SDA and SCL: These pins are used for I2C communication between the camera module and the Raspberry Pi.
- GND: These pins provide a ground connection for the camera module.
- CAM1_D0 to CAM1_D5: These pins are used for transmitting image data from the camera module to the Raspberry Pi using the CSI interface.
- CAM1_CLK: This pin provides the clock signal for synchronizing data transmission between the camera module and the Raspberry Pi.

How to Connect the Raspberry Pi Camera
Connecting the Raspberry Pi camera module to the Raspberry Pi board is a straightforward process. Here’s a step-by-step guide:
- Shut down your Raspberry Pi and disconnect the power supply.
- Locate the CSI port on your Raspberry Pi board. It’s a small connector located near the HDMI port.
- Gently pull up on the edges of the CSI port’s plastic clip to open it.
- Insert the ribbon cable of the camera module into the CSI port, ensuring that the blue side of the ribbon cable is facing towards the Ethernet port of the Raspberry Pi.
- Push the plastic clip back down to secure the ribbon cable in place.
- Connect the other end of the ribbon cable to the camera module, again ensuring that the blue side is facing in the correct direction.
- Secure the camera module in place using the provided mounting holes or a case.
- Reconnect the power supply to your Raspberry Pi and boot it up.

Enabling the Raspberry Pi Camera
Before you can start using the Raspberry Pi camera, you need to enable it in the Raspberry Pi configuration. Here’s how:
- Open the Raspberry Pi configuration tool by entering the following command in the terminal:
sudo raspi-config
- Navigate to “Interfacing Options” using the arrow keys and press Enter.
- Select “Camera” and press Enter.
- Choose “Yes” to enable the camera interface and press Enter.
- Reboot your Raspberry Pi for the changes to take effect.

Testing the Raspberry Pi Camera
Once you have connected and enabled the Raspberry Pi camera, you can test it to ensure it’s working properly. Here’s a simple Python script that captures an image using the camera:
from picamera import PiCamera
from time import sleep

camera = PiCamera()

camera.start_preview()
sleep(5)
camera.capture('/home/pi/Desktop/image.jpg')
camera.stop_preview()
This script does the following:
- Imports the necessary modules:
PiCamerafor accessing the camera andsleepfor adding a delay. - Creates an instance of the
PiCameraclass. - Starts the camera preview, which displays the camera feed on the screen.
- Waits for 5 seconds using the
sleepfunction. - Captures an image and saves it as “image.jpg” on the desktop.
- Stops the camera preview.
To run this script, save it with a “.py” extension (e.g., “test_camera.py”) and run it using the following command in the terminal:
python test_camera.py
If everything is working correctly, you should see the camera preview on the screen for 5 seconds, and then an image will be saved on your desktop.
Advanced Raspberry Pi Camera Usage
Now that you know the basics of connecting and using the Raspberry Pi camera, let’s explore some more advanced usage scenarios.
Recording Videos
In addition to capturing images, the Raspberry Pi camera can also record videos. Here’s an example Python script that records a 10-second video:
from picamera import PiCamera
from time import sleep

camera = PiCamera()

camera.start_preview()
camera.start_recording('/home/pi/Desktop/video.h264')
sleep(10)
camera.stop_recording()
camera.stop_preview()
This script is similar to the image capture script, but instead of capturing an image, it records a video for 10 seconds and saves it as “video.h264” on the desktop.
Adjusting Camera Settings
The Raspberry Pi camera provides various settings that you can adjust to control the image quality, exposure, and other parameters. Here are a few examples:
from picamera import PiCamera

camera = PiCamera()

camera.resolution = (1280, 720)  # Set the resolution to 720p
camera.framerate = 30  # Set the frame rate to 30 fps
camera.brightness = 50  # Set the brightness to 50%
camera.contrast = 0  # Set the contrast to 0
camera.saturation = 0  # Set the saturation to 0
camera.sharpness = 0  # Set the sharpness to 0
camera.iso = 100  # Set the ISO to 100
camera.exposure_mode = 'auto'  # Set the exposure mode to auto
camera.awb_mode = 'auto'  # Set the auto white balance mode to auto
camera.meter_mode = 'average'  # Set the metering mode to average

camera.start_preview()
camera.capture('/home/pi/Desktop/image.jpg')
camera.stop_preview()
In this script, we adjust various camera settings before capturing an image. Some of the settings you can adjust include:
resolution: Sets the resolution of the captured image or video.framerate: Sets the frame rate for video recording.brightness,contrast,saturation,sharpness: Adjust the image properties.iso: Sets the ISO value for the camera sensor.exposure_mode: Sets the exposure mode (e.g., ‘auto’, ‘night’, ‘sports’).awb_mode: Sets the auto white balance mode.meter_mode: Sets the metering mode for exposure calculation.
Using the Raspberry Pi Camera with OpenCV
OpenCV is a popular computer vision library that can be used with the Raspberry Pi camera for various applications such as object detection, face recognition, and more. Here’s an example of using OpenCV with the Raspberry Pi camera to detect faces:
import cv2
from picamera import PiCamera
from picamera.array import PiRGBArray

camera = PiCamera()
camera.resolution = (640, 480)
camera.framerate = 30
rawCapture = PiRGBArray(camera, size=(640, 480))

face_cascade = cv2.CascadeClassifier('/home/pi/opencv/data/haarcascades/haarcascade_frontalface_default.xml')

for frame in camera.capture_continuous(rawCapture, format="bgr", use_video_port=True):
    image = frame.array
    gray = cv2.cvtColor(image, cv2.COLOR_BGR2GRAY)
    faces = face_cascade.detectMultiScale(gray, scaleFactor=1.1, minNeighbors=5, minSize=(30, 30))

    for (x, y, w, h) in faces:
        cv2.rectangle(image, (x, y), (x+w, y+h), (0, 255, 0), 2)

    cv2.imshow("Frame", image)

    key = cv2.waitKey(1) & 0xFF
    rawCapture.truncate(0)

    if key == ord("q"):
        break

cv2.destroyAllWindows()
This script uses OpenCV’s CascadeClassifier to detect faces in the camera feed. It continuously captures frames from the camera, converts them to grayscale, and applies the face detection algorithm. Detected faces are highlighted with green rectangles. The script displays the processed frames in a window and allows you to quit by pressing the ‘q’ key.
Conclusion
The Raspberry Pi camera pinout provides a simple and efficient way to connect a camera module to the Raspberry Pi board. By understanding the pinout and following the steps to connect and enable the camera, you can easily add image and video capture capabilities to your Raspberry Pi Projects. Whether you’re building a security camera system, a wildlife monitoring setup, or a computer vision application, the Raspberry Pi camera opens up a world of possibilities.
FAQs
-
Can I use any camera module with the Raspberry Pi?
No, you need to use a camera module specifically designed for the Raspberry Pi, such as the official Raspberry Pi Camera Module or the Raspberry Pi High Quality Camera. -
How do I connect multiple cameras to the Raspberry Pi?
The Raspberry Pi has a single CSI port, which means you can only connect one camera module directly. However, you can use USB cameras or camera multiplexers to connect multiple cameras to the Raspberry Pi. -
Can I use the Raspberry Pi camera for night vision?
The standard Raspberry Pi camera module does not have infrared (IR) capabilities for night vision. However, you can use the Raspberry Pi NoIR Camera Module, which lacks an infrared filter, along with IR illumination to achieve night vision. -
What is the maximum resolution supported by the Raspberry Pi camera?
The Raspberry Pi Camera Module v2 supports a maximum resolution of 3280 × 2464 pixels for still images and 1080p30 (1920 × 1080 pixels at 30 frames per second) for video recording. -
Can I use the Raspberry Pi camera with languages other than Python?
Yes, you can use the Raspberry Pi camera with various programming languages, including C++, Java, and Node.js, by utilizing the appropriate libraries and APIs provided by the Raspberry Pi community.


Leave a Reply