What is PCB Troubleshooting?
PCB troubleshooting is the process of identifying and resolving issues with printed circuit boards (PCBs). It involves various techniques and tools to diagnose problems and find solutions to ensure the proper functioning of electronic devices.
Importance of PCB Troubleshooting
PCB troubleshooting is crucial for several reasons:
- Ensuring product quality
- Reducing manufacturing costs
- Improving reliability and longevity of electronic devices
- Facilitating timely product delivery
Common PCB Problems
Several issues can arise during the manufacturing and operation of PCBs. Some of the most common problems include:
Short Circuits
Short circuits occur when two or more points on a PCB are unintentionally connected, causing excessive current flow. This can lead to component damage and device malfunction.
Open Circuits
Open circuits happen when there is a break in the conductive path, preventing current from flowing through the circuit. This can result in the device not functioning properly or not turning on at all.
Component Failure
Components on a PCB can fail due to various reasons, such as:
- Overheating
- Mechanical stress
- Electrical overstress
- Manufacturing defects
Solder Joint Issues
Solder joint problems can occur due to improper soldering techniques or environmental factors. Some common solder joint issues include:
- Cold solder joints
- Dry solder joints
- Solder bridges
- Insufficient solder
Signal Integrity Problems
Signal integrity issues can arise when the electrical signals on a PCB are distorted or degraded. This can be caused by factors such as:
- Crosstalk
- Electromagnetic interference (EMI)
- Impedance mismatch
- Reflections

PCB Troubleshooting Techniques
Several techniques can be used to troubleshoot PCBs effectively. Some of the most common methods include:
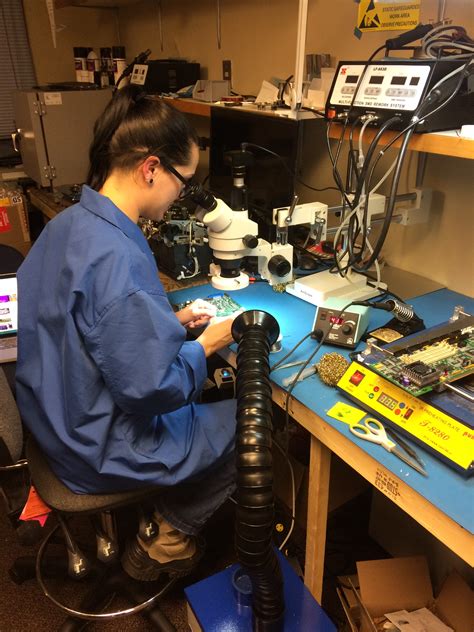
Visual Inspection
Visual inspection is the first step in PCB troubleshooting. It involves examining the board for any visible defects, such as:
- Damaged components
- Solder joint issues
- Burn marks
- Cracks or fractures
Continuity Testing
Continuity testing is used to check for open circuits and short circuits on a PCB. This can be done using a multimeter or a dedicated Continuity Tester.
Voltage and Current Measurements
Measuring voltage and current at various points on the PCB can help identify issues such as:
- Faulty components
- Incorrect power supply voltages
- Excessive current draw
Thermal Imaging
Thermal imaging can be used to detect hotspots on a PCB, which may indicate component failure or design issues. This technique uses an infrared camera to visualize the temperature distribution on the board.
Oscilloscope Measurements
An oscilloscope can be used to analyze the electrical signals on a PCB. This can help identify issues such as:
- Signal distortion
- Noise
- Timing problems
- Incorrect logic levels
In-Circuit Testing (ICT)
In-circuit testing involves using specialized equipment to test individual components on a PCB. This can help identify faulty components and ensure that they meet the required specifications.

PCB Troubleshooting Tools
Various tools are available to assist in PCB troubleshooting. Some of the most essential tools include:
| Tool | Purpose |
|---|---|
| Multimeter | Measure voltage, current, and resistance |
| Oscilloscope | Analyze electrical signals |
| Logic Analyzer | Capture and display digital signals |
| Thermal Camera | Detect hotspots and thermal issues |
| Continuity Tester | Check for open and short circuits |
| Soldering Iron | Repair or replace components |
| Desoldering Tools | Remove faulty components |
| Microscope | Inspect solder joints and small components |

Troubleshooting Process
An effective PCB troubleshooting process should follow these steps:
- Gather information about the problem
- Perform a visual inspection
- Check for obvious faults (e.g., damaged components, loose connections)
- Conduct continuity tests
- Measure voltage and current
- Analyze electrical signals using an oscilloscope
- Perform in-circuit testing if necessary
- Identify the root cause of the problem
- Implement and test the solution
- Document the findings and update relevant records
Best Practices for PCB Troubleshooting
To ensure efficient and effective PCB troubleshooting, follow these best practices:
- Keep a clean and organized workspace
- Use high-quality tools and equipment
- Follow proper safety procedures
- Document the troubleshooting process
- Work methodically and systematically
- Collaborate with team members and share knowledge
- Continuously update your skills and knowledge
Frequently Asked Questions (FAQ)
1. What is the most common cause of PCB failure?
The most common cause of PCB failure is component failure due to factors such as overheating, mechanical stress, or electrical overstress.
2. How can I prevent PCB problems?
To prevent PCB problems, ensure proper design, use high-quality components, follow best manufacturing practices, and perform thorough testing and inspection.
3. What should I do if I can’t identify the problem using basic troubleshooting techniques?
If basic troubleshooting techniques do not help identify the problem, consider using advanced tools like thermal imaging or in-circuit testing. Consult with experienced professionals or the manufacturer for further assistance.
4. How often should I perform preventive maintenance on my PCBs?
The frequency of preventive maintenance depends on the specific application and environment. Generally, it is recommended to perform regular visual inspections and testing to identify potential issues early.
5. Can I troubleshoot a PCB without specialized tools?
While some basic troubleshooting can be done without specialized tools, having the right equipment is essential for accurate diagnosis and efficient problem-solving. Investing in high-quality tools can save time and resources in the long run.
Conclusion
PCB troubleshooting is a critical aspect of ensuring the proper functioning and reliability of electronic devices. By understanding common problems, utilizing appropriate techniques and tools, and following best practices, you can effectively diagnose and resolve issues with printed circuit boards.
Regular maintenance, thorough testing, and continuous learning are key to preventing PCB problems and minimizing downtime. By implementing a systematic troubleshooting approach and staying up-to-date with the latest techniques and technologies, you can significantly improve the quality and performance of your electronic products.


Leave a Reply