Introduction to PCB Troubleshooting
Printed Circuit Boards (PCBs) are the backbone of modern electronics. They are used in almost every electronic device, from smartphones and computers to industrial machinery and medical equipment. However, like any other electronic component, PCBs can encounter various problems during their lifetime. These problems can range from minor issues that can be easily fixed to major faults that can render the entire board useless.
In this article, we will discuss some of the most common problems that can occur with PCBs and how to troubleshoot them effectively. We will cover topics such as short circuits, open circuits, component failures, and more. By the end of this article, you should have a good understanding of how to identify and resolve common PCB issues.
Common PCB Problems
Short Circuits
Short circuits are one of the most common problems that can occur with PCBs. A short circuit occurs when two or more points on the board that should not be connected become electrically connected. This can happen due to a variety of reasons, such as:
- Solder bridges between adjacent pads or traces
- Damaged or broken traces
- Conductive debris on the board surface
- Incorrect component placement or orientation
Short circuits can cause a variety of issues, such as:
- Overheating of components
- Damage to components or the board itself
- Incorrect operation of the circuit
- Complete failure of the board
To troubleshoot short circuits, you can use a multimeter to measure the resistance between various points on the board. If the resistance is lower than expected, there may be a short circuit. You can also visually inspect the board for any obvious signs of damage or debris.
Open Circuits
Open circuits are another common problem that can occur with PCBs. An open circuit occurs when there is a break in the electrical path between two points on the board. This can happen due to a variety of reasons, such as:
- Broken or damaged traces
- Incorrect component placement or orientation
- Poor solder joints
- Damaged or missing components
Open circuits can cause a variety of issues, such as:
- Incorrect operation of the circuit
- Complete failure of the board
To troubleshoot open circuits, you can use a multimeter to measure the resistance between various points on the board. If the resistance is higher than expected, there may be an open circuit. You can also visually inspect the board for any obvious signs of damage or missing components.
Component Failures
Component failures are another common problem that can occur with PCBs. A component failure occurs when a component on the board fails to operate correctly or fails completely. This can happen due to a variety of reasons, such as:
- Overheating
- Electrical stress
- Physical damage
- Manufacturing defects
Component failures can cause a variety of issues, such as:
- Incorrect operation of the circuit
- Complete failure of the board
To troubleshoot component failures, you can use a multimeter to measure the resistance, voltage, or current of the component in question. If the measurements are outside of the expected range, the component may be faulty. You can also visually inspect the component for any obvious signs of damage or overheating.
Incorrect Component Placement or Orientation
Incorrect component placement or orientation is another common problem that can occur with PCBs. This can happen due to human error during the assembly process or due to incorrect component markings.
Incorrect component placement or orientation can cause a variety of issues, such as:
- Short circuits
- Open circuits
- Incorrect operation of the circuit
- Complete failure of the board
To troubleshoot incorrect component placement or orientation, you can visually inspect the board and compare it to the schematic or layout diagram. If any components are in the wrong location or orientation, they should be corrected.
Solder Joint Issues
Solder joint issues are another common problem that can occur with PCBs. Solder joints are the connections between components and the board. Poor solder joints can cause a variety of issues, such as:
- Open circuits
- Intermittent connections
- High resistance connections
Solder joint issues can be caused by a variety of factors, such as:
- Incorrect soldering temperature or technique
- Contaminated or oxidized pads or leads
- Insufficient or excessive solder
- Incorrect component placement or orientation
To troubleshoot solder joint issues, you can visually inspect the joints under magnification. Good solder joints should be shiny, smooth, and concave. Poor solder joints may be dull, rough, or convex. You can also use a multimeter to measure the resistance of the joint. If the resistance is higher than expected, the joint may be faulty.

PCB Troubleshooting Techniques
Visual Inspection
Visual inspection is one of the most basic and effective techniques for troubleshooting PCBs. It involves visually examining the board for any obvious signs of damage, debris, or incorrect assembly.
When performing a visual inspection, you should look for:
- Broken or damaged traces
- Solder bridges or short circuits
- Damaged or missing components
- Incorrect component placement or orientation
- Poor solder joints
- Contamination or debris on the board surface
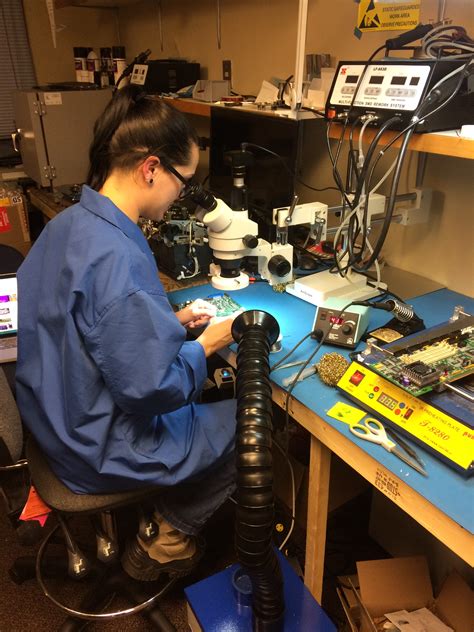
Visual inspection can be performed with the naked eye or with the aid of magnification, such as a magnifying glass or microscope.
Multimeter Testing
Multimeter testing is another essential technique for troubleshooting PCBs. A multimeter is a device that can measure various electrical properties, such as voltage, current, and resistance.
When using a multimeter to troubleshoot a PCB, you should:
- Set the multimeter to the appropriate mode (e.g. resistance, voltage, etc.)
- Connect the probes to the appropriate points on the board
- Compare the measured values to the expected values based on the schematic or datasheet
Multimeter testing can be used to identify a variety of issues, such as:
- Short circuits (low resistance)
- Open circuits (high resistance)
- Incorrect voltage levels
- Excessive current draw
Oscilloscope Testing
Oscilloscope testing is a more advanced technique for troubleshooting PCBs. An oscilloscope is a device that can display the waveform of an electrical signal over time.
When using an oscilloscope to troubleshoot a PCB, you should:
- Connect the oscilloscope probes to the appropriate points on the board
- Set the oscilloscope to the appropriate settings (e.g. timebase, voltage range, etc.)
- Compare the displayed waveform to the expected waveform based on the schematic or datasheet
Oscilloscope testing can be used to identify a variety of issues, such as:
- Signal integrity problems
- Timing issues
- Noise or interference
Thermal Imaging
Thermal imaging is a technique that can be used to identify areas of the PCB that are generating excessive heat. This can be useful for identifying components that are overheating or short circuits that are causing hot spots on the board.
When using thermal imaging to troubleshoot a PCB, you should:
- Use a thermal camera or thermal imaging device to capture an image of the board
- Look for areas of the board that are significantly hotter than the surrounding areas
- Compare the thermal image to the board layout to identify the components or traces that are generating the heat
Thermal imaging can be used to identify a variety of issues, such as:
- Overheating components
- Short circuits
- Poor thermal management

Example PCB Troubleshooting Scenarios
Scenario 1: Power Supply Issues
Symptoms:
– The board is not powering on
– The power LED is not illuminated
– The voltage at the power input is correct
Possible Causes:
– Short circuit on the power rail
– Faulty voltage regulator
– Damaged or missing power components (e.g. capacitors, inductors, etc.)
Troubleshooting Steps:
1. Visually inspect the power section of the board for any obvious signs of damage or short circuits.
2. Use a multimeter to measure the voltage at various points along the power rail. If the voltage drops significantly at any point, there may be a short circuit or excessive current draw.
3. Check the voltage regulator for proper operation. If the voltage output is incorrect or absent, the regulator may be faulty.
4. Use a multimeter to measure the resistance of the power components. If any components have significantly higher or lower resistance than expected, they may be damaged or faulty.
Scenario 2: Intermittent Failures
Symptoms:
– The board operates correctly most of the time, but fails intermittently
– The failures are not reproducible or predictable
Possible Causes:
– Poor solder joints
– Loose or damaged connectors
– Intermittent short circuits or open circuits
– Electromagnetic interference (EMI)
Troubleshooting Steps:
1. Visually inspect the board for any obvious signs of damage, especially around connectors and components that are subject to physical stress.
2. Use a multimeter to measure the resistance of suspect solder joints or connectors. If the resistance is high or varying, the joint may be poor.
3. Use an oscilloscope to monitor the signals on the board during operation. Look for any signs of noise, glitches, or other anomalies that may indicate an intermittent fault.
4. Consider the environment in which the board is operating. If the board is subject to vibration, temperature changes, or EMI, these factors may be contributing to the intermittent failures.
Scenario 3: Incorrect Functionality
Symptoms:
– The board powers on and appears to be operating, but does not function correctly
– The board fails to perform certain functions or operates erratically
Possible Causes:
– Incorrect component values or tolerances
– Incorrect firmware or software
– Timing or signal integrity issues
– Damaged or faulty components
Troubleshooting Steps:
1. Visually inspect the board for any obvious signs of damage or incorrect assembly.
2. Use a multimeter to measure the values of critical components, such as resistors and capacitors. If the values are significantly different from the specified values, the components may be incorrect or faulty.
3. Use an oscilloscope to monitor the signals on the board during operation. Look for any signs of timing issues, such as incorrect pulse widths or frequencies.
4. Consider the firmware or software that is running on the board. If the code is incorrect or has bugs, it may be causing the incorrect functionality.

FAQ
Q: What tools do I need for PCB troubleshooting?
A: The most essential tools for PCB troubleshooting are a multimeter, oscilloscope, soldering iron, and magnifying glass or microscope. Other useful tools include a logic analyzer, thermal camera, and ESD-safe tweezers and pliers.
Q: How can I prevent PCB failures?
A: To prevent PCB failures, it is important to follow good design and manufacturing practices, such as using appropriate component values and tolerances, providing adequate cooling and ventilation, and protecting the board from environmental factors such as moisture and dust. Regular inspection and maintenance can also help to identify potential issues before they cause failures.
Q: Can I repair a damaged PCB trace?
A: In some cases, it may be possible to repair a damaged PCB trace using conductive epoxy or by soldering a small wire jumper across the break. However, this should only be attempted by experienced technicians, as improper repair can cause further damage to the board.
Q: What should I do if I suspect a component is faulty?
A: If you suspect a component is faulty, the first step is to visually inspect the component for any obvious signs of damage or overheating. You can then use a multimeter to measure the component’s resistance, voltage, or current and compare it to the expected values based on the datasheet or schematic. If the component is confirmed to be faulty, it should be replaced with an identical or equivalent component.
Q: How can I identify a short circuit on a PCB?
A: To identify a short circuit on a PCB, you can use a multimeter to measure the resistance between various points on the board. If the resistance is lower than expected, there may be a short circuit. You can also visually inspect the board for any obvious signs of damage or solder bridges between adjacent pads or traces. If a short circuit is found, it should be repaired or the board should be replaced.
Conclusion
PCB troubleshooting can be a complex and challenging task, but by following the techniques and strategies outlined in this article, you can effectively identify and resolve many common PCB issues. Remember to always start with a visual inspection of the board, and then use tools such as multimeters and oscilloscopes to further diagnose the problem.
When working on PCBs, it is important to take appropriate safety precautions, such as wearing ESD-safe clothing and using grounded tools and workstations. It is also important to have a good understanding of the circuit design and components used on the board.
If you are unsure of how to proceed with a particular issue, it may be best to consult with a more experienced technician or engineer. PCB troubleshooting often requires a combination of technical knowledge, practical skills, and problem-solving abilities.
By developing your PCB troubleshooting skills and knowledge, you can improve the reliability and performance of your electronic devices and systems. Whether you are a hobbyist or a professional, the ability to effectively troubleshoot and repair PCBs is a valuable skill that can save time, money, and frustration in the long run.


Leave a Reply