Understanding NiMH Batteries
Before we dive into the specifics of NiMH Charger circuits, let’s first understand the characteristics of NiMH batteries themselves.
Composition and Chemistry
NiMH batteries are composed of a positive electrode made of nickel oxyhydroxide (NiOOH) and a negative electrode made of a hydrogen-absorbing alloy. The electrolyte is typically an alkaline solution, such as potassium hydroxide (KOH). During the charging process, the nickel oxyhydroxide is reduced to nickel hydroxide (Ni(OH)2), while the hydrogen-absorbing alloy is oxidized, releasing electrons and absorbing hydrogen ions.
Voltage and Capacity
A single NiMH cell has a nominal voltage of 1.2V, which is lower than the 1.5V of alkaline batteries. However, NiMH batteries offer higher capacities, ranging from a few hundred mAh to several thousand mAh, depending on the size and form factor of the cell.
Advantages and Disadvantages
NiMH batteries have several advantages over other rechargeable battery technologies:
- High energy density
- Low self-discharge rate
- Environmentally friendly (no toxic metals like cadmium)
- Capable of high discharge rates
However, they also have some drawbacks:
- Lower nominal voltage compared to alkaline batteries
- Susceptible to the “memory effect” if not properly maintained
- Requires a more sophisticated charging circuit than NiCd batteries
NiMH Battery Charging Principles
To design an effective NiMH charger circuit, it is crucial to understand the principles behind charging these batteries.
Constant Current (CC) Charging
The most common method for charging NiMH batteries is constant current (CC) charging. In this method, a constant current is applied to the battery until it reaches a fully charged state. The charging current is typically set to a fraction of the battery’s capacity, expressed as the C-rate. For example, a 1C charge rate for a 2000mAh battery would be 2000mA (2A).
Charge Termination Methods
Determining when to stop the charging process is critical to prevent overcharging, which can damage the battery and reduce its lifespan. There are several charge termination methods used in NiMH charger circuits:
-
Delta-V detection: This method monitors the battery voltage during charging and detects a small voltage drop (-ΔV) that occurs when the battery is fully charged.
-
Temperature monitoring: NiMH batteries experience a temperature rise when approaching a full charge. By monitoring the battery temperature, the charger can terminate the charging process when a predefined temperature threshold is reached.
-
Timer-based termination: A simple yet less accurate method is to use a fixed charging time based on the battery’s capacity and the charging current.
Trickle Charging
After the main charging process is complete, a low-current trickle charge can be applied to the battery to maintain its full charge state and compensate for any self-discharge. The trickle charge current is typically set to a small fraction of the battery’s capacity (e.g., C/20 or C/10).

NiMH Charger Circuit Design
Now that we have a solid understanding of NiMH batteries and charging principles, let’s explore the design of a practical NiMH charger circuit.
Basic Circuit Components
A basic NiMH charger circuit consists of the following components:
-
Power supply: A DC power source with a voltage higher than the fully charged voltage of the NiMH battery pack. For example, a 12V DC supply can be used to charge a 7.2V (6-cell) NiMH battery pack.
-
Current regulator: A constant current regulator is used to maintain the desired charging current. This can be implemented using a simple linear regulator (e.g., LM317) or a more advanced switching regulator (e.g., buck converter).
-
Charge termination circuitry: Depending on the chosen charge termination method, additional components may be required, such as voltage comparators, temperature sensors, or timers.
-
Protection circuitry: To ensure safe operation, the charger circuit should include protection features like overcurrent protection, reverse polarity protection, and thermal shutdown.
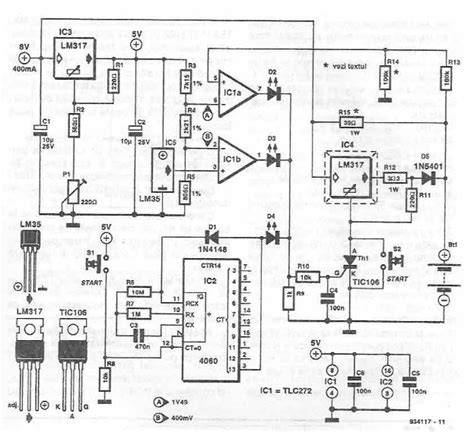
Schematic Diagram
Here’s a simplified schematic diagram of a basic NiMH charger circuit using a linear current regulator and delta-V charge termination:
                  +12V
                   |
                  +-+
                  | |
                  | | R1
                  | |
                  +-+
                   |
                  +-+
                  | |
                  | | LM317
                  | |
                  +-+
                   |
                   +---+---+
                   |   |   |
                  R2  R3  C1
                   |   |   |
                   +---+---+
                       |
                      +-+
                      | | D1
                      +-+
                       |
                      +-+
                      | | R4
                      +-+
                       |
                       +------- To NiMH Battery Pack (+)
                       |
                      +-+
                      | | R5
                      +-+
                       |
                      +-+
                      | | Q1
                      +-+
                       |
                      GND
In this schematic:
– R1 and the LM317 form the constant current regulator.
– R2 and R3 set the charging current.
– C1 provides stability to the regulator.
– D1 and R4 create a voltage reference for the delta-V detection.
– R5 and Q1 (a PNP transistor) form the charge termination switch.
PCB Layout Considerations
When designing the PCB layout for your NiMH charger circuit, consider the following:
- Minimize the trace length and loop area to reduce electromagnetic interference (EMI).
- Use appropriate trace widths for the expected current levels to avoid excessive voltage drops and heating.
- Provide adequate heatsinking for the current regulator and other power components.
- Include proper grounding and shielding techniques to ensure reliable operation.

NiMH Charger Circuit Implementation
With the circuit design in hand, let’s explore the practical aspects of implementing and using a NiMH charger circuit.
Component Selection
When selecting components for your NiMH charger circuit, consider the following factors:
-
Voltage and current ratings: Ensure that all components are rated for the expected voltage and current levels in your circuit.
-
Tolerance and accuracy: Choose components with appropriate tolerances and accuracies to ensure reliable and consistent performance.
-
Temperature rating: Consider the operating temperature range of your charger and select components accordingly.
-
Package size and mounting: Choose components with package sizes and mounting options that are suitable for your PCB layout and assembly process.
Assembly and Testing
Once you have gathered all the necessary components, follow these steps to assemble and test your NiMH charger circuit:
-
Assemble the PCB according to the schematic and layout.
-
Double-check all connections and component orientations before applying power.
-
Use a current-limited power supply or a series resistor to limit the current when first testing the circuit.
-
Verify the charging current and voltage using a multimeter or an oscilloscope.
-
Test the charge termination circuitry by monitoring the battery voltage and temperature during charging.
-
Perform a complete charge-discharge cycle with a NiMH battery pack to ensure proper operation.
Safety Considerations
When working with NiMH charger circuits, always prioritize safety:
-
Use appropriate personal protective equipment (PPE) like safety glasses and gloves.
-
Work in a well-ventilated area and avoid touching the battery or circuit components during operation.
-
Implement proper protection features in your circuit, such as overcurrent protection and thermal shutdown.
-
Regularly inspect the battery and charger for any signs of damage or malfunction.
Maintenance and Troubleshooting
To ensure optimal performance and longevity of your NiMH charger circuit, perform regular maintenance and troubleshooting:
-
Clean the PCB and components periodically to remove dust and debris.
-
Check for any loose connections or damaged components and replace them as necessary.
-
Monitor the charging current and voltage regularly to detect any deviations from the expected values.
-
If the charger fails to terminate the charging process properly, revisit the charge termination circuitry and verify the component values and connections.

Advanced NiMH Charger Features
While a basic NiMH charger circuit is sufficient for most applications, you may want to consider adding advanced features to enhance the functionality and user experience.
Battery Monitoring and Balancing
In multi-cell NiMH battery packs, individual cells may have slightly different capacities and self-discharge rates, leading to an imbalance in the state of charge (SOC) over time. To address this issue, you can incorporate a battery monitoring and balancing system in your charger circuit.
A battery monitoring system measures the voltage of each cell in the pack and provides this information to the charger control circuitry. If an imbalance is detected, the charger can apply a selective charging or discharging process to bring all cells to the same SOC.
User Interface and Feedback
Adding a user interface to your NiMH charger can greatly improve the user experience and provide valuable information about the charging process. Some features to consider include:
-
LCD or OLED display to show the current charging status, battery voltage, and estimated time to full charge.
-
LED indicators to provide visual feedback on the charging progress and any error conditions.
-
Buttons or a touchscreen interface to allow the user to start, stop, or configure the charging process.
-
Audible alerts to notify the user when the charging is complete or if an error occurs.
Data Logging and Communication
Incorporating data logging and communication capabilities into your NiMH charger can be useful for monitoring the long-term performance of your batteries and diagnosing any issues. Some options to consider include:
-
Using a microcontroller or a single-board computer (e.g., Raspberry Pi) to log charging data like voltage, current, and temperature over time.
-
Implementing a wired or wireless communication interface (e.g., USB, Bluetooth, or Wi-Fi) to transfer the logged data to a computer or a mobile device for analysis.
-
Developing a custom software application or using existing tools to visualize and analyze the charging data.
Frequently Asked Questions (FAQ)
- Can I use a NiMH charger for other battery types, like NiCd or Li-ion?
No, it is not recommended to use a NiMH charger for other battery types. Each battery chemistry has specific charging requirements, and using the wrong charger can lead to reduced performance, damage to the battery, or even safety hazards.
- How long does it take to charge a NiMH battery?
The charging time depends on the battery capacity and the charging current. As a general rule, charging a NiMH battery at a 1C rate (i.e., a current equal to the battery’s capacity) takes approximately 1-1.5 hours. Lower charging rates will result in longer charging times.
- Can I leave my NiMH batteries in the charger after they are fully charged?
Yes, most modern NiMH chargers are designed to switch to a trickle charge mode once the batteries are fully charged. This maintains the batteries at their full capacity without causing damage. However, it is generally recommended to remove the batteries from the charger if they will not be used for an extended period.
- How can I extend the lifespan of my NiMH batteries?
To extend the lifespan of your NiMH batteries, follow these tips:
– Avoid overcharging or over-discharging the batteries.
– Store the batteries in a cool, dry place when not in use.
– Charge the batteries regularly, even if they are not completely discharged.
– Use a high-quality charger with proper charge termination and protection features.
- What should I do if my NiMH charger is not working properly?
If your NiMH charger is not working properly, follow these troubleshooting steps:
– Check the power supply and ensure that it is providing the correct voltage and current.
– Verify that all connections are secure and free from corrosion.
– Inspect the battery and charger for any signs of damage or malfunction.
– Review the schematic and PCB layout to ensure that all components are correctly placed and oriented.
– If the issue persists, seek assistance from a qualified electronics technician or the charger manufacturer.
Conclusion
Designing and building a NiMH battery charger circuit requires a solid understanding of NiMH battery characteristics, charging principles, and circuit design techniques. By following the guidelines and best practices outlined in this article, you can create a reliable and efficient charger that will keep your NiMH batteries performing at their best.
Remember to prioritize safety, regularly maintain your charger, and consider adding advanced features to enhance the functionality and user experience. With a well-designed NiMH charger circuit, you can enjoy the benefits of rechargeable batteries in your electronic devices for years to come.


Leave a Reply