Getting Started with OrCAD for DC Circuit Design
Before you begin designing your DC circuit, you’ll need to set up OrCAD on your computer. OrCAD is available in several versions, including OrCAD Capture, OrCAD PCB Designer, and OrCAD PSpice. For designing DC circuits, you’ll primarily be using OrCAD Capture and OrCAD PSpice.
Installing OrCAD
- Download the OrCAD software from the official Cadence website (www.orcad.com).
- Run the installer and follow the on-screen instructions to complete the installation process.
- Launch OrCAD Capture to begin designing your DC circuit.
Creating a New Project
- In OrCAD Capture, click on “File” > “New” > “Project.”
- Choose a name and location for your project, and select “Analog or Mixed-Signal Circuit” as the project type.
- Click “OK” to create your new project.
Designing Your DC Circuit in OrCAD Capture
OrCAD Capture is the schematic capture tool within the OrCAD suite. Here, you’ll create the schematic representation of your DC circuit.
Adding Components
- In the OrCAD Capture workspace, locate the “Place” menu and select “Part.”
- Browse through the part libraries to find the components you need for your DC circuit (e.g., resistors, capacitors, voltage sources).
- Click on a component to place it on the schematic canvas.
- Repeat this process for all the necessary components in your DC circuit.
Connecting Components with Wires
- Select the “Place” menu and choose “Wire.”
- Click on the first component’s pin you want to connect, then click on the second component’s pin to create a wire between them.
- Continue connecting components until your DC circuit schematic is complete.
Assigning Component Values
- Double-click on a component to open its properties dialog box.
- Enter the appropriate value for the component (e.g., resistance value for a resistor, voltage value for a voltage source).
- Click “OK” to apply the changes.

Simulating Your DC Circuit with OrCAD PSpice
Once you have created your DC circuit schematic in OrCAD Capture, you can simulate it using OrCAD PSpice to analyze its behavior and performance.
Setting Up the Simulation
- In OrCAD Capture, click on “PSpice” > “New Simulation Profile.”
- Choose a name for your simulation profile and select “DC Sweep” as the analysis type.
- Set the desired voltage or current range for your DC sweep analysis.
- Click “OK” to create the simulation profile.
Running the Simulation
- In OrCAD Capture, click on “PSpice” > “Run.”
- Select the simulation profile you created earlier.
- Click “OK” to start the simulation.
Analyzing Simulation Results
- Once the simulation is complete, the PSpice Probe window will open, displaying your simulation results.
- Use the various plot and measurement tools to analyze the voltage, current, and power characteristics of your DC circuit.
- Make any necessary adjustments to your circuit based on the simulation results.

Tips and Best Practices for DC Circuit Design in OrCAD
- Keep your schematic organized and easy to read by using hierarchical design techniques and labeling components and nets clearly.
- Use the built-in design rule checks (DRCs) in OrCAD Capture to identify and fix any errors in your schematic before simulating.
- Take advantage of the extensive part libraries available in OrCAD to save time when creating your DC circuit schematic.
- Experiment with different component values and configurations to optimize your DC circuit’s performance.
- Document your design process, including any assumptions, calculations, and design decisions, for future reference and collaboration with others.

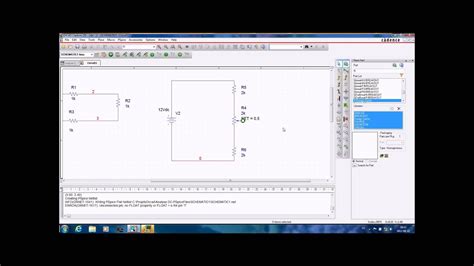
Example: Designing a Simple DC Voltage Divider
Let’s walk through the process of designing a simple DC voltage divider circuit using OrCAD.
Schematic Design
- Create a new project in OrCAD Capture and name it “DC_Voltage_Divider.”
- Add the following components to your schematic:
- One voltage source (VDC)
- Two resistors (R)
- One ground symbol (GND)
- Connect the components as shown in the table below:
| Component | Pin 1 | Pin 2 |
|---|---|---|
| VDC | + | R1 |
| R1 | VDC | R2, Vout |
| R2 | R1, Vout | GND |
| GND | R2 | – |
- Assign the following values to the components:
- VDC: 10V
- R1: 10kΩ
- R2: 5kΩ
Simulation Setup
- Create a new simulation profile named “DC_Voltage_Divider_Sim.”
- Set the DC sweep analysis to sweep the input voltage from 0V to 10V.
- Place a voltage probe on the Vout net to measure the output voltage.
Running the Simulation
- Run the simulation using the “DC_Voltage_Divider_Sim” profile.
- In the PSpice Probe window, plot the Vout voltage against the input voltage.
Analyzing the Results
- The output voltage (Vout) should be approximately 3.33V, as calculated using the voltage divider formula:
Vout = Vin × (R2 / (R1 + R2)) - Verify that the simulated output voltage matches the calculated value.
- Experiment with different resistor values to achieve different output voltages.
Frequently Asked Questions (FAQ)
-
What is OrCAD, and why is it used for designing DC circuits?
OrCAD is an electronic design automation software suite that provides tools for schematic capture, simulation, and PCB design. It is widely used for designing DC circuits because it offers a user-friendly interface, extensive component libraries, and powerful simulation capabilities. -
What are the main components of a DC circuit?
The main components of a DC circuit include voltage sources (e.g., batteries), resistors, capacitors, inductors, and switches. These components work together to control the flow of current and manipulate voltage levels in the circuit. -
How do I troubleshoot errors in my DC circuit schematic?
OrCAD Capture includes built-in design rule checks (DRCs) that can help identify errors in your schematic. Additionally, you can visually inspect your schematic for any missing or incorrect connections, component values, or symbols. If your simulation results do not match your expectations, double-check your schematic and simulation settings. -
Can I import external models into OrCAD for simulation?
Yes, OrCAD supports importing external models in various formats, such as SPICE, Verilog-A, and IBIS. This allows you to simulate your DC circuit with custom or vendor-specific components that may not be available in the built-in libraries. -
How can I optimize my DC circuit design using OrCAD?
To optimize your DC circuit design, you can use OrCAD’s parametric sweep and optimization features. These tools allow you to automatically vary component values and search for the best combination that meets your design goals, such as minimizing power consumption or maximizing output voltage. Additionally, you can manually fine-tune your circuit based on simulation results and your understanding of the circuit’s behavior.
In conclusion, designing DC circuits with OrCAD is a straightforward process that involves creating a schematic in OrCAD Capture, setting up and running simulations in OrCAD PSpice, and analyzing the results to verify and optimize your design. By following the steps and best practices outlined in this guide, you’ll be well-equipped to tackle your own DC circuit design projects using the powerful tools provided by OrCAD.


Leave a Reply