What is Hole Diameter?
Hole diameter refers to the distance across the center of a hole, measured from one inside edge to the opposite inside edge. It is a critical dimension that determines the size of the object that can fit into the hole, such as a screw, rod, or pipe. Accurately measuring and calculating hole diameter is essential for ensuring proper fits and avoiding potential issues like loose or overly tight connections.
Importance of Accurate Hole Diameter
- Proper fit: Accurately sized holes ensure that components fit together seamlessly, without any gaps or excessive force required for assembly.
- Functionality: Holes with the correct diameter allow for smooth operation of moving parts, such as shafts or bearings, preventing binding or excessive wear.
- Strength: Properly sized holes maintain the structural integrity of the material, as oversized holes can weaken the surrounding area and lead to failure.
- Aesthetics: Precise hole diameters contribute to the overall appearance of the finished product, especially when visible on the surface.
Methods for Calculating Hole Diameter
There are several methods for calculating hole diameter, depending on the tools available and the level of precision required. Let’s explore some of the most common techniques:
1. Using a Caliper
Calipers are versatile measuring tools that can be used to determine hole diameter with a high degree of accuracy. There are three main types of calipers:
a. Vernier Caliper
Vernier calipers feature a main scale and a sliding vernier scale that allows for precise measurements down to 0.02 mm or 0.001 inches. To measure hole diameter with a vernier caliper:
- Open the jaws of the caliper and insert the smaller, inside-measuring jaws into the hole.
- Gently close the jaws until they make contact with the inside edges of the hole.
- Ensure that the caliper is perpendicular to the hole’s axis to avoid skewed measurements.
- Read the main scale value where the 0 on the vernier scale aligns, then add the vernier scale value that lines up with a mark on the main scale.
b. Dial Caliper
Dial calipers have a circular dial that rotates as the jaws move, providing a clear readout of the measurement. To use a dial caliper for hole diameter:
- Follow the same steps as with a vernier caliper, inserting the inside-measuring jaws into the hole.
- Close the jaws until they touch the inside edges of the hole, keeping the caliper perpendicular to the hole’s axis.
- Read the measurement directly from the dial, taking note of the primary scale value and adding the number of divisions on the dial.
c. Digital Caliper
Digital calipers display the measurement on a digital screen, eliminating the need for manual reading and interpretation. To measure hole diameter with a digital caliper:
- Insert the inside-measuring jaws into the hole, following the same procedure as with vernier and dial calipers.
- Close the jaws until they make contact with the inside edges of the hole, maintaining perpendicularity.
- Read the measurement directly from the digital display, which typically shows the value in both metric and imperial units.
| Caliper Type | Resolution | Advantages | Disadvantages |
|---|---|---|---|
| Vernier | 0.02 mm | Affordable, no batteries required | Requires skill to read, slower measurement |
| Dial | 0.01 mm | Easy to read, no batteries required | More expensive than vernier |
| Digital | 0.01-0.02 mm | Easiest to read, can switch units | Requires batteries, most expensive |
2. Using a Micrometer
Micrometers are precision measuring instruments that can provide highly accurate hole diameter measurements. They consist of a C-shaped frame with a spindle that moves through a threaded sleeve, allowing for fine adjustments. To measure hole diameter with a micrometer:
- Select a micrometer with a range that encompasses the expected hole diameter.
- Open the micrometer by turning the thimble until the spindle and anvil can fit over the hole.
- Place the micrometer over the hole, ensuring that the spindle and anvil are perpendicular to the hole’s axis.
- Turn the thimble until the spindle and anvil make gentle contact with the inside edges of the hole.
- Read the measurement by adding the values from the sleeve scale and thimble scale.
Micrometers are available in various sizes and resolutions, with some capable of measuring to an accuracy of 0.001 mm or 0.00005 inches. They are ideal for high-precision applications where even the slightest variations in hole diameter can have significant consequences.
3. Using Gauge Pins or Blocks
Gauge pins, also known as gauge blocks, are precision-ground cylindrical pins with highly accurate diameters. They are used to measure hole diameter by inserting the pin into the hole and checking for a snug fit. To use gauge pins for hole diameter measurement:
- Select a set of gauge pins that covers the expected range of hole diameters.
- Start with a pin that is slightly smaller than the estimated hole diameter.
- Insert the pin into the hole, applying gentle pressure to ensure contact with the inside edges.
- If the pin slides in easily, move up to the next larger size until you find a pin that fits snugly without forcing it.
- The diameter of the snugly fitting pin represents the hole diameter.
Gauge pins are available in sets with incremental diameters, typically in steps of 0.01 mm or 0.0005 inches. They are a simple and reliable method for determining hole diameter, especially when a high degree of precision is not required.

Calculating Hole Diameter for Specific Applications
Now that we’ve explored the various methods for measuring hole diameter, let’s look at some specific applications and how to calculate the appropriate Hole Size for each.
Drilling Holes for Bolts and Screws
When drilling holes for bolts or screws, it’s essential to consider the clearance required for proper fit and function. The hole diameter should be slightly larger than the bolt or screw diameter to allow for easy insertion and removal. Here’s how to calculate the appropriate hole diameter:
- Determine the nominal diameter of the bolt or screw, which is typically specified in the fastener’s description (e.g., M6, 1/4-20).
- Consult a clearance hole chart or formula to find the recommended hole diameter for the given fastener size.
For example, a common formula for calculating clearance hole diameter is:
Clearance Hole Diameter = Nominal Fastener Diameter + (2 × Clearance Factor)
The clearance factor depends on the fastener type and the desired fit, with typical values ranging from 0.1 mm to 0.5 mm (0.004 to 0.020 inches).
| Nominal Fastener Diameter (mm) | Clearance Factor (mm) | Clearance Hole Diameter (mm) |
|---|---|---|
| 6 | 0.2 | 6.4 |
| 8 | 0.3 | 8.6 |
| 10 | 0.4 | 10.8 |
| 12 | 0.5 | 13.0 |
Sizing Holes for Press Fits
Press fits involve inserting a shaft or component into a hole with a slightly smaller diameter, creating a tight, interference fit. To calculate the hole diameter for a press fit:
- Determine the nominal diameter of the shaft or component to be inserted.
- Consult a press fit chart or formula to find the recommended hole diameter for the given shaft size and desired fit.
The hole diameter for a press fit is typically calculated using the following formula:
Press Fit Hole Diameter = Nominal Shaft Diameter – Interference
The interference value depends on factors such as the materials involved, the desired strength of the fit, and the length of engagement. Common interference values range from 0.01 mm to 0.1 mm (0.0004 to 0.004 inches) for small to medium-sized components.
| Nominal Shaft Diameter (mm) | Interference (mm) | Press Fit Hole Diameter (mm) |
|---|---|---|
| 10 | 0.02 | 9.98 |
| 20 | 0.04 | 19.96 |
| 30 | 0.06 | 29.94 |
| 40 | 0.08 | 39.92 |
Calculating Hole Diameter for Pipe Fittings
When working with pipe fittings, it’s crucial to drill holes with the correct diameter to ensure a proper seal and prevent leaks. The hole diameter for pipe fittings depends on the pipe size and the type of fitting being used. Here’s a general guide for calculating hole diameters for common pipe fittings:
- Determine the nominal pipe size (NPS) of the fitting, which is typically specified in inches (e.g., 1/2″, 3/4″, 1″).
- Consult a pipe fitting chart or standard to find the recommended hole diameter for the given NPS and fitting type.
For example, here are some common hole diameters for NPT (National Pipe Thread) fittings:
| Nominal Pipe Size (NPS) | Hole Diameter (inches) |
|---|---|
| 1/8 | 0.339 |
| 1/4 | 0.516 |
| 3/8 | 0.688 |
| 1/2 | 0.875 |
| 3/4 | 1.063 |
It’s important to note that hole diameters for pipe fittings may vary slightly depending on the specific standard or manufacturer. Always consult the appropriate resources to ensure the correct hole size for your application.

Frequently Asked Questions (FAQ)
- What is the difference between nominal and actual hole diameter?
-
Nominal hole diameter refers to the ideal or theoretical size of the hole, while actual hole diameter is the measured size of the drilled or machined hole, which may have slight variations due to factors such as tool wear or material properties.
-
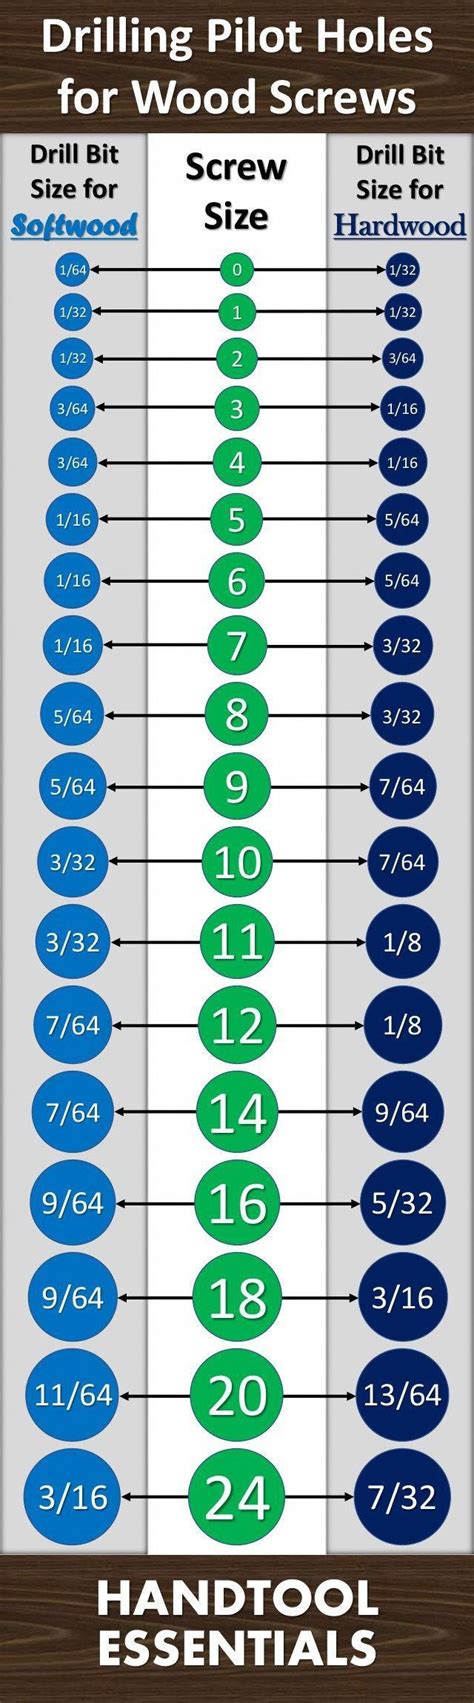
How do I choose the right drill bit size for a specific hole diameter?
-
To select the appropriate drill bit size, first determine the required hole diameter. Then, consult a drill bit size chart or use the nominal drill bit size that most closely matches the desired hole diameter. Keep in mind that the actual hole size may be slightly larger than the drill bit size due to factors like material type and drilling technique.
-
Can I use a drill bit with a smaller diameter than the desired hole size and enlarge the hole?
-
Yes, it is possible to start with a smaller drill bit and gradually enlarge the hole using progressively larger bits until the desired diameter is reached. This technique is called step drilling and can be useful when working with harder materials or when a specific drill bit size is not available.
-
What should I do if I accidentally drill a hole that is too large?
-
If a hole is drilled too large, there are several potential solutions, depending on the application and the extent of the oversizing. Some options include using a larger fastener or component, adding a bushing or sleeve to reduce the hole diameter, or filling the hole and re-drilling it to the correct size.
-
How can I ensure that my holes are drilled perpendicular to the surface?
- To drill holes perpendicular to the surface, use a drill press whenever possible, as it provides a stable, vertical platform for drilling. If using a handheld drill, employ a drill guide or jig to maintain a straight drilling path. Additionally, use a center punch to create a starting point for the drill bit, preventing it from wandering at the start of the hole.

Conclusion
Calculating hole diameter is a critical skill for anyone working on projects that involve drilling or machining. By understanding the various methods for measuring and calculating hole size, such as using calipers, micrometers, or gauge pins, you can ensure that your holes are accurately sized for the intended application. Whether you’re working with bolts, press fits, or pipe fittings, taking the time to determine the correct hole diameter will lead to better fits, improved functionality, and higher-quality results.
Remember to consult the appropriate charts, standards, and formulas when calculating hole diameters for specific applications, and always double-check your measurements to avoid costly mistakes. With practice and attention to detail, you’ll be able to confidently calculate and create holes of the perfect size for all your projects.


Leave a Reply