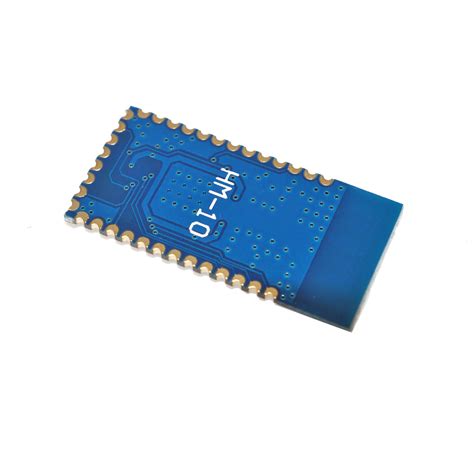
Introduction to the HM-10 Bluetooth Module
The HM-10 is a small, low-power Bluetooth 4.0 BLE module based on the Texas Instruments CC2540 or CC2541 chipset. It is designed for easy integration into various projects, enabling wireless communication between devices. The module supports the Bluetooth 4.0 protocol stack and is compatible with both Android and iOS devices.
Key Features of the HM-10 Module
- Bluetooth 4.0 BLE compatible: The HM-10 module adheres to the Bluetooth 4.0 specification, ensuring low power consumption and reliable wireless communication.
- Small form factor: Measuring just 27mm x 13mm x 2.2mm, the HM-10 module is compact and easy to integrate into various projects.
- Low power consumption: With a supply voltage range of 3.3V to 5V and a typical current consumption of just 8.5mA during transmission, the HM-10 is ideal for battery-powered applications.
- Configurable parameters: The module allows users to configure various parameters, such as baud rate, device name, and pin functions, using AT commands.
HM-10 Module Specifications
| Parameter | Value |
|---|---|
| Bluetooth Version | 4.0 BLE |
| Chipset | TI CC2540 or CC2541 |
| Operating Voltage | 3.3V – 5V |
| Transmit Power | -23dbm to +6dbm |
| Receiving Sensitivity | -93dbm |
| Antenna Type | PCB Antenna or external |
| Interface | UART, GPIO |
| Dimensions | 27mm x 13mm x 2.2mm |
Working with the HM-10 Module
To start working with the HM-10 module, you’ll need to understand its pin configuration, AT commands, and how to establish a connection between devices.
HM-10 Pin Configuration
The HM-10 module has six pins:
- VCC: Power supply (3.3V – 5V)
- GND: Ground
- TXD: UART transmit data
- RXD: UART receive data
- STATE: Connection state indication
- EN: Enable pin (active low)
Connecting the HM-10 Module
To connect the HM-10 module to your microcontroller or development board, follow these steps:
- Connect the VCC pin to a 3.3V or 5V power supply.
- Connect the GND pin to the ground of your system.
- Connect the TXD pin of the HM-10 to the RX pin of your microcontroller’s UART.
- Connect the RXD pin of the HM-10 to the TX pin of your microcontroller’s UART.
- Optionally, connect the STATE pin to an input pin on your microcontroller to monitor the connection state.
- If required, connect the EN pin to ground to enable the module.
Configuring the HM-10 Module using AT Commands
The HM-10 module can be configured using AT commands sent via the UART interface. Some essential AT commands include:
AT: Check the connection status and return “OK” if the module is functioning properly.AT+NAME: Set or query the device name.AT+BAUD: Set or query the UART baud rate.AT+ROLE: Set or query the device role (Central or Peripheral).AT+ADDR: Query the Bluetooth address of the module.
For a complete list of AT commands and their usage, refer to the HM-10 datasheet.

HM-10 Module Applications
The HM-10 module finds applications in various fields, including:
-
IoT and Smart Home: The HM-10 can be used to create wireless sensors, actuators, and controllers for smart home devices, such as smart lights, thermostats, and door locks.
-
Wearables: The module’s low power consumption and small size make it suitable for wearable devices, such as fitness trackers and smartwatches.
-
Industrial Automation: HM-10 can be employed in industrial settings for wireless data acquisition, monitoring, and control systems.
-
Healthcare: The module can be used in medical devices for remote monitoring, data logging, and wireless communication between devices.
-
Robotics: HM-10 enables wireless control and communication between robots and control systems, making it useful in robotics projects.

Troubleshooting Common Issues
-
Module not responding to AT commands: Ensure that the module is properly powered and connected to the UART pins. Verify the baud rate and other UART settings match between the module and your microcontroller.
-
Unable to establish a Bluetooth connection: Check that the module is in the correct role (Central or Peripheral) and that the device you’re trying to connect to is compatible with Bluetooth 4.0 BLE. Ensure that the device is within range and not connected to another module.
-
Inconsistent data transmission: Verify that the baud rate and other UART settings are consistent between the module and your microcontroller. Check for any interference sources that may affect the wireless communication.

Frequently Asked Questions (FAQ)
-
Q: What is the maximum range of the HM-10 module?
A: The range of the HM-10 module depends on various factors, such as the environment, obstacles, and antenna type. In an open area, the module can achieve a range of up to 50 meters. -
Q: Can I use the HM-10 module with a 3.3V microcontroller?
A: Yes, the HM-10 module is compatible with both 3.3V and 5V systems. However, ensure that the logic levels of the UART pins are compatible with your microcontroller. -
Q: How do I update the firmware on the HM-10 module?
A: Firmware updates for the HM-10 module can be performed using a CC Debugger and the TI BLE-Stack software. Consult the HM-10 datasheet and TI’s documentation for detailed instructions. -
Q: Is the HM-10 module compatible with Bluetooth 5.0 devices?
A: No, the HM-10 module is based on Bluetooth 4.0 and is not compatible with Bluetooth 5.0 devices. For Bluetooth 5.0 compatibility, consider using newer modules like the HM-19. -
Q: Can I use multiple HM-10 modules in the same project?
A: Yes, you can use multiple HM-10 modules in a single project. However, ensure that each module has a unique name and address to avoid conflicts during communication.
Conclusion
The HM-10 Bluetooth Low Energy module is a versatile and easy-to-use solution for adding wireless communication capabilities to your projects. By understanding its features, pin configuration, and AT commands, you can effectively integrate the HM-10 module into various applications, from IoT and wearables to industrial automation and robotics.
As you work with the HM-10 module, remember to follow best practices for wiring, configuration, and troubleshooting to ensure reliable and efficient wireless communication between devices.


Leave a Reply