Introduction to EAGLE
EAGLE (Easily Applicable Graphical Layout Editor) is a powerful and user-friendly PCB design software developed by Autodesk. It is widely used by electronics engineers, hobbyists, and students for designing and creating printed circuit boards (PCBs). EAGLE offers a comprehensive set of tools for schematic capture, board layout, and PCB manufacturing.
In this article, we will guide you through the process of creating a new project in EAGLE 6 or 7 and starting to draw your schematic. We will cover the essential steps and provide tips to help you get started with your PCB design journey.
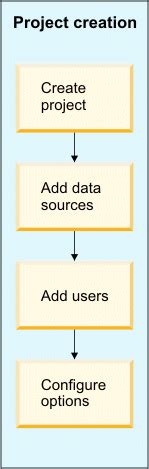
Creating a New Project
Step 1: Launch EAGLE
To begin, launch the EAGLE software on your computer. You will be greeted with the EAGLE Control Panel, which serves as the main interface for managing your projects, libraries, and settings.
Step 2: Create a New Project
- In the EAGLE Control Panel, click on the “File” menu and select “New Project.”
- A dialog box will appear, prompting you to choose a location for your new project. Navigate to the desired directory on your computer where you want to save your project.
- Enter a name for your project in the “File name” field. It is recommended to choose a descriptive name that reflects the purpose of your PCB design.
- Click “Save” to create the new project.
Step 3: Project Structure
Once you have created a new project, EAGLE will automatically create a project directory with the following structure:
your_project_name/
  ├── your_project_name.sch
  ├── your_project_name.brd
  └── your_project_name.lbr
- The
.schfile represents the schematic of your project. - The
.brdfile represents the board layout of your project. - The
.lbrfile is the library file associated with your project, where you can store custom components or symbols.

Drawing the Schematic
Step 1: Open the Schematic Editor
Double-click on the .sch file in the EAGLE Control Panel to open the schematic editor. This is where you will create the schematic diagram for your PCB design.
Step 2: Familiarize Yourself with the Interface
Take a moment to familiarize yourself with the schematic editor interface. The main elements of the interface include:
- Toolbars: Located at the top of the window, the toolbars provide access to various tools and commands for drawing and editing your schematic.
- Command Prompt: Located at the bottom of the window, the command prompt allows you to enter EAGLE commands directly.
- Drawing Area: The central area of the window where you will draw your schematic.
Step 3: Add Components
To start drawing your schematic, you need to add components to the drawing area. EAGLE provides a vast library of pre-designed components that you can use in your design. To add a component:
- Click on the “Add” tool in the toolbar (or press the “Add” button on your keyboard).
- The “Add” dialog box will appear, displaying the available libraries and components.
- Browse through the libraries to find the desired component, or use the search function to locate a specific component by name or description.
- Select the component and click “OK” to add it to the drawing area.
- Move the component to the desired location on the schematic by clicking and dragging it with your mouse.
Step 4: Connect Components with Wires
Once you have added the necessary components to your schematic, you need to connect them using wires. To draw a wire:
- Click on the “Wire” tool in the toolbar (or press the “Wire” button on your keyboard).
- Click on the starting point of the wire (usually a pin of a component).
- Move your mouse to the ending point of the wire (usually another pin or a connection point) and click to complete the wire.
- Repeat the process to connect all the necessary components in your schematic.
Step 5: Add Labels and Values
To enhance the readability and clarity of your schematic, it is important to add labels and values to your components. Labels provide meaningful names to nets and signals, while values specify the parameters of components (e.g., resistance, capacitance).
To add a label:
1. Click on the “Label” tool in the toolbar (or press the “Label” button on your keyboard).
2. Click on the wire or net where you want to place the label.
3. Enter the desired label text and press Enter.
To add a value to a component:
1. Double-click on the component to open its properties dialog box.
2. Enter the desired value in the “Value” field.
3. Click “OK” to apply the changes.
Step 6: Check and Verify the Schematic
Before proceeding to the board layout, it is crucial to thoroughly check and verify your schematic for any errors or inconsistencies. EAGLE provides several tools to help you with this process:
- Electrical Rule Check (ERC): The ERC tool analyzes your schematic for potential electrical errors, such as unconnected pins, shorted nets, or missing power supplies. To run the ERC, click on the “ERC” tool in the toolbar or select “Tools” > “ERC” from the menu.
- Design Rule Check (DRC): The DRC tool checks your schematic against a set of predefined design rules to ensure compliance with manufacturing and assembly requirements. To run the DRC, click on the “DRC” tool in the toolbar or select “Tools” > “DRC” from the menu.
Review the results of the ERC and DRC and make necessary corrections to your schematic until no errors are reported.

Tips for Drawing Schematics
- Keep your schematic organized and readable by using consistent naming conventions and arranging components in a logical manner.
- Use buses and net labels to simplify complex connections and improve schematic clarity.
- Utilize the grid and snap settings to ensure precise placement and alignment of components and wires.
- Create custom components or symbols for frequently used or project-specific components to save time and maintain consistency.
- Regularly save your work and create backups to prevent data loss.

Frequently Asked Questions (FAQ)
1. Can I use EAGLE for commercial projects?
Yes, EAGLE offers both free and paid versions, depending on your needs. The free version has some limitations but is suitable for personal and small-scale projects. For commercial use, it is recommended to purchase the appropriate license that suits your requirements.
2. How do I create a custom component in EAGLE?
To create a custom component in EAGLE, follow these steps:
1. Open the library editor by clicking on the “Library” tool in the toolbar or selecting “File” > “New” > “Library” from the menu.
2. Create a new symbol by clicking on the “Symbol” tool and drawing the component’s schematic representation.
3. Create a new package by clicking on the “Package” tool and defining the component’s physical footprint.
4. Assign the symbol to the package using the “Device” tool.
5. Save the library and use the custom component in your schematic.
3. Can I import schematics from other EDA software into EAGLE?
EAGLE supports importing schematics from some other EDA software, such as OrCAD and Altium Designer, using the “Import” function. However, the compatibility and success of the import process may vary depending on the complexity and format of the source files. It is recommended to refer to the EAGLE documentation or seek assistance from the EAGLE community forums for specific import requirements.
4. How can I collaborate with others on an EAGLE project?
EAGLE provides a version control system called “EAGLE Version Control” (EVC) that allows multiple users to work on the same project simultaneously. EVC integrates with version control platforms like Git or SVN, enabling team collaboration, tracking changes, and managing revisions of your EAGLE project files.
5. What should I do if I encounter an error while drawing the schematic?
If you encounter an error while drawing the schematic, first review the error message and try to understand the cause of the issue. Common errors include unconnected pins, overlapping components, or violated design rules. Use the ERC and DRC tools to identify and resolve the errors. If the error persists or you need further assistance, consult the EAGLE documentation, search online forums, or seek help from the EAGLE community or support channels.
Conclusion
Creating a project and starting to draw the schematic in EAGLE 6 or 7 is a straightforward process that lays the foundation for your PCB design. By following the steps outlined in this article and utilizing the various tools and features provided by EAGLE, you can efficiently create a well-structured and error-free schematic.
Remember to keep your schematic organized, use consistent naming conventions, and regularly verify your design using the ERC and DRC tools. With practice and experience, you will become proficient in using EAGLE and be able to create complex and professional-grade PCB designs.
Happy designing!


Leave a Reply