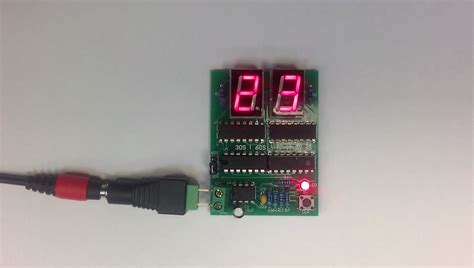
What is a DIY Timer?
A DIY timer is a device that can be programmed to count down from a set time or count up to a specific duration. It is built using readily available electronic components such as a microcontroller, display, buttons, and a power source. The timer can be customized to suit specific needs and can be used in a wide range of applications.
How Does a DIY Timer Work?
Basic Components
The core components of a DIY timer include:
- Microcontroller: The brain of the timer, responsible for processing input and controlling output.
- Display: Shows the current time or countdown/count-up progress.
- Buttons: Allow user input for setting time, starting, and resetting the timer.
- Power Source: Provides the necessary power to run the timer, usually a battery or USB connection.
Working Principle
The working principle of a DIY timer can be broken down into the following steps:
- User Input: The user sets the desired time using the buttons on the timer.
- Microcontroller Processing: The microcontroller reads the user input and starts the countdown or count-up process.
- Display Update: As the timer runs, the microcontroller continuously updates the display to show the current time or progress.
- Alarm: When the set time is reached, the microcontroller triggers an alarm or executes a predefined action.

Applications of DIY Timers
DIY timers can be used in various settings, from personal projects to industrial applications. Some common applications include:
1. Time Management
DIY timers can be used to manage time effectively in both personal and professional settings. For example:
- Pomodoro Technique: A DIY timer can be programmed to follow the Pomodoro Technique, which involves working in 25-minute intervals followed by short breaks.
- Meeting Timer: A timer can be used to ensure meetings stay on schedule and don’t run overtime.
2. Sports and Fitness
Timers are essential tools in sports and fitness, helping athletes and enthusiasts track their performance and progress. Some examples include:
- Interval Training: A DIY timer can be used to set custom intervals for high-intensity workouts followed by rest periods.
- Stopwatch: A count-up timer can function as a stopwatch, allowing users to accurately measure elapsed time during activities such as running or swimming.
3. Photography and Videography
In photography and videography, timers play a crucial role in capturing the perfect shot or footage. DIY timers can be used for:
- Long Exposure Shots: A timer can be set to control the shutter speed for long exposure photography, such as capturing star trails or light painting.
- Time-lapse Videos: By programming a timer to capture images at set intervals, users can create stunning time-lapse videos of events like sunsets or plant growth.
4. Cooking and Baking
Timers are indispensable tools in the kitchen, ensuring that dishes are cooked to perfection. A DIY timer can be used for:
- Meal Preparation: Set timers for various steps in a recipe to ensure each component is cooked for the appropriate duration.
- Baking: Precise timing is crucial in baking, and a DIY timer can help users achieve consistent results.
5. Industrial Applications
In industrial settings, timers are used to control and automate processes. Some examples include:
- Process Control: DIY timers can be integrated into production lines to control the duration of specific steps, such as curing or cooling.
- Quality Control: Timers can be used to ensure consistent testing procedures, such as measuring the time taken for a product to fail under stress.

Building a DIY Timer
Now that we’ve explored the working principles and applications of DIY timers, let’s dive into the process of building one yourself.
Materials Required
To build a basic DIY timer, you will need the following components:
| Component | Description |
|---|---|
| Arduino Uno (or similar microcontroller) | The brain of the timer |
| LCD Display (16×2) | Displays the timer value |
| Pushbuttons (x3) | Used for user input (set, start/stop, reset) |
| Resistors (10k ohms x3) | Pull-down resistors for buttons |
| Breadboard | For prototyping the circuit |
| Jumper Wires | For connecting components |
| USB Cable | For powering the Arduino and uploading code |
Step-by-Step Guide
-
Set up the Arduino IDE on your computer and ensure you have the necessary libraries installed (e.g., LiquidCrystal for the LCD display).
-
Connect the LCD display to the Arduino using the following pins:
| LCD Pin | Arduino Pin |
|---|---|
| VSS | GND |
| VDD | 5V |
| V0 | Potentiometer (for contrast adjustment) |
| RS | Digital Pin 12 |
| RW | GND |
| E | Digital Pin 11 |
| D4 | Digital Pin 5 |
| D5 | Digital Pin 4 |
| D6 | Digital Pin 3 |
| D7 | Digital Pin 2 |
| A | 5V (via 220 ohm resistor) |
| K | GND |
- Connect the pushbuttons to the Arduino using the following pins:
| Button | Arduino Pin |
|---|---|
| Set | Digital Pin 9 |
| Start/Stop | Digital Pin 8 |
| Reset | Digital Pin 7 |
Each button should be connected to GND via a 10k ohm pull-down resistor.
- Open a new sketch in the Arduino IDE and write the code for your timer. The code should include the following functionalities:
- Setting the timer value using the “Set” button
- Starting and stopping the timer using the “Start/Stop” button
- Resetting the timer using the “Reset” button
-
Displaying the current timer value on the LCD
-
Upload the code to your Arduino and test the timer functionality. Make adjustments as necessary.
-
Once you are satisfied with the timer’s performance, you can create a permanent enclosure for the components using a project box or 3D-printed case.

Frequently Asked Questions (FAQ)
-
Can I use a different microcontroller instead of an Arduino?
Yes, you can use any microcontroller that is compatible with the Arduino IDE or has similar capabilities, such as the ESP32 or Teensy. -
How can I add an audible alarm to my DIY timer?
To add an audible alarm, you can connect a piezo buzzer to one of the Arduino’s digital pins and program it to sound when the timer reaches zero or a specific time. -
Can I power my DIY timer using a battery?
Yes, you can power your timer using a battery. A 9V battery with a suitable connector can be used, or you can opt for a rechargeable lithium-ion battery with a battery management module. -
How do I adjust the contrast of the LCD display?
The contrast of the LCD can be adjusted using the potentiometer connected to the V0 pin. Rotate the potentiometer until the desired contrast is achieved. -
Can I create a multi-channel timer with multiple independent timers?
Yes, you can create a multi-channel timer by using a larger display (e.g., 20×4 LCD) and adding more pushbuttons for each channel. The code will need to be modified to handle multiple timers simultaneously.
Conclusion
A DIY timer is a versatile and cost-effective tool that can be used in a wide range of applications, from personal projects to industrial settings. By understanding the working principles behind a timer and following the step-by-step guide provided, you can build your own customizable timer to suit your specific needs.
As you explore the world of DIY timers, consider experimenting with different features and functionalities, such as adding an audible alarm, creating a multi-channel timer, or integrating the timer with other electronic projects. With creativity and innovation, the possibilities are endless.
Happy tinkering!


Leave a Reply