Introduction to IoT and BLE Nano
The Internet of Things (IoT) has revolutionized the way we interact with everyday devices. By connecting various objects to the internet, IoT enables seamless communication and data exchange between devices, creating a smart and interconnected ecosystem. One of the key technologies driving the growth of IoT is Bluetooth Low Energy (BLE), which allows for efficient wireless communication between devices while consuming minimal power.
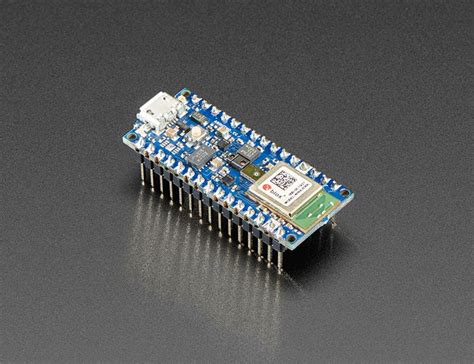
The Arduino BLE Nano is a powerful development board that combines the ease of use of the Arduino platform with the capabilities of BLE, making it an ideal choice for IoT projects. In this article, we will explore the features of the BLE Nano, its applications in IoT, and provide step-by-step tutorials for building exciting IoT projects using this versatile development board.
What is the Arduino BLE Nano?
The Arduino BLE Nano is a compact and feature-rich development board designed for IoT applications. It is based on the Nordic nRF52840 SoC, which integrates a powerful Arm Cortex-M4F processor and a BLE radio. The board offers the following key features:
- Arm Cortex-M4F processor running at 64 MHz
- 1 MB of Flash memory and 256 KB of RAM
- Integrated BLE 5.0 radio with support for Bluetooth mesh networking
- USB Type-C connector for programming and power
- Compatible with the Arduino IDE and Arduino libraries
The BLE Nano’s small form factor and low power consumption make it suitable for a wide range of IoT projects, from wearable devices to smart home automation systems.
Getting Started with the BLE Nano
Before diving into IoT projects, let’s set up the development environment and explore the basics of programming the BLE Nano.
Setting Up the Arduino IDE
- Download and install the latest version of the Arduino IDE from the official Arduino website (https://www.arduino.cc/en/software).
- Open the Arduino IDE and navigate to File > Preferences.
- In the “Additional Boards Manager URLs” field, enter the following URL: https://raw.githubusercontent.com/Seeed-Studio/ArduinoCore-ble-nano/main/package_seeeduino_boards_index.json
- Click “OK” to save the preferences.
- Go to Tools > Board > Boards Manager.
- Search for “ble nano” in the search bar and install the “Seeed XIAO nRF52840 Boards” package.
Uploading a Simple Blink Sketch
Let’s test our setup by uploading a simple blink sketch to the BLE Nano.
- Connect the BLE Nano to your computer using a USB Type-C cable.
- Open the Arduino IDE and select Tools > Board > Seeed XIAO nRF52840.
- Select the appropriate port under Tools > Port.
- Open the Blink example sketch by navigating to File > Examples > 01.Basics > Blink.
- Click the “Upload” button to compile and upload the sketch to the BLE Nano.
If the upload is successful, you should see the built-in LED on the BLE Nano blinking at a regular interval.

IoT Project 1: BLE-Controlled LED Strip
In this project, we will create a BLE-controlled LED strip that can be controlled using a smartphone app.
Hardware Requirements
- Arduino BLE Nano
- WS2812B LED Strip
- Jumper Wires
- Breadboard
- 5V Power Supply
Wiring Diagram
| BLE Nano | LED Strip |
|---|---|
| VCC | 5V |
| GND | GND |
| D2 | DIN |
Arduino Code
#include <Adafruit_NeoPixel.h>
#include <ArduinoBLE.h>

#define LED_PIN    2
#define LED_COUNT 30

Adafruit_NeoPixel strip(LED_COUNT, LED_PIN, NEO_GRB + NEO_KHZ800);

BLEService ledService("19B10000-E8F2-537E-4F6C-D104768A1214");
BLEByteCharacteristic ledCharacteristic("19B10001-E8F2-537E-4F6C-D104768A1214", BLERead | BLEWrite);

void setup() {
  strip.begin();
  strip.show();

  BLE.begin();
  BLE.setLocalName("LED Strip");
  BLE.setAdvertisedService(ledService);
  ledService.addCharacteristic(ledCharacteristic);
  BLE.addService(ledService);
  BLE.advertise();
}

void loop() {
  BLEDevice central = BLE.central();

  if (central) {
    while (central.connected()) {
      if (ledCharacteristic.written()) {
        uint8_t value = ledCharacteristic.value();
        setColor(value);
      }
    }
  }
}

void setColor(uint8_t value) {
  switch (value) {
    case 0:
      colorWipe(strip.Color(0, 0, 0), 50);
      break;
    case 1:
      colorWipe(strip.Color(255, 0, 0), 50);
      break;
    case 2:
      colorWipe(strip.Color(0, 255, 0), 50);
      break;
    case 3:
      colorWipe(strip.Color(0, 0, 255), 50);
      break;
  }
}

void colorWipe(uint32_t color, int wait) {
  for (int i = 0; i < strip.numPixels(); i++) {
    strip.setPixelColor(i, color);
    strip.show();
    delay(wait);
  }
}
Explanation
The code uses the Adafruit NeoPixel library to control the WS2812B LED strip and the ArduinoBLE library for BLE communication. It sets up a BLE service and characteristic to receive color commands from a connected smartphone app. Based on the received value, the LED strip is set to a specific color using the colorWipe function.
Smartphone App
To control the LED strip, you can use a BLE scanner app like nRF Connect or LightBlue. Connect to the “LED Strip” device and write a value (0-3) to the characteristic to change the color of the LED strip.

IoT Project 2: BLE Environmental Sensor
In this project, we will create a BLE environmental sensor that measures temperature, humidity, and pressure using the BMP280 sensor and sends the data to a smartphone app.
Hardware Requirements
- Arduino BLE Nano
- BMP280 Sensor Module
- Jumper Wires
- Breadboard
Wiring Diagram
| BLE Nano | BMP280 |
|---|---|
| 3.3V | VCC |
| GND | GND |
| SCL | SCL |
| SDA | SDA |
Arduino Code
#include <ArduinoBLE.h>
#include <Adafruit_BMP280.h>

Adafruit_BMP280 bmp;

BLEService envService("181A");
BLEFloatCharacteristic tempCharacteristic("2A6E", BLERead | BLENotify);
BLEUnsignedIntCharacteristic pressureCharacteristic("2A6D", BLERead | BLENotify);

void setup() {
  bmp.begin(0x76);

  BLE.begin();
  BLE.setLocalName("Environmental Sensor");
  BLE.setAdvertisedService(envService);
  envService.addCharacteristic(tempCharacteristic);
  envService.addCharacteristic(pressureCharacteristic);
  BLE.addService(envService);
  BLE.advertise();
}

void loop() {
  BLEDevice central = BLE.central();

  if (central) {
    while (central.connected()) {
      float temperature = bmp.readTemperature();
      tempCharacteristic.writeValue(temperature);

      uint32_t pressure = bmp.readPressure();
      pressureCharacteristic.writeValue(pressure);

      delay(1000);
    }
  }
}
Explanation
The code uses the Adafruit BMP280 library to read temperature and pressure data from the BMP280 sensor. It sets up a BLE service with two characteristics: one for temperature and one for pressure. The sensor data is continuously read and sent to the connected smartphone app every second.
Smartphone App
To view the sensor data, you can use a BLE scanner app like nRF Connect or LightBlue. Connect to the “Environmental Sensor” device and subscribe to the temperature and pressure characteristics to receive real-time updates.

Frequently Asked Questions (FAQ)
-
What is the range of the BLE Nano?
The BLE Nano has a typical range of 10-20 meters, depending on the environment and obstacles. -
Can I use other sensors with the BLE Nano?
Yes, the BLE Nano is compatible with a wide range of sensors and modules that use I2C, SPI, or UART communication protocols. -
How do I power the BLE Nano in standalone projects?
You can power the BLE Nano using a 3.7V Li-Po battery or a 5V power supply connected to the VIN and GND pins. -
Is the BLE Nano compatible with other Arduino libraries?
Yes, the BLE Nano is compatible with most Arduino libraries, making it easy to integrate with existing projects and code. -
Can I use the BLE Nano for Bluetooth mesh networking?
Yes, the BLE Nano supports Bluetooth mesh networking, allowing you to create large-scale, interconnected IoT networks.
Conclusion
The Arduino BLE Nano is a powerful and versatile development board that opens up a world of possibilities for IoT projects. With its built-in BLE capabilities and compatibility with the Arduino ecosystem, the BLE Nano simplifies the process of creating wireless, low-power IoT devices.
In this article, we explored the features of the BLE Nano, set up the development environment, and created two exciting IoT projects: a BLE-controlled LED strip and a BLE environmental sensor. These projects demonstrate the potential of the BLE Nano in real-world applications and serve as a starting point for your own IoT adventures.
As you continue to explore the capabilities of the BLE Nano, remember to leverage the extensive Arduino community and resources available online. With creativity and innovation, you can build smart, connected devices that make a real impact in our increasingly interconnected world.


Leave a Reply