Introduction to Arduino Relay Shield
An Arduino Relay Shield is a powerful tool that allows you to control high-voltage devices using your Arduino board. It acts as an interface between the low-voltage digital world of the Arduino and the high-voltage realm of electrical appliances, motors, and other devices. This comprehensive guide will delve into the basics of the Arduino Relay Shield, its features, and how to effectively use it in your projects.
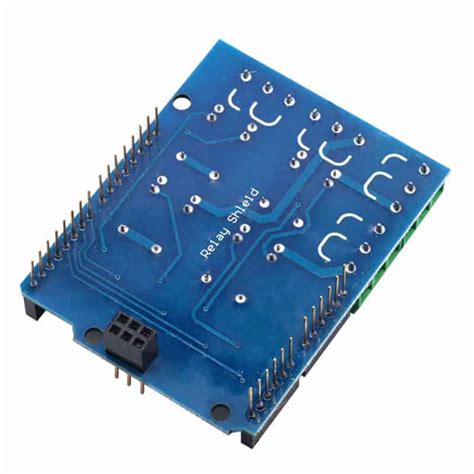
What is an Arduino Relay Shield?
An Arduino Relay Shield is an expansion board that sits on top of your Arduino board, providing it with the ability to control high-voltage devices. It contains one or more relays, which are essentially electrically operated switches. When a relay is activated, it can switch on or off a connected device, allowing your Arduino to control devices that require higher voltages or currents than the Arduino can handle directly.
Why Use an Arduino Relay Shield?
There are several reasons why you might want to use an Arduino Relay Shield in your projects:
-
High-voltage control: Arduino boards operate at low voltages (usually 5V), which is not sufficient to control many real-world devices like motors, lights, or appliances. A relay shield allows you to control these devices safely.
-
Isolation: Relays provide electrical isolation between the low-voltage Arduino circuit and the high-voltage device circuit. This isolation protects your Arduino from potential damage caused by high voltages or currents.
-
Current capacity: Relays can handle much higher currents than the Arduino’s digital pins. This allows you to control devices that draw more current than the Arduino can provide directly.
-
Flexibility: With a relay shield, you can control a wide variety of devices, making it a versatile addition to your Arduino toolkit.
Features of Arduino Relay Shields
Arduino Relay Shields come with various features that make them suitable for different applications. Let’s explore some of the common features you’ll find in these shields.
Number of Relays
Relay shields can have a different number of relays, typically ranging from one to eight. The number of relays determines how many devices you can control independently. Choose a shield with the appropriate number of relays based on your project requirements.
Relay Types
There are different types of relays used in Arduino Relay Shields, each with its own characteristics:
-
Electromechanical Relays (EMR): These are the most common type of relays. They consist of a coil, an armature, and contacts. When current flows through the coil, it creates a magnetic field that attracts the armature, switching the contacts and allowing current to flow through the connected device.
-
Solid State Relays (SSR): These relays use semiconductor devices to switch the load instead of mechanical contacts. They have no moving parts, making them faster, quieter, and more durable than EMRs. However, they are generally more expensive and have lower current ratings.
Relay Ratings
Relays are rated based on the maximum voltage and current they can handle. It’s crucial to choose a relay shield with ratings that match or exceed the requirements of the devices you want to control. Common relay ratings include:
- Voltage rating: The maximum voltage the relay can switch. Typical values are 110V AC, 220V AC, or 30V DC.
- Current rating: The maximum current the relay can handle. This can range from a few amps to tens of amps, depending on the relay type and size.
Opto-isolation
Some Arduino Relay Shields feature opto-isolation, which provides an additional layer of protection between the Arduino and the relay. Opto-isolators use light to transmit signals between two circuits while keeping them electrically isolated. This isolation helps protect the Arduino from potential voltage spikes or damage caused by the connected devices.
Connectors and Pins
Relay shields usually have screw terminals or header pins for connecting the devices to the relays. Screw terminals provide a secure and easy way to connect wires, while header pins allow for a more compact and permanent connection. Some shields also include pins for connecting additional sensors or modules, expanding the functionality of your project.

Setting Up an Arduino Relay Shield
Now that you understand the features and benefits of Arduino Relay Shields, let’s walk through the steps to set one up for your project.
Hardware Setup
-
Mount the shield: Carefully align the pins of the relay shield with the headers on your Arduino board. Gently press the shield onto the Arduino, ensuring that all pins are securely connected.
-
Connect the devices: Using the screw terminals or header pins, connect the devices you want to control to the appropriate relay outputs. Make sure to follow the shield’s documentation for the correct wiring configuration.
-
Power the Arduino: Connect your Arduino to a power source, either through the USB port or an external power supply. Make sure the power source provides sufficient current for both the Arduino and the connected devices.
Software Setup
To control the relays on your Arduino Relay Shield, you’ll need to write a sketch (program) in the Arduino IDE. Here’s a basic example that demonstrates how to control a single relay:
const int relayPin = 3;  // Relay connected to digital pin 3

void setup() {
  pinMode(relayPin, OUTPUT);  // Set the relay pin as an output
}

void loop() {
  digitalWrite(relayPin, HIGH);  // Turn the relay on
  delay(1000);  // Wait for 1 second
  digitalWrite(relayPin, LOW);  // Turn the relay off
  delay(1000);  // Wait for 1 second
}
In this example, the relay is connected to digital pin 3. The setup() function sets the relay pin as an output. In the loop() function, the relay is turned on by setting the pin HIGH, then turned off after a one-second delay. This process repeats indefinitely.
You can extend this basic example to control multiple relays or incorporate sensors and other inputs to create more complex control systems.

Applications of Arduino Relay Shields
Arduino Relay Shields find applications in a wide range of projects, from home automation to industrial control systems. Let’s explore some common use cases.
Home Automation
Arduino Relay Shields are widely used in home automation projects, allowing you to control various devices and appliances remotely or automatically. Some examples include:
- Lighting control: Use relays to turn lights on and off based on time, sensor input, or user commands.
- HVAC control: Control heating, ventilation, and air conditioning systems using relays and temperature sensors.
- Appliance control: Automate the operation of appliances like coffee makers, fans, or water heaters.
Industrial Control
In industrial settings, Arduino Relay Shields can be used to control machinery, monitor processes, and automate tasks. Examples include:
- Machine control: Use relays to control motors, solenoids, or pneumatic actuators in production lines or manufacturing processes.
- Process automation: Automate the sequence of operations in a process by controlling valves, pumps, or other devices using relays.
- Safety systems: Implement safety interlocks or emergency stop mechanisms using relays to prevent accidents or damage.
Automotive Applications
Arduino Relay Shields can also be used in automotive projects to control various vehicle systems:
- Lighting control: Control headlights, taillights, or interior lights using relays and sensors.
- Accessory control: Automate the operation of accessories like horns, wipers, or power windows.
- Engine management: Control ignition, fuel injection, or cooling systems using relays and sensors.

Troubleshooting and Safety Considerations
When working with Arduino Relay Shields and high-voltage devices, it’s essential to keep safety and troubleshooting in mind.
Safety Precautions
- Always disconnect power before working on the circuit or making connections.
- Use appropriate wire gauges and insulation ratings for the voltage and current levels involved.
- Make sure the relay ratings match or exceed the requirements of the connected devices.
- Use fuses or circuit breakers to protect against overcurrent conditions.
- Enclose the high-voltage parts of the circuit in a protective case to prevent accidental contact.
Troubleshooting Tips
- Double-check all connections and wiring for any loose or incorrect connections.
- Verify that the Arduino sketch is correctly uploaded and running.
- Use a multimeter to check for proper voltage levels and continuity.
- If a relay is not switching, check the relay coil voltage and the control signal from the Arduino.
- If a device is not responding, ensure it is properly connected and powered.
FAQ
-
Can I use an Arduino Relay Shield with any Arduino board?
Yes, Arduino Relay Shields are designed to be compatible with most Arduino boards, including the Uno, Mega, and Leonardo. However, always check the shield’s documentation for specific compatibility information. -
How do I know what relay ratings I need for my project?
The relay ratings should match or exceed the voltage and current requirements of the devices you want to control. Check the specifications of your devices and choose a relay shield with appropriate ratings. -
Can I control AC devices with an Arduino Relay Shield?
Yes, many Arduino Relay Shields are designed to handle both AC and DC loads. However, make sure to use a shield with relays rated for the AC voltage you intend to use (e.g., 110V or 220V AC). -
How many devices can I control with one Arduino Relay Shield?
The number of devices you can control depends on the number of relays on the shield. Shields typically have between one and eight relays, allowing you to control an equal number of devices independently. -
Do I need to use an external power supply with an Arduino Relay Shield?
It depends on the power requirements of your project. If the total current draw of the Arduino and the connected devices exceeds the current capacity of the Arduino’s built-in voltage regulator, you’ll need to use an external power supply to power the Arduino and the relay shield.
Conclusion
Arduino Relay Shields are powerful tools that expand the capabilities of your Arduino board, allowing you to control high-voltage devices safely and efficiently. By understanding the features, setup process, and applications of these shields, you can create a wide range of projects, from home automation to industrial control systems.
Remember to prioritize safety and follow best practices when working with high-voltage circuits. With the knowledge gained from this guide, you’re well-equipped to start exploring the possibilities of Arduino Relay Shields in your own projects. Happy tinkering!


Leave a Reply