Introduction to the Proto Screwshield
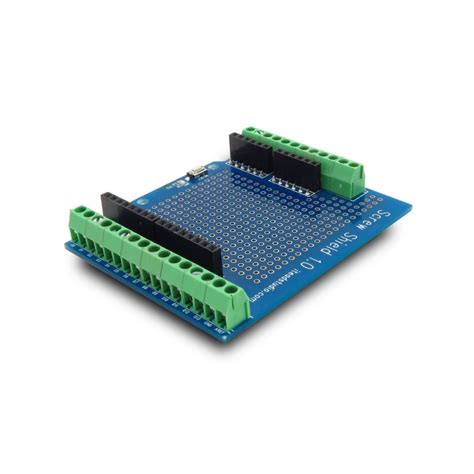
The Arduino Mega Proto Screwshield is a printed circuit board (PCB) designed to simplify the process of connecting external components to an Arduino Mega microcontroller board. This shield provides a convenient and organized way to prototype and develop Arduino projects by offering a grid of prototyping space and screw terminals for easy connections.
What is a Proto Screwshield?
A Proto Screwshield is a type of Arduino shield that combines the features of a Prototyping Board and screw terminals. It allows users to create custom circuits and connect various sensors, actuators, and other components to the Arduino Mega without the need for soldering or breadboards.
Benefits of using a Proto Screwshield
- Easy connectivity: The screw terminals on the Proto Screwshield make it simple to connect wires and components securely without soldering.
- Prototyping space: The prototyping grid on the shield provides ample space to build custom circuits and add additional components.
- Compatibility: The Proto Screwshield is designed specifically for the Arduino Mega, ensuring perfect compatibility and ease of use.
- Time-saving: By eliminating the need for breadboards and soldering, the Proto Screwshield saves time and effort during the prototyping and development process.
Features of the Arduino Mega Proto Screwshield
Screw Terminals
The Arduino Mega Proto Screwshield comes equipped with screw terminals that allow for secure and reliable connections between the shield and external components. These terminals are located along the edges of the shield, providing easy access to the Arduino Mega’s pins.
| Terminal Type | Number of Terminals | Description |
|---|---|---|
| Digital Pins | 54 | Screw terminals for connecting to the Arduino Mega’s digital pins (0-53) |
| Analog Pins | 16 | Screw terminals for connecting to the Arduino Mega’s analog pins (A0-A15) |
| Power Pins | 4 | Screw terminals for connecting to the Arduino Mega’s power pins (VIN, GND, 5V, 3.3V) |
Prototyping Grid
The Proto Screwshield features a large prototyping grid that allows users to build custom circuits and add additional components to their projects. The grid consists of a matrix of through-holes that are compatible with standard electronic components and wire sizes.
| Specification | Value |
|---|---|
| Grid Size | 26 x 52 holes |
| Hole Pitch | 2.54mm (0.1 inches) |
| Hole Diameter | 1.0mm |
PCB Specifications
The Arduino Mega Proto Screwshield PCB is manufactured using high-quality materials and processes to ensure reliability and durability.
| Specification | Value |
|---|---|
| PCB Material | FR-4 |
| PCB Thickness | 1.6mm |
| Copper Weight | 1 oz |
| Solder Mask | Green |
| Silkscreen | White |

Getting Started with the Proto Screwshield
Hardware Setup
To start using the Arduino Mega Proto Screwshield, follow these steps:
- Align the Proto Screwshield with the Arduino Mega, ensuring that the pins on the shield match the headers on the Arduino board.
- Gently press the shield onto the Arduino Mega until it is securely seated.
- Connect the desired components to the screw terminals on the Proto Screwshield, following your project’s requirements.
- If necessary, use the prototyping grid to build additional circuits or add components.
- Connect the Arduino Mega to your computer using a USB cable.
Software Setup
To program the Arduino Mega with the Proto Screwshield, you’ll need to use the Arduino Integrated Development Environment (IDE). Follow these steps to set up the software:
- Download and install the Arduino IDE from the official Arduino website (https://www.arduino.cc/en/software).
- Launch the Arduino IDE.
- Select the appropriate board (Arduino Mega) from the “Tools” menu.
- Choose the correct port from the “Tools” menu, which should correspond to the USB port your Arduino Mega is connected to.
- Write your Arduino sketch or upload an existing one.
- Click the “Upload” button to compile and upload the sketch to the Arduino Mega.

Example Projects
Project 1: Temperature and Humidity Monitoring System
In this project, we’ll use the Arduino Mega Proto Screwshield to create a temperature and humidity monitoring system. We’ll connect a DHT22 sensor to the shield and display the readings on an LCD screen.
Components Required
- Arduino Mega
- Arduino Mega Proto Screwshield
- DHT22 temperature and humidity sensor
- 16×2 LCD screen
- 10K potentiometer
- Jumper wires
Wiring Diagram
Arduino Mega  Proto Screwshield  Component
------------  -----------------  ---------
5V            VCC                DHT22 VCC, LCD VCC
GND           GND                DHT22 GND, LCD GND
D2            D2                 DHT22 DATA
D7            D7                 LCD D7
D6            D6                 LCD D6
D5            D5                 LCD D5
D4            D4                 LCD D4
D3            D3                 LCD E
D2            D2                 LCD RS
A0            A0                 Potentiometer
Code
#include <DHT.h>
#include <LiquidCrystal.h>

#define DHTPIN 2
#define DHTTYPE DHT22

DHT dht(DHTPIN, DHTTYPE);
LiquidCrystal lcd(2, 3, 4, 5, 6, 7);

void setup() {
  dht.begin();
  lcd.begin(16, 2);
}

void loop() {
  float humidity = dht.readHumidity();
  float temperature = dht.readTemperature();

  lcd.setCursor(0, 0);
  lcd.print("Temp: ");
  lcd.print(temperature);
  lcd.print(" C");

  lcd.setCursor(0, 1);
  lcd.print("Humidity: ");
  lcd.print(humidity);
  lcd.print("%");

  delay(2000);
}
Project 2: Soil Moisture Monitoring System
In this project, we’ll use the Arduino Mega Proto Screwshield to create a soil moisture monitoring system. We’ll connect a Soil Moisture Sensor to the shield and display the readings on an OLED display.
Components Required
- Arduino Mega
- Arduino Mega Proto Screwshield
- Soil moisture sensor
- 0.96″ OLED display
- Jumper wires
Wiring Diagram
Arduino Mega  Proto Screwshield  Component
------------  -----------------  ---------
5V            VCC                OLED VCC, Soil Moisture VCC
GND           GND                OLED GND, Soil Moisture GND
A1            A1                 Soil Moisture Analog Output
D21           SDA                OLED SDA
D20           SCL                OLED SCL
Code
#include <Wire.h>
#include <Adafruit_GFX.h>
#include <Adafruit_SSD1306.h>

#define SCREEN_WIDTH 128
#define SCREEN_HEIGHT 64

#define OLED_RESET -1
Adafruit_SSD1306 display(SCREEN_WIDTH, SCREEN_HEIGHT, &Wire, OLED_RESET);

#define SOIL_MOISTURE_PIN A1

void setup() {
  display.begin(SSD1306_SWITCHCAPVCC, 0x3C);
  display.clearDisplay();
  display.setTextSize(1);
  display.setTextColor(WHITE);
}

void loop() {
  int moistureValue = analogRead(SOIL_MOISTURE_PIN);
  int moisturePercentage = map(moistureValue, 0, 1023, 0, 100);

  display.clearDisplay();
  display.setCursor(0, 0);
  display.println("Soil Moisture:");
  display.println();
  display.print(moisturePercentage);
  display.println("%");
  display.display();

  delay(2000);
}

Troubleshooting
Common Issues and Solutions
-
Issue: The Arduino Mega does not recognize the Proto Screwshield.
Solution: Ensure that the Proto Screwshield is properly aligned and securely seated on the Arduino Mega headers. Check for any bent pins or obstructions. -
Issue: Components connected to the screw terminals are not functioning as expected.
Solution: Double-check the wiring connections and ensure that the components are connected to the correct pins. Verify that the screw terminals are tightened securely. -
Issue: The Arduino Mega is not communicating with the computer.
Solution: Check the USB cable connection and ensure that the correct board and port are selected in the Arduino IDE. Try using a different USB cable or port if the issue persists. -
Issue: The prototyping grid is not making proper connections.
Solution: Inspect the prototyping grid for any debris or damaged traces. Use a multimeter to test the continuity between the holes. If necessary, clean the grid with isopropyl alcohol and a soft brush.
Frequently Asked Questions (FAQ)
-
Can I use the Arduino Mega Proto Screwshield with other Arduino Boards?
No, the Arduino Mega Proto Screwshield is designed specifically for the Arduino Mega. It is not compatible with other Arduino boards due to the different pin layouts and sizes. -
How many components can I connect to the Proto Screwshield?
The number of components you can connect depends on the number of available screw terminals and the prototyping grid space. The Proto Screwshield provides 54 digital pin terminals, 16 analog pin terminals, and 4 power pin terminals, along with a 26×52 hole prototyping grid. -
Do I need to solder anything to use the Proto Screwshield?
No, the main advantage of the Proto Screwshield is that it eliminates the need for soldering. The screw terminals allow you to securely connect components and wires without soldering. -
Can I use the Proto Screwshield for permanent installations?
While the Proto Screwshield is primarily designed for prototyping and development, it can be used for permanent installations. However, ensure that the connections are secure and that the shield is properly enclosed to protect it from environmental factors. -
Is the Arduino Mega Proto Screwshield open-source?
Yes, the Arduino Mega Proto Screwshield is an open-source hardware design. You can find the schematics, PCB layout, and other design files available for modification and customization.
Conclusion
The Arduino Mega Proto Screwshield is a versatile and convenient tool for prototyping and developing projects with the Arduino Mega. Its combination of screw terminals and a prototyping grid makes it easy to connect components and build custom circuits without the need for soldering or breadboards.
By following the getting started guide and exploring the example projects, you can quickly begin using the Proto Screwshield to create innovative and exciting Arduino projects. Whether you’re a beginner or an experienced Arduino user, the Proto Screwshield is a valuable addition to your toolkit.
Remember to refer to the troubleshooting section if you encounter any issues, and don’t hesitate to consult the frequently asked questions for additional information. With the Arduino Mega Proto Screwshield, you’ll be well-equipped to bring your Arduino projects to life efficiently and effectively.


Leave a Reply