Introduction to Raspberry Pi Pico
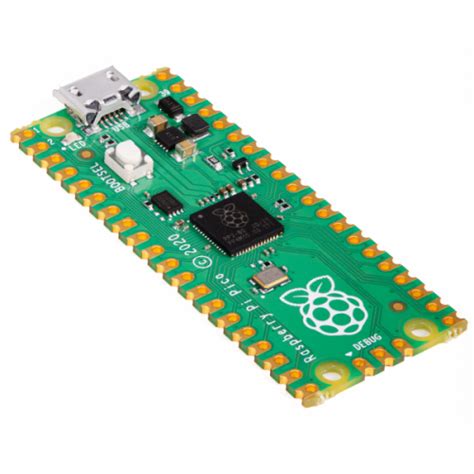
The Raspberry Pi Pico is a microcontroller board developed by the Raspberry Pi Foundation, known for their popular single-board computers. Unlike the Raspberry Pi SBCs, which run full-fledged operating systems, the Pico is a microcontroller designed for low-level, real-time applications. It is built around the RP2040 microcontroller chip, which is a custom silicon designed by the Raspberry Pi Foundation.
Key Features of the Raspberry Pi Pico
- Dual-core ARM Cortex-M0+ processor running at 133 MHz
- 264KB of on-chip SRAM
- 2MB of on-board QSPI flash memory
- 26 multi-function GPIO pins
- 2 UART, 2 SPI, and 2 I2C interfaces
- 16 PWM channels
- 8 Programmable I/O (PIO) state machines for custom peripheral support
- USB 1.1 host and device support
- On-board temperature sensor and low-power sleep modes
Raspberry Pi Pico Pinout
The Raspberry Pi Pico features a 40-pin GPIO header, which provides access to various input/output pins and interfaces. Understanding the pinout is crucial for connecting external components and peripherals to the Pico. Let’s take a closer look at the Pico’s pinout.
GPIO Pins
The Pico has 26 multi-function GPIO pins, which can be configured as input or output pins, and can be used for various purposes, such as:
- Digital input/output
- Analog input (ADC)
- PWM output
- UART, SPI, and I2C communication
- PIO state machines
Here’s a table showing the GPIO pin numbers and their alternative functions:
| Pin | GPIO | Alt Function 1 | Alt Function 2 | Alt Function 3 | Alt Function 4 | Alt Function 5 |
|---|---|---|---|---|---|---|
| 1 | GP0 | UART0 TX | I2C0 SDA | SPI0 RX | PWM0 A | PIO0 SM0 |
| 2 | GP1 | UART0 RX | I2C0 SCL | SPI0 CSn | PWM0 B | PIO0 SM1 |
| 3 | GND | – | – | – | – | – |
| 4 | GP2 | I2C1 SDA | PWM1 A | SPI0 SCK | PIO0 SM2 | – |
| 5 | GP3 | I2C1 SCL | PWM1 B | SPI0 TX | PIO0 SM3 | – |
| … | … | … | … | … | … | … |
Note: This table is a simplified representation of the GPIO pinout. Refer to the official Raspberry Pi Pico documentation for the complete pinout details.
Power and Ground Pins
The Pico has several power and ground pins:
- VSYS: System voltage input (1.8V to 5.5V)
- 3V3: 3.3V regulated output
- 3V3_EN: Enable pin for the 3.3V regulator
- GND: Ground pins
Other Notable Pins
- ADC_VREF: ADC reference voltage pin
- RUN: Reset pin for the RP2040 microcontroller
- BOOTSEL: Boot mode selection pin

Getting Started with Raspberry Pi Pico
To start using the Raspberry Pi Pico, you’ll need to set up the development environment and upload your code to the board. Here are the basic steps:
-
Install the Pico SDK: The Pico SDK provides libraries and tools for developing applications on the Pico. You can download it from the official Raspberry Pi website.
-
Choose a Programming Language: The Pico supports multiple programming languages, including C/C++ and MicroPython. Select the language you’re most comfortable with.
-
Connect the Pico: Connect the Pico to your computer using a USB cable. The Pico will appear as a USB mass storage device.
-
Write and Upload Code: Write your code using an IDE or text editor, and save it with the appropriate file extension (e.g.,
.cfor C,.pyfor MicroPython). To upload the code, simply drag and drop the file onto the Pico’s mass storage device. -
Test and Debug: Use the serial console or other debugging tools to test and debug your code. The Pico SDK provides various debugging options, such as UART communication and GPIO toggling.

Example Projects
Here are a few example projects to help you get started with the Raspberry Pi Pico:
-
Blinking LED: Connect an LED to a GPIO pin and write a program to blink the LED at regular intervals.
-
Temperature Sensor: Use the on-board temperature sensor to measure the ambient temperature and display it on an LCD or send it over a serial connection.
-
PWM Motor Control: Control the speed and direction of a DC motor using PWM signals generated by the Pico.
-
I2C Sensor Integration: Connect an I2C sensor, such as an accelerometer or gyroscope, to the Pico and read sensor data.
-
PIO State Machine: Implement a custom communication protocol or generate complex waveforms using the Pico’s PIO state machines.

FAQ
-
What is the difference between the Raspberry Pi Pico and other Raspberry Pi models?
The Raspberry Pi Pico is a microcontroller board, while other Raspberry Pi models (e.g., Pi 3, Pi 4) are single-board computers (SBCs). Microcontrollers are designed for low-level, real-time control applications, while SBCs run full-fledged operating systems and are suitable for more complex tasks. -
Can I use the Raspberry Pi Pico with Arduino libraries?
No, the Raspberry Pi Pico is not directly compatible with Arduino libraries. However, you can use the Pico SDK, which provides similar functionality and supports multiple programming languages, including C/C++. -
Does the Raspberry Pi Pico support wireless communication?
The Pico does not have built-in wireless capabilities, such as Wi-Fi or Bluetooth. However, you can connect external wireless modules to the Pico using its GPIO pins and communication interfaces (e.g., UART, SPI, I2C). -
What is the maximum clock speed of the Raspberry Pi Pico?
The Raspberry Pi Pico’s RP2040 microcontroller runs at a maximum clock speed of 133 MHz. -
Can I power the Raspberry Pi Pico using batteries?
Yes, you can power the Pico using batteries. The VSYS pin accepts a wide range of input voltages (1.8V to 5.5V), making it compatible with various battery types, such as AA, AAA, or lithium-ion batteries.
Conclusion
The Raspberry Pi Pico is a versatile, low-cost, and energy-efficient microcontroller board that offers a wide range of features and capabilities. With its powerful RP2040 microcontroller, extensive GPIO pinout, and support for multiple programming languages, the Pico is an excellent choice for hobbyists, educators, and professionals working on embedded systems and IoT projects.
By understanding the Pico’s pinout and exploring its features, you can create innovative projects and solve real-world problems. Whether you’re a beginner or an experienced developer, the Raspberry Pi Pico provides a solid foundation for learning and experimentation in the world of microcontrollers.


Leave a Reply