Introduction to Arduino Protoshield
Arduino Protoshield is a powerful tool for electronics enthusiasts and professionals alike. It is a versatile shield that allows you to create custom circuits and prototypes quickly and easily. With its breadboard-like layout and numerous connection points, the Protoshield is an essential accessory for anyone looking to expand the capabilities of their Arduino board.
In this comprehensive guide, we will walk you through the process of assembling your Arduino Protoshield step by step. Whether you are a beginner or an experienced user, this guide will provide you with all the information you need to get started with your Protoshield Assembly.
What is Arduino Protoshield?
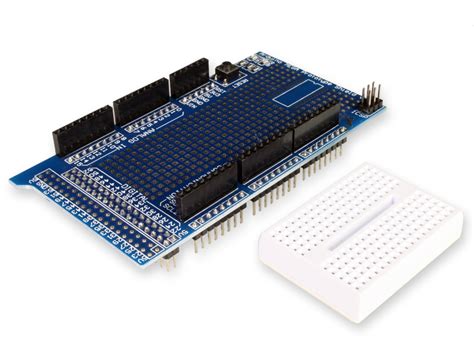
Arduino Protoshield is a printed circuit board (PCB) that sits on top of your Arduino board, providing additional space for connecting components and building circuits. It is designed to make prototyping easier and more efficient by eliminating the need for soldering or using breadboards.
The Protoshield features a grid of holes that are compatible with standard 0.1″ pitch components, such as resistors, capacitors, and integrated circuits (ICs). It also includes power rails and ground rails, which make it easy to distribute power to your components.

Why Use Arduino Protoshield?
There are several reasons why you might want to use an Arduino Protoshield for your projects:
-
Rapid Prototyping: The Protoshield allows you to quickly build and test circuits without the need for soldering. This makes it ideal for experimenting with different designs and configurations.
-
Compact and Portable: With the Protoshield, you can create compact and portable projects that are easy to transport and demonstrate.
-
Saves Time and Effort: Assembling circuits on a breadboard can be time-consuming and prone to errors. The Protoshield simplifies the process by providing a stable and organized platform for your components.
-
Compatibility: The Protoshield is designed to be compatible with a wide range of Arduino boards, including the Uno, Mega, and Leonardo.

Tools and Materials Required
Before we dive into the assembly process, let’s gather the necessary tools and materials:
- Arduino board (Uno, Mega, Leonardo, etc.)
- Arduino Protoshield PCB
- Soldering iron and solder
- Wire cutters
- Pliers
- Jumper wires
- Components for your project (resistors, capacitors, ICs, etc.)

Step-by-Step Guide to Assembling Arduino Protoshield
Step 1: Familiarize Yourself with the Protoshield Layout
Take a moment to examine the Protoshield PCB and familiarize yourself with its layout. You will notice the grid of holes, power rails, and ground rails. The power rails are typically labeled with “+” and “-” symbols, indicating positive and negative voltage, respectively.
Step 2: Solder the Headers
The first step in assembling your Protoshield is to solder the headers. Headers are the long pins that allow you to connect the Protoshield to your Arduino board. Follow these steps to solder the headers:
- Place the Protoshield PCB on a flat surface with the component side facing up.
- Insert the headers into the designated holes on the Protoshield. Make sure the pins are perpendicular to the PCB.
- Flip the Protoshield over so that the soldering side is facing up.
- Heat up your soldering iron and apply a small amount of solder to each pin. Make sure the solder flows evenly around the pin and creates a strong connection.
- Repeat the process for all the header pins.
Step 3: Connect the Power and Ground Rails
The next step is to connect the power and ground rails on the Protoshield. This will provide a convenient way to distribute power to your components. Follow these steps:
- Locate the power and ground rails on the Protoshield. They are typically labeled with “+” and “-” symbols.
- Using jumper wires, connect the positive power rail to the appropriate pin on your Arduino board (e.g., 5V or 3.3V).
- Similarly, connect the negative ground rail to the GND pin on your Arduino board.
Step 4: Install Components
Now it’s time to install the components for your project. The specific components you use will depend on your project requirements. Here are some general guidelines for installing components on the Protoshield:
- Identify the component you want to install and determine its pin configuration.
- Locate the appropriate holes on the Protoshield grid that correspond to the component’s pins.
- Gently insert the component’s pins into the holes, making sure they are fully seated.
- If necessary, use jumper wires to connect the component to other parts of the circuit or to the power and ground rails.
Step 5: Test and Verify
Once you have installed all the components, it’s important to test and verify your circuit before powering it up. Follow these steps:
- Double-check all your connections to ensure they are secure and properly oriented.
- Use a multimeter to test for continuity between critical points in your circuit.
- If everything looks good, connect your Arduino board to a power source (e.g., USB cable or battery).
- Upload your Arduino sketch to the board and observe the behavior of your circuit.
- If you encounter any issues, carefully review your connections and code to identify and resolve the problem.
Tips and Best Practices
Here are some additional tips and best practices to keep in mind when working with Arduino Protoshield:
- Always disconnect power before making changes to your circuit.
- Use color-coded jumper wires to make your connections more organized and easier to follow.
- Label your components and connections to avoid confusion and errors.
- Keep your Protoshield clean and free from debris to ensure proper functioning.
- When soldering, use a well-ventilated area and wear protective eyewear.
- Regularly inspect your connections and components for any signs of damage or wear.
Frequently Asked Questions (FAQ)
1. Can I use the Arduino Protoshield with any Arduino board?
The Arduino Protoshield is designed to be compatible with most Arduino boards, including the Uno, Mega, and Leonardo. However, it’s always a good idea to double-check the specifications of your specific board to ensure compatibility.
2. Do I need to solder the components onto the Protoshield?
No, the Protoshield is designed for solderless prototyping. You can simply insert the components into the appropriate holes on the Protoshield grid and use jumper wires to make connections as needed.
3. How many components can I connect to the Protoshield?
The number of components you can connect to the Protoshield depends on the size and complexity of your circuit. The Protoshield provides ample space for most common prototyping needs, but if you have a particularly large or complex project, you may need to use multiple Protoshields or consider a custom PCB.
4. Can I use the Protoshield for permanent installations?
While the Protoshield is great for prototyping and testing, it may not be the best choice for permanent installations. For long-term projects, it’s often better to design a custom PCB or use a more robust prototyping solution.
5. How do I clean my Protoshield?
To clean your Protoshield, you can use a soft brush or compressed air to gently remove any dust or debris. Avoid using water or cleaning solvents, as they can damage the PCB and components. If you need to remove stubborn dirt or residue, you can use a small amount of isopropyl alcohol on a cotton swab, but be careful not to oversaturate the board.
Conclusion
Arduino Protoshield is a valuable tool for anyone interested in electronics prototyping and Arduino development. By following this comprehensive guide, you should now have a solid understanding of how to assemble and use your Protoshield effectively.
Remember to take your time, double-check your connections, and always practice safe handling procedures when working with electronic components. With your Protoshield assembled and ready to go, you can now focus on bringing your creative ideas to life and exploring the exciting world of Arduino projects.
Happy prototyping!


Leave a Reply