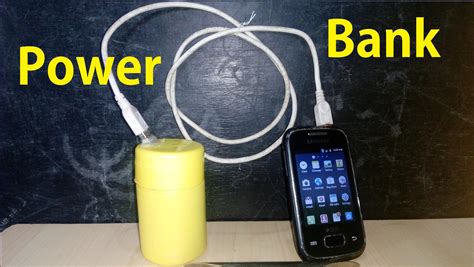
What is a Power Bank?
A power bank is a portable battery-powered device that can charge your electronic devices when you don’t have access to a wall outlet. It works by storing electrical energy in its internal battery and then releasing it to your device when needed. Power banks come in various sizes and capacities, depending on your needs and the devices you want to charge.
Why Make Your Own Power Bank?
There are several reasons why you might want to create your own power bank:
-
Cost-effective: Building your own power bank can be significantly cheaper than purchasing a pre-made one, especially if you’re looking for a high-capacity model.
-
Customization: By making your own power bank, you can customize its size, shape, and capacity to suit your specific needs.
-
Learning experience: Creating a DIY Power Bank is an excellent way to learn about electronics and how batteries work.
-
Sense of accomplishment: There’s a certain satisfaction that comes with using a device you’ve built yourself.

Components Required for a DIY Power Bank
Before we dive into the step-by-step process of creating your power bank, let’s take a look at the components you’ll need:
| Component | Description |
|---|---|
| Battery cell | The heart of your power bank, usually a 18650 lithium-ion cell |
| Battery holder | Holds the battery cell in place |
| Boost converter | Increases the battery’s voltage to the required 5V for USB |
| USB female port | Allows you to connect your devices to the power bank |
| Switch | Turns the power bank on and off |
| Wires | Connects the components |
| Solder | Used to join the electronic components |
| Enclosure | Houses and protects the power bank components |
Choosing the Right Battery Cell
The most common battery cell used in power banks is the 18650 lithium-ion cell. These cells are widely available, affordable, and have a high energy density. When selecting your battery cell, consider the following factors:
- Capacity: Measured in milliamp hours (mAh), this determines how much energy your power bank can store. Higher capacity means more charges for your devices.
- Discharge rate: This is the maximum current the battery can safely provide. A higher discharge rate allows for faster charging of your devices.
- Protection circuit: Some 18650 cells come with built-in protection circuits that prevent overcharging, over-discharging, and short-circuiting. Using a protected cell is highly recommended for safety reasons.

Step-by-Step Guide to Building Your Power Bank
Now that you have your components ready, let’s start building your DIY power bank.
Step 1: Test Your Battery Cell
Before using your battery cell, it’s essential to test it to ensure it’s functioning properly and has the correct voltage. Use a multimeter to measure the cell’s voltage; a fully charged 18650 cell should read around 4.2V.
Step 2: Solder the Boost Converter
Solder the input and output wires to the boost converter according to the manufacturer’s instructions. Typically, the input wires (red and black) will be connected to the battery holder, while the output wires (red and black) will be connected to the USB female port.
Step 3: Connect the Battery Holder
Solder the positive (red) wire from the battery holder to the positive input on the boost converter. Then, solder the negative (black) wire from the battery holder to one side of the switch.
Step 4: Connect the Switch
Solder a wire from the other side of the switch to the negative input on the boost converter. This will allow you to turn the power bank on and off.
Step 5: Connect the USB Port
Solder the positive (red) output wire from the boost converter to the positive terminal on the USB female port. Then, solder the negative (black) output wire from the boost converter to the negative terminal on the USB port.
Step 6: Test Your Circuit
Before placing your components in the enclosure, test your circuit to ensure everything is connected correctly. Insert your battery cell into the holder and turn on the switch. Use a multimeter to check that the USB port is outputting 5V. If everything is working correctly, you can proceed to the next step.
Step 7: Assemble the Enclosure
Place your components in the enclosure, ensuring that the USB port and switch are accessible. You may need to drill holes in the enclosure for the USB port and switch. Use hot glue or double-sided tape to secure the components in place.
Step 8: Charge and Use Your Power Bank
Congratulations! You’ve now built your own DIY power bank. To charge it, simply connect it to a USB power source using a micro-USB cable. Once charged, you can use it to power your devices by connecting them to the USB port and turning on the switch.

Safety Considerations
When working with batteries and electronics, it’s crucial to prioritize safety. Keep these safety tips in mind:
- Always use a protected 18650 battery cell to prevent overcharging, over-discharging, and short-circuiting.
- Wear safety goggles and work in a well-ventilated area when soldering.
- Do not leave your power bank charging unattended or charge it overnight.
- Dispose of used or damaged battery cells properly, as they can be a fire hazard.
Frequently Asked Questions
-
Q: How long does it take to charge a DIY power bank?
A: The charging time depends on the capacity of your battery cell and the output of your charging source. Generally, a 3000mAh 18650 cell will take around 3-4 hours to charge fully. -
Q: How many times can a DIY power bank charge my smartphone?
A: This depends on the capacity of your battery cell and your smartphone’s battery. A 3000mAh power bank can typically charge a smartphone with a 3000mAh battery once. -
Q: Can I use different battery cells in my DIY power bank?
A: While 18650 cells are the most common, you can use other types of batteries, such as 26650 or 14500 cells. However, you’ll need to ensure that your boost converter and battery holder are compatible with the chosen cell. -
Q: Is it safe to carry a DIY power bank on a plane?
A: Regulations regarding power banks on planes vary by airline and country. Generally, power banks with a capacity of less than 100Wh are allowed in carry-on luggage. Always check with your airline before traveling. -
Q: Can I charge multiple devices simultaneously with my DIY power bank?
A: This depends on the output current of your boost converter and the current draw of your devices. If your boost converter can provide enough current, you can add multiple USB ports to your power bank to charge several devices at once.
Conclusion
Building your own DIY power bank is a fun, cost-effective, and educational project that can provide you with a reliable source of portable power. By following this guide and prioritizing safety, you can create a customized power bank that meets your needs and gives you the satisfaction of having built it yourself. Happy building!


Leave a Reply