Introduction to PCB Milling
PCB milling is a process of creating custom printed circuit boards (PCBs) using a computer-controlled milling machine. This method allows for rapid prototyping and small-scale production of PCBs without the need for expensive and time-consuming chemical etching processes. In this article, we will guide you through the step-by-step process of creating your own PCB milling boards.
What You Need to Get Started
Before you begin, you’ll need to gather the necessary tools and materials:
- A computer-controlled milling machine (e.g., CNC mill)
- PCB design software (e.g., Eagle, KiCad)
- Copper-clad PCB material
- Milling bits (end mills)
- Safety equipment (safety glasses, dust mask)
- Cleaning supplies (isopropyl alcohol, brushes)

Step 1: Design Your PCB
Choosing PCB Design Software
To create your PCB design, you’ll need to use specialized software. Some popular options include:
- Eagle: A widely used, user-friendly PCB design software with a free version available.
- KiCad: An open-source, cross-platform PCB design software with a growing user community.
- Altium Designer: A professional-grade PCB design software with advanced features, but it comes at a higher cost.
Creating Your PCB Design
- Open your chosen PCB design software and create a new project.
- Design your schematic, adding components and connecting them according to your circuit diagram.
- Create a new PCB layout and arrange the components on the board.
- Route the traces between components, ensuring proper spacing and width for your milling machine.
- Add any necessary text, logos, or graphics to your PCB design.
- Generate the Gerber files, which will be used to control the milling machine.

Step 2: Prepare Your Milling Machine
Setting Up Your CNC Mill
- Ensure your CNC mill is properly assembled and calibrated according to the manufacturer’s instructions.
- Install the appropriate milling bit (end mill) for your PCB material and design.
- Secure your copper-clad PCB material to the milling machine bed using tape or a vacuum table.
- Set the origin point (zero position) for your milling machine, typically at the lower-left corner of your PCB material.
Configuring Milling Software
- Import your Gerber files into the milling machine software.
- Set the appropriate feed rate, spindle speed, and depth of cut for your PCB material and milling bit.
- Generate the G-code, which contains the instructions for the milling machine to follow.

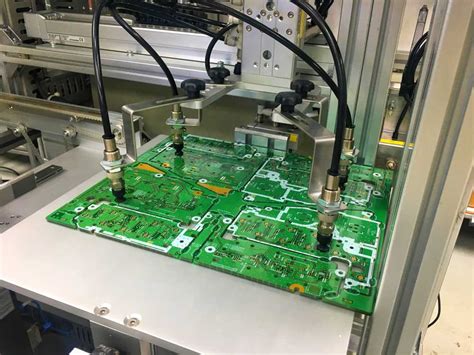
Step 3: Mill Your PCB
- Load the G-code into your milling machine software and begin the milling process.
- Monitor the milling progress, ensuring that the machine is operating smoothly and without any issues.
- Once the milling is complete, remove the PCB from the machine bed.
Step 4: Clean and Inspect Your PCB
- Clean the milled PCB using isopropyl alcohol and a brush to remove any debris or dust.
- Visually inspect the PCB for any defects, such as incomplete traces or shorts between pads.
- Use a multimeter to test for continuity between connected points and ensure there are no short circuits.
Step 5: Assemble and Test Your PCB
- Solder your components onto the milled PCB, following your schematic and PCB layout.
- Double-check your soldering for any bridges or poor connections.
- Connect your assembled PCB to a power supply and test its functionality.
Tips and Tricks for Successful PCB Milling
- Always wear safety equipment, such as safety glasses and a dust mask, when operating your milling machine.
- Use the appropriate milling bit for your PCB material and design to ensure clean, accurate cuts.
- Regularly clean and maintain your milling machine to ensure optimal performance and longevity.
- Double-check your PCB design for errors before milling to avoid wasting time and materials.
- Practice on scrap PCB material to fine-tune your milling settings and technique before working on your final design.
Troubleshooting Common PCB Milling Issues
| Issue | Possible Cause | Solution |
|---|---|---|
| Incomplete or missing traces | Milling depth too shallow or feed rate too high | Adjust milling depth or reduce feed rate |
| Rough or uneven cuts | Dull or damaged milling bit | Replace milling bit with a new, sharp one |
| Shorts between pads or traces | Milling path too close or overlapping | Increase spacing between pads and traces in PCB design |
| PCB material lifting or tearing | Insufficient or uneven securing to machine bed | Use tape or vacuum table to securely hold PCB material during milling |
| Inaccurate or misaligned milling | Improper calibration or origin point setting | Recalibrate milling machine and double-check origin point setting |
Frequently Asked Questions (FAQ)
1. What is the difference between PCB milling and PCB Etching?
PCB milling uses a computer-controlled milling machine to mechanically remove copper from a PCB material, while PCB etching uses chemicals to dissolve unwanted copper. Milling is faster and more environmentally friendly but is better suited for prototyping and small-scale production, while etching is more cost-effective for larger production runs.
2. Can I use any PCB material for milling?
Most common PCB materials, such as FR-4, can be used for milling. However, some materials may be more difficult to mill or require specific milling bits and settings. Always consult your PCB material manufacturer’s specifications and recommendations.
3. How small can the traces and pads be when milling a PCB?
The minimum trace width and pad size achievable through PCB milling depends on the capabilities of your milling machine and the size of your milling bit. Generally, traces and pads can be as small as 0.2mm to 0.3mm, but this may vary depending on your setup.
4. Can I mill double-sided PCBs?
Yes, you can mill double-sided PCBs using a CNC mill. However, you will need to design your PCB with alignment holes and use a method to accurately align the two sides during the milling process, such as using registration pins or a camera-based alignment system.
5. How do I choose the right milling bit for my PCB?
When selecting a milling bit for your PCB, consider the following factors:
- PCB material: Different materials may require specific types of milling bits for optimal results.
- Trace and pad size: Smaller traces and pads will require smaller diameter milling bits.
- Milling depth: Ensure your milling bit is long enough to achieve the desired depth of cut.
- Flute count: Higher flute counts (e.g., 2-flute or 4-flute) can provide a smoother finish but may require slower feed rates.
Consult your milling machine manufacturer’s recommendations or seek advice from experienced PCB milling professionals when choosing your milling bits.
Conclusion
PCB milling is an efficient and accessible method for creating custom printed circuit boards for prototyping and small-scale production. By following the step-by-step process outlined in this article and utilizing the tips, troubleshooting guidance, and FAQ answers provided, you can successfully design, mill, and assemble your own PCBs. With practice and experimentation, you’ll be able to create high-quality, professional-looking PCBs using a CNC milling machine.


Leave a Reply