Introduction to Microammeters
A microammeter, also known as a micro amp meter or μA meter, is an electrical measuring instrument designed to measure very small electric currents, typically in the range of microamperes (μA). These devices are essential tools for troubleshooting, monitoring, and analyzing low-current circuits in various applications, including electronics, telecommunications, and scientific research.
What is a Microammeter?
A microammeter is a highly sensitive galvanometer that measures electric current in the microampere range. It is similar to a standard ammeter but is specifically designed to detect and measure much smaller currents. The typical measuring range of a microammeter is from 0 to 500 μA, although some models can measure currents as low as a few nanoamperes (nA).
Applications of Microammeters
Microammeters find applications in a wide range of fields, such as:
- Electronics and circuit design
- Telecommunications
- Scientific research
- Medical equipment
- Automotive industry
- Environmental monitoring
In these fields, microammeters are used to:
- Measure leakage currents in capacitors and insulators
- Monitor the output of sensors and transducers
- Test the performance of low-power electronic devices
- Detect and diagnose faults in electronic circuits
- Measure the conductivity of materials
How Does a Microammeter Work?
Basic Working Principle
The working principle of a microammeter is based on the interaction between an electric current and a magnetic field. When an electric current flows through a conductor, it generates a magnetic field around the conductor. The strength of this magnetic field is proportional to the magnitude of the current.
In a microammeter, a small coil of wire is suspended between the poles of a permanent magnet. When a current passes through the coil, it generates a magnetic field that interacts with the field of the permanent magnet, causing the coil to rotate. The angle of rotation is proportional to the magnitude of the current.
A pointer attached to the coil indicates the magnitude of the current on a calibrated scale. The scale is typically marked in microamperes (μA) or milliamperes (mA).
Components of a Microammeter
A microammeter consists of the following main components:
- Moving coil: A lightweight coil of wire suspended between the poles of a permanent magnet. The coil is free to rotate around its axis.
- Permanent magnet: Provides a strong, stable magnetic field in which the moving coil is suspended.
- Springs: Help to control the movement of the coil and provide a restoring force to return the pointer to zero when no current is flowing.
- Pointer: Attached to the moving coil, it indicates the magnitude of the current on the calibrated scale.
- Scale: A calibrated scale marked in microamperes (μA) or milliamperes (mA) that displays the measured current.
Sensitivity and Resistance
The sensitivity of a microammeter is determined by the number of turns in the moving coil and the strength of the permanent magnet. A microammeter with a higher number of turns and a stronger magnet will be more sensitive, capable of detecting smaller currents.
However, increasing the sensitivity of a microammeter also increases its internal resistance. This is because the more turns in the coil, the longer the wire, and thus the higher the resistance. High internal resistance can be problematic when measuring low-resistance circuits, as it can significantly alter the circuit’s characteristics.
To minimize the effect of the microammeter’s internal resistance on the circuit being measured, a low-resistance shunt is often used in parallel with the microammeter. The shunt diverts most of the current away from the microammeter, allowing it to measure a small fraction of the total current without significantly affecting the circuit.
Advantages and Disadvantages of Microammeters
Advantages:
1. High sensitivity: Microammeters can measure very small currents in the microampere range, making them suitable for low-current applications.
2. Accuracy: Modern digital microammeters offer high accuracy and resolution, providing reliable measurements.
3. Wide range: Some microammeters have multiple measuring ranges, allowing users to measure currents from a few nanoamperes to several milliamperes.
Disadvantages:
1. Fragility: The moving coil mechanism in a microammeter is delicate and can be easily damaged by mechanical shocks or overloads.
2. High internal resistance: The high internal resistance of a microammeter can affect the circuit being measured, particularly when dealing with low-resistance circuits.
3. Cost: High-quality, precision microammeters can be expensive compared to standard ammeters.

Types of Microammeters
There are two main types of microammeters: analog and digital.
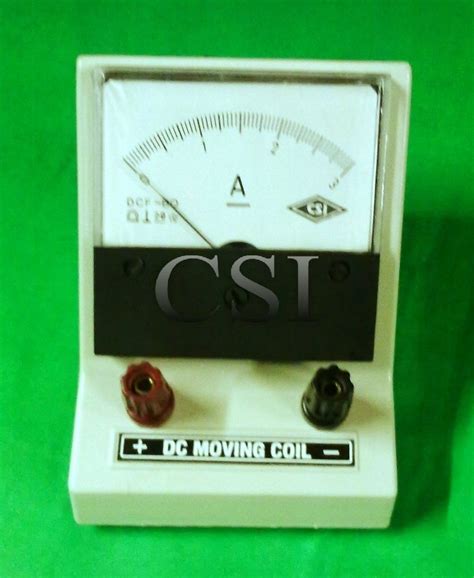
Analog Microammeters
Analog microammeters use the basic moving coil mechanism described earlier. They display the measured current on a calibrated scale using a pointer attached to the moving coil. Analog microammeters are simple, reliable, and do not require a power source to operate.
However, analog microammeters have some limitations:
- Limited resolution: The resolution of an analog microammeter is determined by the spacing of the scale divisions and the user’s ability to interpolate between them.
- Parallax error: When reading an analog microammeter, the user’s eye must be directly in line with the pointer to avoid parallax error, which can lead to inaccurate readings.
- Sensitivity to external factors: Analog microammeters can be affected by external factors such as magnetic fields, vibrations, and temperature changes.
Digital Microammeters
Digital microammeters use electronic circuits to convert the measured current into a digital signal, which is then displayed on a digital readout. These devices offer several advantages over their analog counterparts:
- High resolution: Digital microammeters can display measurements with a resolution of up to 0.1 μA or better, depending on the model.
- Ease of reading: The digital display eliminates the need for interpolation and reduces the risk of parallax error.
- Additional features: Many digital microammeters offer additional features such as data logging, auto-ranging, and computer connectivity.
However, digital microammeters also have some drawbacks:
- Power requirement: Digital microammeters require a power source, either batteries or an external power supply, to operate.
- Complexity: The electronic circuits in a digital microammeter are more complex than the simple moving coil mechanism of an analog device, which can make them more prone to failures.
- Cost: Digital microammeters are generally more expensive than their analog counterparts.

Selecting the Right Microammeter
When choosing a microammeter for a specific application, consider the following factors:
- Measuring range: Ensure that the microammeter’s measuring range covers the expected current levels in your application.
- Resolution and accuracy: Determine the required resolution and accuracy for your measurements and choose a microammeter that meets or exceeds these requirements.
- Input impedance: Consider the microammeter’s input impedance and its potential impact on the circuit being measured.
- Additional features: Evaluate whether features like data logging, auto-ranging, or computer connectivity are necessary for your application.
- Analog vs. digital: Decide between an analog or digital microammeter based on your preferences and the specific requirements of your application.
- Cost: Balance the cost of the microammeter against your budget and the expected benefits of higher-end features.

Proper Use and Maintenance of Microammeters
To ensure accurate measurements and prolong the life of your microammeter, follow these guidelines:
- Always connect the microammeter in series with the circuit being measured.
- Ensure that the microammeter’s measuring range is appropriate for the expected current levels to avoid damage from overloads.
- Use shunts or current dividers when measuring currents that exceed the microammeter’s measuring range.
- Avoid mechanical shocks, vibrations, and extreme temperatures, which can damage the microammeter’s delicate components.
- Handle the microammeter with care, especially when connecting or disconnecting it from a circuit.
- Regularly calibrate your microammeter to ensure accurate measurements.
- Store the microammeter in a dry, dust-free environment when not in use.
Frequently Asked Questions (FAQ)
-
What is the difference between a microammeter and a standard ammeter?
A microammeter is designed to measure very small currents in the microampere range, while a standard ammeter measures currents in the milliampere to ampere range. Microammeters are more sensitive and have higher internal resistance compared to standard ammeters. -
Can a microammeter be used to measure voltage?
No, a microammeter is designed to measure electric current, not voltage. To measure voltage, you would need a voltmeter or a multimeter with a voltage measuring function. -
How do I connect a microammeter to a circuit?
A microammeter must be connected in series with the circuit being measured. This means that the current you want to measure must flow through the microammeter. Connecting a microammeter in parallel with a circuit can cause damage to the instrument due to excessive current flow. -
What should I do if the current I want to measure exceeds the microammeter’s measuring range?
If the current you want to measure is too high for your microammeter, you can use a shunt resistor or a current divider to divert some of the current away from the microammeter. This allows you to measure a small fraction of the total current, which can then be scaled up to determine the actual current value. -
How often should I calibrate my microammeter?
The calibration frequency depends on factors such as the microammeter’s usage, storage conditions, and the accuracy requirements of your application. As a general rule, it is recommended to calibrate your microammeter at least once a year or according to the manufacturer’s guidelines. More frequent calibration may be necessary for high-precision applications or if the microammeter is subject to harsh operating conditions.
Conclusion
Microammeters are essential tools for measuring small electric currents in a variety of applications. By understanding the basic working principle, components, and types of microammeters, you can select the right instrument for your needs and ensure accurate, reliable measurements.
Proper use and maintenance of your microammeter, including regular calibration and careful handling, will help prolong its life and maintain its performance. With the right microammeter and a solid understanding of its operation, you can effectively troubleshoot, monitor, and analyze low-current circuits in electronics, telecommunications, scientific research, and beyond.


Leave a Reply