Introduction to 7-Segment Displays
A 7-segment display is an electronic device that can display decimal numerals and some alphabetic characters. It consists of seven segments, each of which can be lit separately to form different characters. These displays are widely used in digital clocks, calculators, meters, and other electronic devices that need to display numerical information.
Types of 7-Segment Displays
There are two main types of 7-segment displays:
- Common Cathode 7-Segment Display
- Common Anode 7-Segment Display
The difference between these two types lies in the way the LEDs are connected internally.
Common Cathode 7-Segment Display
In a common cathode display, all the cathodes of the LEDs are connected together to a single pin, which is connected to ground. To light up a segment, a high voltage is applied to the corresponding anode pin.
Common Anode 7-Segment Display
In a common anode display, all the anodes of the LEDs are connected together to a single pin, which is connected to the positive supply voltage. To light up a segment, a low voltage (ground) is applied to the corresponding cathode pin.
7-Segment Display Pins
A typical 7-segment display has 10 pins, as shown in the table below:
| Pin Number | Function |
|---|---|
| 1 | Segment E |
| 2 | Segment D |
| 3 | Common Cathode (CC) or Anode (CA) |
| 4 | Segment C |
| 5 | Decimal Point (DP) |
| 6 | Segment B |
| 7 | Segment A |
| 8 | Common Cathode (CC) or Anode (CA) |
| 9 | Segment F |
| 10 | Segment G |
The common cathode or anode pin (pin 3 and 8) is used to control the entire display. The decimal point pin (pin 5) is used to display the decimal point.
Controlling 7-Segment Displays
To control a 7-segment display, you need to apply the appropriate voltage to each segment pin. For a common cathode display, you need to apply a high voltage to the segment pin to light it up. For a common anode display, you need to apply a low voltage (ground) to the segment pin.
You can use a microcontroller or a dedicated driver IC to control the display. Some common driver ICs include:
- MAX7219
- TM1637
- 74HC595
These driver ICs simplify the control of multiple 7-segment displays and provide features like brightness control and multiplexing.

Working of 7-Segment Displays
The working of a 7-segment display is based on the principle of electroluminescence. Each segment of the display consists of an LED (Light Emitting Diode) that emits light when a voltage is applied to it.
Multiplexing
When using multiple 7-segment displays, multiplexing is often employed to reduce the number of pins required to control the displays. In multiplexing, the displays are turned on one at a time in rapid succession, giving the illusion that all the displays are on simultaneously.
To achieve multiplexing, the common cathode or anode pins of the displays are connected to the microcontroller or driver IC, and the segment pins are connected to a shared bus. The microcontroller or driver IC then cycles through each display, turning it on for a brief period before moving on to the next one.

Applications of 7-Segment Displays
7-segment displays find applications in various fields, including:
- Digital Clocks and Watches
- Calculators
- Measuring Instruments (e.g., multimeters, scales)
- Elevator Displays
- Scoreboards
- Automotive Dashboards
- Industrial Control Panels
Digital Clocks and Watches
7-segment displays are commonly used in digital clocks and watches to display the time. The displays are multiplexed to show the hours, minutes, and seconds.
Calculators
Basic calculators often use 7-segment displays to show the input numbers and the result of the calculation.
Measuring Instruments
Multimeters, scales, and other measuring instruments use 7-segment displays to show the measured value.
Elevator Displays
Elevators use 7-segment displays to indicate the current floor and the direction of movement.
Scoreboards
Scoreboards in sports arenas and stadiums use large 7-segment displays to show the score and other relevant information.
Automotive Dashboards
Some older automobiles use 7-segment displays in the dashboard to show the speed, fuel level, and other information.
Industrial Control Panels
7-segment displays are used in industrial control panels to display process variables, setpoints, and alarms.

Interfacing 7-Segment Displays with Microcontrollers
Interfacing a 7-segment display with a microcontroller involves the following steps:
- Identify the type of display (common cathode or common anode).
- Connect the common cathode or anode pin to the appropriate voltage level (ground or Vcc).
- Connect the segment pins to the microcontroller’s GPIO pins, either directly or through a current-limiting resistor.
- Write the code to control the display, turning on the appropriate segments for each character to be displayed.
If using multiple displays, you can either use a driver IC or implement multiplexing in your code.
Example Code (Arduino)
Here’s a simple example of how to control a single common cathode 7-segment display using an Arduino:
// Define the segment pins
const int segmentPins[] = {2, 3, 4, 5, 6, 7, 8};
const int numSegments = 7;

// Define the character patterns
const byte digitPatterns[] = {
  0b1111110, // 0
  0b0110000, // 1
  0b1101101, // 2
  0b1111001, // 3
  0b0110011, // 4
  0b1011011, // 5
  0b1011111, // 6
  0b1110000, // 7
  0b1111111, // 8
  0b1111011  // 9
};

void setup() {
  // Set the segment pins as outputs
  for (int i = 0; i < numSegments; i++) {
    pinMode(segmentPins[i], OUTPUT);
  }
}

void loop() {
  // Display digits 0-9
  for (int digit = 0; digit < 10; digit++) {
    displayDigit(digit);
    delay(1000);
  }
}

void displayDigit(int digit) {
  byte pattern = digitPatterns[digit];
  for (int i = 0; i < numSegments; i++) {
    digitalWrite(segmentPins[i], bitRead(pattern, i));
  }
}
This code defines the segment pins and the character patterns for digits 0-9. In the loop() function, it displays each digit for one second. The displayDigit() function takes a digit as input and sets the appropriate segment pins high or low based on the corresponding pattern.
Frequently Asked Questions (FAQ)
-
Q: What is the difference between a common cathode and common anode 7-segment display?
A: In a common cathode display, the cathodes of all the segments are connected together and tied to ground, while in a common anode display, the anodes are connected together and tied to the positive supply voltage. -
Q: Can a 7-segment display show alphabetic characters?
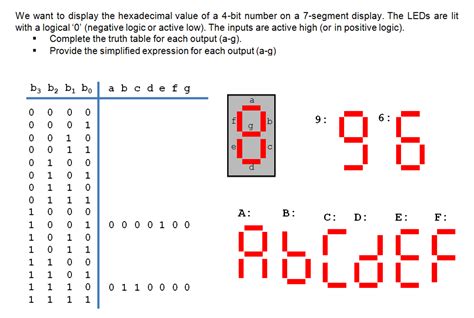
A: Yes, a 7-segment display can show some alphabetic characters, such as A, b, C, d, E, and F. However, not all letters can be displayed due to the limited number of segments. -
Q: How do I control the brightness of a 7-segment display?
A: You can control the brightness by varying the duty cycle of the signal applied to the segment pins. This is typically done using pulse-width modulation (PWM). -
Q: Can I use a shift register to control multiple 7-segment displays?
A: Yes, you can use a shift register, such as the 74HC595, to control multiple 7-segment displays. This reduces the number of pins required on the microcontroller. -
Q: What is the purpose of the decimal point in a 7-segment display?
A: The decimal point is used to display fractional numbers or to separate different parts of a number, such as the hours and minutes in a clock.
Conclusion
7-segment displays are versatile and widely used components in electronic devices that need to display numerical information. They consist of seven segments that can be lit independently to form different characters. The two main types of 7-segment displays are common cathode and common anode, which differ in the way the LEDs are connected internally.
To control a 7-segment display, you need to apply the appropriate voltage to each segment pin, either directly or through a driver IC. When using multiple displays, multiplexing is often employed to reduce the number of pins required.
7-segment displays find applications in various fields, including digital clocks and watches, calculators, measuring instruments, elevator displays, scoreboards, automotive dashboards, and industrial control panels.
Interfacing a 7-segment display with a microcontroller involves identifying the display type, connecting the pins, and writing the code to control the display. With the right tools and techniques, you can easily incorporate 7-segment displays into your electronic projects and create informative and visually appealing user interfaces.


Leave a Reply