Introduction to Ultrasonic Foggers
An ultrasonic fogger is a device that uses high-frequency vibrations to create a fine mist or fog. These devices have a wide range of applications, from humidifiers and terrariums to special effects and industrial processes. In this comprehensive guide, we will explore the principles behind ultrasonic foggers and provide a step-by-step tutorial on how to build your own ultrasonic fogger circuit.
What is an Ultrasonic Fogger?
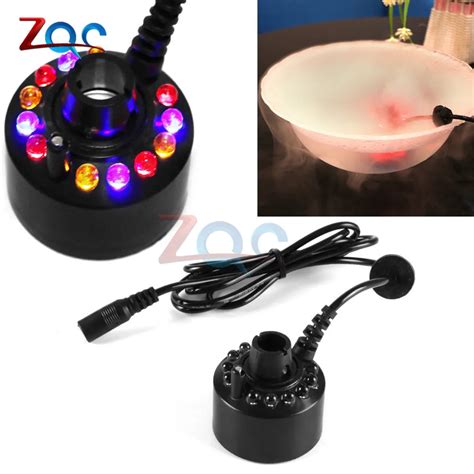
An ultrasonic fogger, also known as an ultrasonic atomizer or nebulizer, is a device that converts water into a fine mist using high-frequency vibrations. The key component of an ultrasonic fogger is a piezoelectric transducer, which vibrates at frequencies above 20 kHz (beyond the range of human hearing) when an alternating current is applied to it.
How Does an Ultrasonic Fogger Work?
The piezoelectric transducer in an ultrasonic fogger is typically a ceramic disc with electrodes on either side. When an alternating current is applied to the electrodes, the piezoelectric material expands and contracts rapidly, creating high-frequency vibrations.
These vibrations are transmitted to a thin layer of water above the transducer, causing the water to break up into tiny droplets. The resulting mist is then carried away by the airflow generated by a fan or the natural convection currents in the surrounding environment.
Applications of Ultrasonic Foggers
Ultrasonic foggers have a wide range of applications, including:
-
Humidifiers: Ultrasonic foggers are commonly used in household humidifiers to increase the moisture content of the air, which can help alleviate respiratory issues and improve overall comfort.
-
Terrariums and greenhouses: Ultrasonic foggers can create a humid environment for plants, mimicking their natural habitats and promoting healthy growth.
-
Special effects: In the entertainment industry, ultrasonic foggers are used to create atmospheric effects, such as fog, mist, or smoke, for stage productions, movies, and themed events.
-
Industrial processes: Ultrasonic foggers are employed in various industrial applications, such as dust suppression, chemical processing, and precision cleaning.

Building an Ultrasonic Fogger Circuit
Now that we have a basic understanding of ultrasonic foggers and their applications, let’s dive into the process of building your own ultrasonic fogger circuit.
Components Required
To build an ultrasonic fogger circuit, you will need the following components:
| Component | Quantity | Description |
|---|---|---|
| Piezoelectric transducer | 1 | The heart of the ultrasonic fogger, typically a 20mm ceramic disc with a resonant frequency of 113 kHz |
| MOSFET transistor | 1 | An N-channel MOSFET transistor, such as the IRF540N, to drive the piezoelectric transducer |
| Resistors | 2 | 100Ω and 1kΩ resistors for the MOSFET gate and feedback circuit |
| Capacitor | 1 | A 100nF ceramic capacitor for decoupling |
| Inductor | 1 | A 100µH inductor for the resonant circuit |
| DC power supply | 1 | A 24V DC power supply to power the circuit |
| PCB or breadboard | 1 | A printed circuit board (PCB) or breadboard for assembling the components |
| Wires and connectors | As needed | Wires and connectors for connecting the components |
Circuit Diagram
Here’s a simple circuit diagram for an ultrasonic fogger:
[Insert circuit diagram image here]
Step-by-Step Assembly Instructions
-
Begin by gathering all the necessary components and tools.
-
If using a PCB, solder the components according to the circuit diagram. If using a breadboard, insert the components into the appropriate holes.
-
Connect the 100Ω resistor between the gate and source of the MOSFET transistor.
-
Connect the 1kΩ resistor between the drain of the MOSFET and the positive terminal of the piezoelectric transducer.
-
Connect the negative terminal of the piezoelectric transducer to ground.
-
Connect the 100nF capacitor between the drain of the MOSFET and ground.
-
Connect the 100µH inductor in series with the drain of the MOSFET.
-
Connect the positive terminal of the DC power supply to the free end of the inductor, and the negative terminal to ground.
-
Double-check all connections to ensure they are secure and correct.
Testing and Troubleshooting
Once you have assembled the ultrasonic fogger circuit, it’s time to test it and troubleshoot any issues that may arise.
-
Fill a small container with water and place the piezoelectric transducer at the bottom, ensuring that the ceramic disc is fully submerged.
-
Connect the DC power supply to the circuit and turn it on.
-
Observe the surface of the water. If the circuit is working correctly, you should see a fine mist or fog forming above the water’s surface.
-
If no mist is generated, check the following:
- Ensure all connections are secure and correct
- Verify that the power supply is providing the correct voltage
- Check the orientation of the MOSFET transistor and the polarity of the piezoelectric transducer
-
Ensure the piezoelectric transducer is fully submerged in water
-
If the mist output is weak or intermittent, try adjusting the position of the piezoelectric transducer or experimenting with different water levels.

Optimizing Your Ultrasonic Fogger Circuit
Once you have a working ultrasonic fogger circuit, you may want to optimize its performance for your specific application. Here are a few tips to help you get the most out of your ultrasonic fogger:
-
Experiment with different piezoelectric transducers to find one with the optimal frequency and power output for your needs.
-
Adjust the water level above the transducer to control the mist output. A higher water level will generally produce a denser mist, while a lower level will create a finer mist.
-
Use distilled or deionized water to minimize mineral buildup on the transducer, which can reduce its efficiency over time.
-
Incorporate a fan or other means of airflow to help disperse the mist and improve coverage.
-
Consider adding a timer or humidity sensor to automate the operation of your ultrasonic fogger based on specific conditions or schedules.

FAQ
-
Can I use tap water with my ultrasonic fogger?
While tap water can be used, it is not recommended due to the mineral content, which can lead to buildup on the piezoelectric transducer over time. Distilled or deionized water is preferred for optimal performance and longevity. -
How long can I run my ultrasonic fogger continuously?
The duration of continuous operation depends on factors such as the transducer’s power rating, the water level, and the ambient temperature. As a general rule, it’s best to follow the manufacturer’s recommendations and allow the device to cool down periodically to prevent overheating. -
Can I add essential oils or other substances to the water?
Adding essential oils or other substances directly to the water is not recommended, as they can damage the piezoelectric transducer or clog the atomizing membrane. If you wish to disperse scents or other substances, it’s best to use a separate diffuser or add them to the mist after it has been generated. -
How do I clean my ultrasonic fogger?
To clean your ultrasonic fogger, first, disconnect it from the power source and remove any remaining water. Gently wipe the piezoelectric transducer and surrounding surfaces with a soft, damp cloth. For stubborn mineral deposits, you can use a mixture of white vinegar and water, followed by a thorough rinse with distilled water. -
Can I use my ultrasonic fogger outdoors?
Ultrasonic foggers can be used outdoors, but it’s essential to protect the device from direct exposure to the elements. Ensure that the fogger is placed in a waterproof enclosure and that the electrical connections are properly insulated to prevent short circuits or electrical hazards.
Conclusion
Ultrasonic foggers are versatile devices with a wide range of applications, from humidity control to special effects. By understanding the principles behind their operation and following this step-by-step guide, you can build your own ultrasonic fogger circuit and customize it to suit your specific needs.
Remember to prioritize safety when working with electrical components and to always follow best practices for handling and maintaining your ultrasonic fogger. With proper care and optimization, your homemade ultrasonic fogger can provide reliable and efficient mist generation for years to come.


Leave a Reply