Introduction
When troubleshooting audio equipment, a Signal Injector can be an invaluable tool to quickly identify where a problem lies in a system. A signal injector is a simple device that generates an audio test tone which can be injected at various points in an audio signal chain to trace the signal path and isolate issues.
Whether you are a professional audio technician, a musician, or a home audio enthusiast, having a signal injector in your toolkit can save significant time and frustration when diagnosing problems with mixers, amplifiers, speakers, cables, and other audio gear.
In this article, we’ll dive into what a signal injector is, how it works, the different types available, and step-by-step guidance on using one for effective audio troubleshooting. We’ll also cover some frequently asked questions about signal injectors.
What is a Signal Injector?
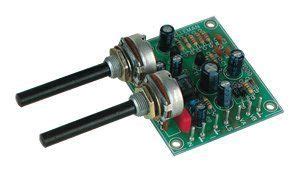
A signal injector, also known as a tone generator or audio probe, is a compact handheld device that produces a continuous test tone, typically a sine wave, at a specific frequency (often 1 kHz) and output level (usually around line level or -10 dBV).
The purpose of a signal injector is to provide a known-good audio signal that can be fed into different points of an audio system to verify if the signal is passing through correctly. By systematically working through the signal chain, you can pinpoint where the audio path is broken or problematic.
Signal injectors are battery-powered for portability and feature a 1/4″ TS (tip-sleeve) output jack, sometimes with a selectable output level switch or dial. Some models may also include additional features like multiple tone frequencies, a built-in speaker for monitoring, or a microphone input for tracing signals backward through a system.

How Does a Signal Injector Work?
The core of a signal injector is an oscillator circuit that generates a continuous sinusoidal waveform at the desired test frequency, most commonly 1 kHz. This frequency was chosen because it falls within the midrange of human hearing and is easy to distinguish from background noise.
The oscillator’s output is buffered and sent to a level control stage, which allows the user to adjust the output signal strength to match the requirements of the equipment being tested (mic level, line level, etc.). Finally, the signal is routed to the output jack, ready to be patched into the audio system.
When the signal injector is connected to an audio input (mixer channel, amplifier input, etc.) and the test tone is activated, the tone should be audible through the downstream audio chain if everything is functioning properly. If the tone is not heard or is distorted at any point, it indicates a problem with the equipment or cabling at that stage.

Types of Signal Injectors
While all signal injectors serve the same basic purpose, there are a few variations in features and capabilities to suit different needs and budgets:
Basic Signal Injector
A basic signal injector offers a single fixed test tone frequency (usually 1 kHz) and a fixed or switchable output level (mic/line). These no-frills models are affordable and suitable for most general troubleshooting tasks.
Multi-Frequency Signal Injector
Some signal injectors provide multiple selectable test tone frequencies (e.g., 100 Hz, 1 kHz, 10 kHz) to check the response of audio equipment across different frequency ranges. This can be helpful for diagnosing frequency-specific issues like a malfunctioning EQ circuit or crossover.
Signal Injector with Built-In Speaker
Certain models incorporate a small built-in speaker for directly monitoring the test tone without needing to connect the injector to an audio system. This can be convenient for quick checks or when troubleshooting headphones or earpieces.
Signal Injector with Microphone Input
A few advanced signal injectors include a microphone input jack, allowing the unit to also function as a signal tracer. With this feature, you can connect the injector to various outputs in your audio chain and use the built-in mic to audibly trace the signal from the end of the system back to the source, helping pinpoint issues in the reverse direction.
Here’s a table summarizing the different types of signal injectors and their key features:
| Type | Key Features |
|---|---|
| Basic Signal Injector | – Single fixed test tone (1 kHz) |
| – Fixed or switchable output level | |
| – Affordable and suitable for general troubleshooting | |
| Multi-Frequency Signal Injector | – Multiple selectable test tone frequencies |
| – Helpful for diagnosing frequency-specific issues | |
| Signal Injector with Speaker | – Built-in speaker for direct monitoring |
| – Convenient for quick checks or headphone testing | |
| Signal Injector with Mic Input | – Microphone input jack for signal tracing |
| – Traces signal from output back to source |

How to Use a Signal Injector for Audio Troubleshooting
Using a signal injector to troubleshoot audio equipment is a straightforward process that involves systematically injecting the test tone at various points in the signal chain to isolate where a problem is occurring. Here’s a step-by-step guide:
Step 1: Prepare the Signal Injector
- Insert a fresh battery into the signal injector if it is not already powered.
- Connect a known-good audio cable to the injector’s output jack.
- Turn on the signal injector and verify that the test tone is audible (if it has a built-in speaker) or measurable with a multimeter or oscilloscope.
Step 2: Identify the Signal Chain
- Determine the complete signal path of the audio system you are troubleshooting, from the source (microphone, instrument, etc.) to the final output (speakers, headphones, recording device).
- Make a note of all the intermediate components in the chain, such as mixers, preamps, effects processors, amplifiers, and patch bays.
Step 3: Start at the Source
- Begin by connecting the signal injector to the input of the first device in the signal chain (e.g., the microphone input of a mixer or preamp).
- If the test tone is heard through the system, the issue is likely with the original audio source (microphone, cable, etc.).
Step 4: Move Down the Signal Chain
- If the tone is not heard or is distorted, move the signal injector to the output of the first device and the input of the next device in the chain.
- Listen for the test tone again. If it is present and clean, the problem is with the first device.
- Continue moving the signal injector down the chain, checking the input and output of each component until you no longer hear the test tone or it becomes distorted.
Step 5: Isolate the Problem Component
- Once you have identified the point in the signal chain where the audio fails or becomes distorted, you have isolated the problematic component.
- Test the component’s input and output connections, power supply, and settings to determine the specific issue.
- If necessary, replace or repair the faulty component.
Step 6: Verify the Fix
- After addressing the problem, reconnect the audio system and use the signal injector to recheck the signal path and ensure that the test tone passes cleanly through the entire chain.
- If the issue persists, repeat the troubleshooting process to identify any additional problems.
By following these steps and using a signal injector as a systematic troubleshooting tool, you can quickly and efficiently diagnose issues in audio systems, saving time and effort compared to guesswork or trial-and-error methods.
Frequently Asked Questions (FAQ)
1. Can a signal injector be used to troubleshoot any type of audio equipment?
Yes, a signal injector can be used to troubleshoot a wide variety of audio equipment, including mixers, preamps, amplifiers, effects processors, speakers, and more. As long as the device has an accessible input and output, a signal injector can be used to trace the audio path and isolate issues.
2. What is the difference between a signal injector and a signal tracer?
A signal injector generates a test tone that is fed into an audio system to trace the signal path from the input to the output. A signal tracer, on the other hand, is used to audibly monitor the presence and quality of an audio signal at various points in the system, helping to pinpoint where the signal is lost or degraded. Some advanced signal injectors include a microphone input, allowing them to also function as signal tracers.
3. What frequency is typically used for the test tone in a signal injector?
The most common test tone frequency used in signal injectors is 1 kHz (1,000 Hz). This frequency was chosen because it falls within the midrange of human hearing, making it easy to distinguish from background noise and suitable for testing a wide range of audio equipment. Some signal injectors offer multiple frequency options to check the response of equipment across different frequency ranges.
4. Can a signal injector be used to diagnose issues with digital audio systems?
While signal injectors are primarily designed for use with analog audio systems, they can still be helpful in troubleshooting certain aspects of digital audio setups. For example, a signal injector can be used to verify the functioning of analog input and output stages on digital mixers, audio interfaces, or converters. However, for issues related to digital signal processing, clocking, or software, more specialized digital troubleshooting tools may be necessary.
5. Are there any safety precautions to keep in mind when using a signal injector?
When using a signal injector, it is important to observe proper safety precautions to avoid damage to the injector or the equipment being tested. Always start with the signal injector’s output level set to its lowest setting and gradually increase it as needed to avoid overloading sensitive inputs. Be cautious when injecting signals into high-gain or high-power stages like preamps or power amplifiers, as excessive levels could cause damage. Additionally, make sure to power off equipment before making or breaking connections to prevent loud pops or shorts.
Conclusion
A signal injector is a valuable troubleshooting tool that every audio technician, musician, or enthusiast should have in their toolkit. By providing a known-good test tone that can be systematically injected into various points of an audio system, a signal injector allows you to quickly and efficiently trace the signal path and isolate problems.
Whether you are working with a basic setup or a complex professional rig, understanding how to use a signal injector can save you significant time and frustration when diagnosing issues with mixers, amplifiers, effects, cables, and more. By following the step-by-step troubleshooting process outlined in this article and keeping the frequently asked questions in mind, you’ll be well-equipped to tackle audio problems with confidence and precision.
So the next time you encounter an issue with your audio equipment, reach for your trusty signal injector and let it guide you to a speedy resolution!


Leave a Reply