What Is a Prototyping Board?
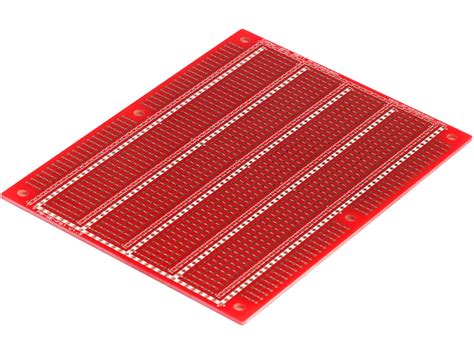
A prototyping board is a rectangular plastic board with a grid of holes. These holes are connected by metal strips underneath the surface, allowing you to insert electronic components and create circuits without soldering. The board is divided into several sections, each serving a specific purpose.
Main Sections of a Prototyping Board
-
Terminal Strips: These are the long horizontal rows of holes on either side of the board. They are typically used for power supply connections (e.g., VCC and GND).
-
Component Strips: The central area of the board consists of several vertical rows of holes. These are used for placing components and creating connections between them.
-
DIP Support: Some prototyping boards have a central gap to accommodate DIP (Dual In-Line Package) chips, such as integrated circuits (ICs).
Advantages of Using a Prototyping Board
1. Quick and Easy Circuit Creation
One of the main advantages of using a prototyping board is the ability to create circuits quickly and easily. You can insert components into the holes and make connections using jumper wires, allowing you to test your circuit design without the need for soldering.
2. Reusability
Prototyping boards are reusable, which means you can easily modify or disassemble your circuit and use the components for other projects. This flexibility is particularly useful when experimenting with different designs or troubleshooting issues.
3. Cost-Effective
Compared to other prototyping methods, such as PCB fabrication or perfboard, prototyping boards are relatively inexpensive. They are an excellent option for beginners or those working on small-scale projects.
4. Educational Value
Prototyping boards are an excellent tool for learning electronics. They allow you to visualize the connections between components and understand how circuits work. Many educational institutions use prototyping boards to teach students the fundamentals of electronics.

How to Use a Prototyping Board
Using a prototyping board is relatively straightforward. Here are the basic steps:
-
Plan Your Circuit: Before starting, it’s essential to have a clear idea of your circuit design. Draw a schematic diagram to visualize the connections between components.
-
Gather Components: Collect all the necessary components for your circuit, such as resistors, capacitors, ICs, and jumper wires.
-
Place Components: Insert the components into the appropriate holes on the prototyping board. Make sure to orient them correctly (e.g., pay attention to the polarity of polarized components).
-
Make Connections: Use jumper wires to connect the components according to your circuit diagram. The metal strips underneath the board will facilitate these connections.
-
Test Your Circuit: Once you have completed the connections, you can power up your circuit and test its functionality. Use a multimeter or oscilloscope to measure voltages, currents, or signals.

Tips for Working with Prototyping Boards
-
Keep It Organized: Use color-coded jumper wires to make your connections more visually apparent. This will help you avoid mistakes and make debugging easier.
-
Use Shorter Wires: Whenever possible, use shorter jumper wires to reduce clutter and minimize the risk of accidental short circuits.
-
Label Your Components: If you’re working on a complex circuit, consider labeling your components or using a marker to indicate their values or functions.
-
Double-Check Connections: Before powering up your circuit, double-check all connections to ensure they are correct and secure.
-
Use a Power Supply with Current Limiting: When testing your circuit, use a power supply with current limiting to protect your components from damage in case of a short circuit.

Common Prototyping Board Sizes and Types
Prototyping boards come in various sizes and configurations to suit different project needs. Here are some common types:
| Type | Description |
|---|---|
| Full-Size | A large board with many holes, suitable for complex circuits |
| Half-Size | A smaller board, ideal for simpler projects or when space is limited |
| Mini | A compact board for very small projects or tight spaces |
| Modular | Boards that can be connected together to create larger circuits |
| PCB-Mounted | Boards designed to be soldered directly onto a PCB for permanent installation |
Frequently Asked Questions (FAQ)
-
Can I reuse a prototyping board?
Yes, prototyping boards are designed to be reusable. You can easily remove components and wires and use them for other projects. -
How do I clean a prototyping board?
To clean a prototyping board, use a soft brush or compressed air to remove any debris from the holes. For stubborn dirt, you can use isopropyl alcohol and a cotton swab to gently clean the board. -
Can I solder components directly to a prototyping board?
While it’s possible to solder components to a prototyping board, it’s not recommended. The main purpose of a prototyping board is to create temporary circuits without soldering. -
What’s the difference between a breadboard and a prototyping board?
“Breadboard” and “prototyping board” are often used interchangeably. However, some people use “breadboard” to refer specifically to the white, solderless boards, while “prototyping board” can include other types of boards used for prototyping. -
Can I use a prototyping board for permanent installations?
Prototyping boards are not designed for permanent installations. For final projects, it’s recommended to create a custom PCB or use a more robust solution like a perfboard or stripboard.
Conclusion
Prototyping boards are an invaluable tool for anyone working with electronics. They offer a quick, easy, and cost-effective way to create temporary circuits and test designs. By understanding the unique features of prototyping boards and following best practices, you can maximize their potential and bring your electronic projects to life.
Whether you’re a beginner learning the basics or an experienced engineer working on complex designs, prototyping boards are an essential part of the electronics toolkit. So grab a board, gather your components, and start exploring the exciting world of electronics prototyping!


Leave a Reply