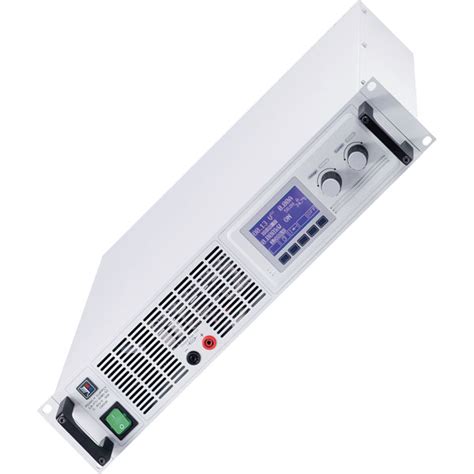
What is a Programmable Power Supply?
A programmable power supply is a versatile piece of equipment that provides adjustable DC Voltage and current to power electronic circuits and devices. Unlike fixed power supplies that offer a constant output, a Programmable PSU allows you to set specific voltage and current levels via user input, typically through knobs, buttons, or a digital interface.
The main features of a programmable power supply include:
– Adjustable voltage output
– Adjustable current limiting
– Overload and short-Circuit Protection
– Precise control and monitoring of output parameters
– Remote programming capabilities (in some models)
Key Components of a Programmable Power Supply Schematic
To understand how a programmable PSU works, let’s break down its schematic into the main functional blocks:
1. Power Transformer and Rectifier
The power transformer steps down the AC mains voltage to a lower level suitable for the PSU. The transformer’s secondary winding is connected to a full-wave bridge rectifier, which converts the AC voltage to pulsating DC. Smoothing capacitors are used to reduce the ripple in the rectified DC voltage.
2. Voltage Regulator
The heart of a programmable PSU is the voltage regulator circuit. It takes the unregulated DC voltage from the rectifier and produces a stable, adjustable DC output voltage. The most common type of voltage regulator used in programmable PSUs is a linear regulator, such as the LM317 or LM338.
The output voltage of the regulator is set by a Voltage Divider network, typically consisting of a fixed resistor and a potentiometer. By adjusting the potentiometer, you can vary the output voltage within the specified range of the regulator.
3. Current Limiting Circuit
To protect the connected load and the PSU itself, a current limiting circuit is incorporated. It works by sensing the output current and comparing it to a user-set limit. If the current exceeds the limit, the circuit reduces the output voltage to maintain the current at the set maximum value.
The current limiting circuit usually employs a high-power transistor, such as a MOSFET, controlled by an op-amp or a dedicated current limiting IC. The user can adjust the current limit using a potentiometer or a digital input.
4. Output Stage and Connectors
The regulated and current-limited DC voltage is then passed through an output stage, which may include additional filtering capacitors and protection diodes. The output is made available via binding posts, banana jacks, or a terminal block, allowing easy connection to the load.
5. Control and Display Circuitry
Modern programmable PSUs often feature digital control and display circuitry. This includes:
– A microcontroller or FPGA for managing the PSU’s functions
– Analog-to-digital converters (ADCs) for measuring output voltage and current
– Digital-to-analog converters (DACs) for setting the voltage and current levels
– A display, such as an LCD or OLED, for showing the output parameters and settings
– Buttons, encoders, or a touchscreen for user input

Designing a Programmable Power Supply Schematic
Now that we’ve covered the main components, let’s dive into the process of designing a programmable PSU schematic.
Step 1: Determine the Specifications
Before starting the design, you need to define the key specifications of your programmable PSU:
– Input voltage range (e.g., 110-240 VAC)
– Output voltage range (e.g., 0-30 VDC)
– Maximum output current (e.g., 0-5 A)
– Desired regulation accuracy and ripple
– Additional features (e.g., remote programming, USB connectivity)
Step 2: Select the Main Components
Based on your specifications, choose the appropriate components for each functional block:
- Power transformer: Ensure it can handle the input voltage range and provide sufficient power for the desired output.
- Rectifier: Use a full-wave bridge rectifier rated for the transformer’s secondary voltage and current.
- Voltage regulator: Select a linear regulator IC that covers the desired output voltage range and can handle the maximum output current. Popular choices include LM317 (1.2-37 V, 1.5 A) and LM338 (1.2-32 V, 5 A).
- Current limiting circuit: Choose a high-power transistor (e.g., MOSFET) and an op-amp or dedicated current limiting IC that can handle the maximum output current.
- Microcontroller or FPGA: Select a device with sufficient I/O pins, ADC/DAC resolution, and processing power for your control and display needs.
Step 3: Design the Schematic
Using a schematic capture software (e.g., KiCad, Eagle, or Altium), create the schematic diagram for your programmable PSU. Start by placing the main components and connecting them according to their datasheets and application notes.
Here’s a simplified schematic example using an LM317 voltage regulator:
[Simplified LM317-based programmable PSU schematic]
In this schematic:
– The LM317 regulates the output voltage, which is set by the R1 and R2 voltage divider. The potentiometer R2 allows for voltage adjustment.
– The current limiting circuit consists of a sense resistor (R_sense), an op-amp (U2), and a MOSFET (Q1). The op-amp compares the voltage across R_sense with the reference voltage set by the potentiometer R3, controlling the MOSFET to limit the current when necessary.
– C1 and C2 are input and output filtering capacitors, while C3 improves the regulator’s stability.
– D1 protects against reverse voltage, and F1 is a fuse for overload protection.
Step 4: Add Control and Display Circuitry
Integrate the microcontroller or FPGA into the schematic, connecting it to the voltage regulator, current limiting circuit, ADCs, DACs, and display. Implement the necessary control algorithms and user interface functions in the microcontroller’s firmware.
Step 5: Simulate and Refine
Use a circuit simulation software (e.g., LTspice or PSpice) to simulate your programmable PSU schematic. Verify that the output voltage and current are within the desired ranges and that the protection mechanisms work as intended. Refine the component values and circuit topology as needed.

Building and Testing Your Programmable Power Supply
Once you have a complete and verified schematic, you can proceed to the PCB design and fabrication stages. Consider the following tips when laying out your PCB:
– Use wide traces for high-current paths to minimize voltage drop and heating.
– Provide adequate heatsinking for the voltage regulator and power transistors.
– Keep sensitive analog and digital circuits separated to minimize noise and interference.
– Include test points and debugging headers for easier troubleshooting.
After assembling the PCB, thoroughly test your programmable PSU:
1. Verify the input voltage range and current consumption.
2. Check the output voltage range and regulation accuracy at different load conditions.
3. Test the current limiting function by short-circuiting the output or connecting a variable load.
4. Validate the user interface and remote programming features, if applicable.

Applications and Benefits of Programmable Power Supplies
Programmable power supplies find use in a wide range of applications, including:
– Electronics prototyping and testing
– Battery charging and management
– Automotive electronics development
– Industrial process control
– Scientific research and instrumentation
The main benefits of using a programmable PSU are:
– Flexibility: The adjustable voltage and current output allows you to power and test various devices with different requirements.
– Precision: High-quality programmable PSUs offer excellent regulation accuracy and low ripple, ensuring stable and clean power delivery.
– Protection: Built-in features like current limiting, short-circuit protection, and Overvoltage Protection safeguard your devices under test and the PSU itself.
– Automation: Programmable PSUs with remote control capabilities enable automated testing and integration into larger systems.
Programmable Power Supply Schematic FAQs
Q1: What is the difference between a linear and switching programmable power supply?
A1: Linear programmable power supplies use a linear voltage regulator to control the output, resulting in lower noise and ripple but limited efficiency. Switching power supplies employ high-frequency switching techniques to regulate the output, offering higher efficiency but potentially more noise.
Q2: Can I use a programmable power supply for battery charging?
A2: Yes, programmable power supplies are often used for battery charging applications. However, ensure that the PSU’s voltage and current ranges are compatible with the battery’s specifications and that proper charging algorithms are implemented.
Q3: How do I select the right voltage regulator for my programmable PSU?
A3: When choosing a voltage regulator, consider the following factors:
– Output voltage range
– Maximum output current
– Dropout voltage
– Thermal dissipation
– Regulation accuracy and ripple
Refer to the regulator’s datasheet and application notes for guidance on selecting the appropriate component for your design.
Q4: What are some safety considerations when working with programmable power supplies?
A4: Always follow these safety guidelines when using programmable power supplies:
– Ensure proper grounding and isolation of the input and output circuits.
– Use appropriate fuses and circuit breakers to protect against overcurrent and short-circuit conditions.
– Wear personal protective equipment (PPE) when working with high voltages or currents.
– Disconnect the power supply from the mains and discharge any capacitors before servicing or modifying the circuit.
Q5: Can I add remote programming capabilities to my programmable PSU?
A5: Yes, you can incorporate remote programming features into your programmable PSU design. This typically involves adding communication interfaces like USB, Ethernet, or GPIB, along with the necessary firmware and software support. Some microcontrollers and FPGAs have built-in communication peripherals that can be leveraged for this purpose.
Conclusion
Programmable power supplies are versatile tools that enable precise control and monitoring of DC voltage and current. By understanding the key components and design principles behind a programmable PSU schematic, you can create a custom power supply tailored to your specific needs.
Remember to follow best practices in schematic design, PCB layout, and safety when building your own programmable PSU. With the right design and implementation, your programmable power supply will be a valuable asset in your electronics projects and experiments.


Leave a Reply