Introduction to Micro:Bit
The BBC Micro:Bit is a pocket-sized, programmable computer designed to make learning and teaching easy and fun. It’s a great tool for beginners to start their coding journey and create amazing projects. In this article, we’ll explore 11 cool Micro:Bit Projects suitable for beginners.
What is a Micro:Bit?
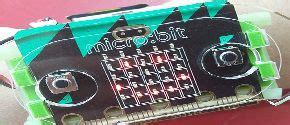
A Micro:Bit is a small, programmable computer that measures 4cm by 5cm. It features a 5×5 LED matrix display, two programmable buttons, an accelerometer, a compass, Bluetooth connectivity, and pins for connecting external components. The Micro:Bit can be programmed using a variety of languages, including Python, JavaScript, and Microsoft Block Editor.

Why Choose Micro:Bit for Beginner Projects?
Micro:Bit is an excellent choice for beginners due to its:
- Simplicity: The Micro:Bit is easy to set up and use, making it accessible to beginners.
- Versatility: With various sensors and connectivity options, the Micro:Bit can be used for a wide range of projects.
- Educational value: Micro:Bit projects help develop essential coding and problem-solving skills.
- Community support: A large community of users and resources is available for guidance and inspiration.

11 Cool Micro:Bit Projects for Beginners
1. Digital Die
Create a digital die that displays a random number between 1 and 6 when the Micro:Bit is shaken.
Required components:
- Micro:Bit
- Battery pack
Steps:
- Open the Microsoft Block Editor.
- Use the
on shakeblock to detect when the Micro:Bit is shaken. - Use the
pick randomblock to generate a random number between 1 and 6. - Display the random number on the LED matrix using the
show numberblock.
2. Temperature Sensor
Create a temperature sensor that displays the current temperature on the LED matrix.
Required components:
- Micro:Bit
- Battery pack
Steps:
- Open the Microsoft Block Editor.
- Use the
foreverblock to continuously read the temperature. - Use the
temperatureblock to get the current temperature. - Display the temperature on the LED matrix using the
show numberblock.
3. Step Counter
Build a step counter that tracks the number of steps taken while walking or running.
Required components:
- Micro:Bit
- Battery pack
Steps:
- Open the Microsoft Block Editor.
- Create a variable called
stepsto store the step count. - Use the
on shakeblock to detect when the Micro:Bit is shaken. - Increment the
stepsvariable by 1 each time the Micro:Bit is shaken. - Display the step count on the LED matrix using the
show numberblock.
4. Rock, Paper, Scissors Game
Create a rock, paper, scissors game that allows the user to play against the Micro:Bit.
Required components:
- Micro:Bit
- Battery pack
Steps:
- Open the Microsoft Block Editor.
- Create variables for the user’s choice and the Micro:Bit’s choice.
- Use the
on button A pressedandon button B pressedblocks to allow the user to select their choice. - Use the
pick randomblock to generate the Micro:Bit’s choice. - Compare the user’s choice with the Micro:Bit’s choice to determine the winner.
- Display the result on the LED matrix using the
show stringblock.
5. Light Sensor
Create a light sensor that displays the current light level on the LED matrix.
Required components:
- Micro:Bit
- Battery pack
Steps:
- Open the Microsoft Block Editor.
- Use the
foreverblock to continuously read the light level. - Use the
light levelblock to get the current light level. - Display the light level on the LED matrix using the
show numberblock.
6. Compass
Build a compass that points to the magnetic north using the LED matrix.
Required components:
- Micro:Bit
- Battery pack
Steps:
- Open the Microsoft Block Editor.
- Use the
foreverblock to continuously read the compass heading. - Use the
compass headingblock to get the current heading. - Display an arrow pointing to the north on the LED matrix using the
show arrowblock.
7. Reaction Time Game
Create a reaction time game that measures how quickly the user can press a button after seeing a visual cue.
Required components:
- Micro:Bit
- Battery pack
Steps:
- Open the Microsoft Block Editor.
- Use the
on startblock to display a countdown on the LED matrix. - After the countdown, display a visual cue (e.g., a smiley face) on the LED matrix.
- Use the
running timeblock to record the time when the visual cue is displayed. - Use the
on button A pressedblock to record the time when the user presses the button. - Calculate the reaction time by subtracting the visual cue time from the button press time.
- Display the reaction time on the LED matrix using the
show numberblock.
8. Music Maker
Create a music maker that plays different tones when the buttons are pressed.
Required components:
- Micro:Bit
- Battery pack
- Headphones or speaker (optional)
Steps:
- Open the Microsoft Block Editor.
- Use the
on button A pressedandon button B pressedblocks to detect button presses. - Use the
play toneblock to play different tones when each button is pressed. - Experiment with different frequencies and durations to create a melody.
9. Motion Detector
Build a motion detector that displays a message on the LED matrix when motion is detected.
Required components:
- Micro:Bit
- Battery pack
- PIR motion sensor
Steps:
- Connect the PIR motion sensor to the Micro:Bit.
- Open the Microsoft Block Editor.
- Use the
foreverblock to continuously read the motion sensor. - Use an
ifblock to check if motion is detected. - If motion is detected, display a message on the LED matrix using the
show stringblock.
10. Scoreboard
Create a scoreboard that keeps track of points for two teams using the buttons.
Required components:
- Micro:Bit
- Battery pack
Steps:
- Open the Microsoft Block Editor.
- Create variables for each team’s score.
- Use the
on button A pressedandon button B pressedblocks to increment the respective team’s score. - Display the scores on the LED matrix using the
show numberblock. - Use the
on shakeblock to reset the scores when the Micro:Bit is shaken.
11. Morse Code Transmitter
Build a Morse code transmitter that allows the user to input a message and transmit it using the LED matrix.
Required components:
- Micro:Bit
- Battery pack
Steps:
- Open the Microsoft Block Editor.
- Create a variable to store the user’s message.
- Use the
on button A pressedblock to allow the user to input characters using Morse code. - Use the
on button B pressedblock to transmit the message. - Display the Morse code on the LED matrix using the
show stringblock.

Micro:Bit Project Ideas: Comparison Table
| Project | Difficulty | Required Components |
|---|---|---|
| Digital Die | Easy | Micro:Bit, Battery pack |
| Temperature Sensor | Easy | Micro:Bit, Battery pack |
| Step Counter | Easy | Micro:Bit, Battery pack |
| Rock, Paper, Scissors | Medium | Micro:Bit, Battery pack |
| Light Sensor | Easy | Micro:Bit, Battery pack |
| Compass | Easy | Micro:Bit, Battery pack |
| Reaction Time Game | Medium | Micro:Bit, Battery pack |
| Music Maker | Easy | Micro:Bit, Battery pack, Headphones/Speaker |
| Motion Detector | Medium | Micro:Bit, Battery pack, PIR motion sensor |
| Scoreboard | Easy | Micro:Bit, Battery pack |
| Morse Code Transmitter | Medium | Micro:Bit, Battery pack |
Frequently Asked Questions (FAQ)
1. What age group are Micro:Bit projects suitable for?
Micro:Bit projects are suitable for a wide age range, typically from 8 years old and up. The simplicity of the Micro:Bit makes it accessible to young learners, while its versatility allows for more advanced projects for older students and adults.
2. Do I need prior coding experience to start with Micro:Bit projects?
No prior coding experience is necessary to start with Micro:Bit projects. The Microsoft Block Editor provides a user-friendly, drag-and-drop interface that allows beginners to create projects without writing any code. As users gain more experience, they can transition to text-based programming languages like Python and JavaScript.
3. Where can I find more Micro:Bit project ideas and tutorials?
There are numerous resources available for Micro:Bit project ideas and tutorials, including:
- The official Micro:Bit website (microbit.org)
- Micro:Bit educational foundation (microbit.org/lessons/)
- Micro:Bit community forums (tech.microbit.org/community/)
- Online learning platforms like Coursera and Udemy
- YouTube tutorials and project videos
4. Can I use the Micro:Bit with other hardware components?
Yes, the Micro:Bit can be connected to various external components using its pins. These components include sensors, motors, servos, and displays. Combining the Micro:Bit with other hardware components allows for more advanced and interactive projects.
5. Are there any limitations to what I can create with a Micro:Bit?
While the Micro:Bit is a versatile tool, it does have some limitations due to its size and processing power. Complex projects or those requiring high-speed processing may be more challenging to implement on a Micro:Bit. However, for most beginner and intermediate-level projects, the Micro:Bit is more than capable of delivering an engaging and educational experience.
Conclusion
The BBC Micro:Bit is an excellent tool for beginners to start their coding journey and create fun, interactive projects. With its simplicity, versatility, and educational value, the Micro:Bit offers a wide range of project possibilities. By exploring these 11 cool Micro:Bit projects, beginners can develop essential coding skills and unleash their creativity. As you gain more experience, you can dive into more advanced projects and even combine the Micro:Bit with other hardware components to create unique and innovative solutions.


Leave a Reply