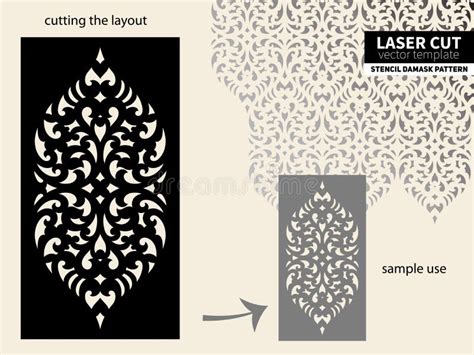
Introduction to Laser-Cut Stencils
Laser-cut stencils have revolutionized the world of art and crafts, providing artists, designers, and hobbyists with a precise and efficient way to create stunning designs on various surfaces. These stencils are made using a laser cutting machine, which burns away unwanted material from a sheet of plastic, metal, or wood, leaving behind a custom-designed pattern. The result is a durable and reusable stencil that can be used for painting, etching, or spraying.
Benefits of Laser-Cut Stencils
- Precision: Laser cutting offers unparalleled accuracy, ensuring that every detail of your design is perfectly captured in the stencil.
- Durability: Laser-cut stencils are made from high-quality materials that can withstand repeated use without warping or wearing out.
- Versatility: These stencils can be used on a wide range of surfaces, including walls, fabric, wood, glass, and more.
- Customization: With laser cutting technology, you can create stencils in any size, shape, or design you desire.
The Process of Creating Laser-Cut Stencils
Designing Your Stencil
The first step in creating a laser-cut stencil is to design your pattern using vector-based software such as Adobe Illustrator or CorelDRAW. When designing your stencil, keep the following tips in mind:
- Use clean, simple lines and shapes to ensure that your design translates well to the stencil format.
- Consider the size of your stencil and the level of detail you want to include. Intricate designs may require a larger stencil size to maintain accuracy.
- If your design includes text, make sure to choose a font that is easily readable and has clear, bold lines.
Choosing the Right Material
Laser-cut stencils can be made from various materials, each with its own advantages and disadvantages. Some popular options include:
| Material | Pros | Cons |
|---|---|---|
| Mylar | – Durable – Flexible – Resistant to solvents and heat |
– Can be expensive – Not biodegradable |
| Acrylic | – Rigid and sturdy – Available in various colors and thicknesses |
– Can crack or break if bent – Not suitable for curved surfaces |
| MDF | – Inexpensive – Easy to cut and paint |
– Not as durable as other materials – Can absorb moisture and warp over time |
Choose the material that best suits your project’s needs and budget.
Laser Cutting Your Stencil
Once you have finalized your design and chosen your material, it’s time to send your file to the laser cutter. If you don’t have access to a laser cutter, many online services and local makerspaces offer laser cutting services at reasonable prices.
When preparing your file for laser cutting, make sure to:
- Convert all text to outlines to avoid font compatibility issues.
- Set your line weights to hairline (0.001 pt) to ensure clean, crisp cuts.
- Remove any unwanted layers or elements from your file to avoid confusion during the cutting process.

Framing Your Laser-Cut Stencil
While laser-cut stencils are ready to use as-is, framing them can add an extra level of durability and style to your project. Framing your stencil also makes it easier to store and transport without damaging the delicate cut-out areas.
Choosing a Frame
When selecting a frame for your laser-cut stencil, consider the following factors:
- Size: Make sure to choose a frame that is slightly larger than your stencil, allowing for a small border around the edges.
- Depth: The frame should be deep enough to accommodate the thickness of your stencil material, as well as any additional backing or support.
- Material: Opt for a frame material that complements your stencil design and the intended use of your project. Common options include wood, metal, and plastic.
Mounting Your Stencil
To mount your laser-cut stencil in a frame, follow these steps:
- Clean your stencil thoroughly to remove any dust or debris from the cutting process.
- If desired, apply a backing material such as felt or cork to the back of your stencil to prevent paint or other media from seeping through.
- Position your stencil in the center of the frame and secure it in place using double-sided tape or a non-permanent adhesive.
- If your frame has a glass or acrylic front, make sure to remove it before using your stencil to avoid any interference with your design.

Using Your Framed Laser-Cut Stencil
Now that your laser-cut stencil is framed and ready to use, it’s time to get creative! Here are some ideas for using your stencil:
- Wall art: Use your stencil to create a unique, eye-catching design on a wall in your home or office.
- Fabric printing: Apply fabric paint or ink through your stencil to create custom-designed clothing, pillows, or curtains.
- Glassware etching: Use etching cream and your stencil to add a personal touch to glass dishes, jars, or windows.
- Woodworking: Incorporate your stencil design into a woodworking project, such as a carved sign or a decorative box.
Remember to always test your stencil on a scrap piece of material before applying it to your final project to ensure that you are happy with the placement and overall look of your design.

Caring for Your Framed Laser-Cut Stencil
To ensure that your framed laser-cut stencil lasts for many projects to come, follow these care tips:
- Clean your stencil after each use with warm, soapy water or a gentle solvent to remove any residual paint or media.
- Store your framed stencil in a cool, dry place away from direct sunlight to prevent warping or fading.
- Handle your stencil with care to avoid bending or breaking the delicate cut-out areas.
- If your stencil becomes damaged, consider having it professionally repaired or laser-cut a new one to maintain the integrity of your design.
Frequently Asked Questions (FAQ)
- Can I use any design for a laser-cut stencil?
-
Yes, you can use any design that can be created in a vector-based software. However, keep in mind that intricate designs with thin lines or small details may be more challenging to cut and use effectively.
-
How long does a laser-cut stencil last?
-
The lifespan of your laser-cut stencil depends on the material it’s made from and how well you care for it. With proper cleaning and storage, a high-quality stencil can last for dozens of uses or more.
-
Can I resize my stencil design after it’s been laser-cut?
-
No, once your design has been laser-cut, it cannot be resized. If you need your stencil in a different size, you’ll need to create a new design file and have it laser-cut again.
-
What is the best way to apply paint or ink through a laser-cut stencil?
-
For best results, use a foam brush or a stencil brush to apply your paint or ink. These brushes have short, dense bristles that help to prevent seepage under the edges of your stencil. Always use a small amount of paint or ink at a time and apply it using a dabbing or stippling motion rather than brushing or rubbing.
-
Can I use my framed laser-cut stencil on multiple surfaces?
- Yes, one of the great things about laser-cut stencils is their versatility. As long as your stencil is made from a durable material and is properly cleaned between uses, you can apply it to a wide range of surfaces, including walls, fabric, wood, glass, and more.
Conclusion
Laser-cut stencils offer a fun and creative way to add personalized designs to a variety of surfaces and projects. By following the tips and techniques outlined in this article, you can create your own custom-designed, framed laser-cut stencils that will last for years to come. Whether you’re an experienced artist or a beginner crafter, these stencils provide endless opportunities for self-expression and creativity. So why not give it a try and see what amazing designs you can come up with?


Leave a Reply