Introduction to Keyboard PCBs
A keyboard PCB (Printed Circuit Board) is the foundation of any custom mechanical keyboard. It serves as the central nervous system, connecting all the components and enabling the keyboard to function properly. Designing and building a keyboard PCB requires a thorough understanding of various factors, including the layout, switch types, microcontroller, and firmware.
In this article, we will dive deep into the world of keyboard PCBs, exploring the design process, the necessary components, and the factors to consider when building your own custom keyboard.
Understanding Keyboard Layouts
Common Keyboard Layouts
Before designing a keyboard PCB, it’s essential to decide on the layout of your keyboard. There are several common layouts to choose from, each with its own advantages and disadvantages. Here are some of the most popular keyboard layouts:
| Layout | Description |
|---|---|
| Full-size | Includes a numeric keypad, function keys, and navigation keys |
| Tenkeyless (TKL) | Removes the numeric keypad for a more compact design |
| 75% | Combines the function keys and navigation keys into a single row |
| 60% | Removes the function keys, navigation keys, and numeric keypad |
| 40% | Ultra-compact layout with minimal keys |
Ergonomic Layouts
In addition to the standard layouts, there are also ergonomic layouts designed to reduce strain on the wrists and hands. These layouts often feature a split design or a curved shape to promote a more natural typing position.
Some popular ergonomic layouts include:
- Ergodox
- Kinesis Advantage
- Dactyl Manuform

Selecting the Right Switches
Switch Types
Mechanical keyboard switches come in various types, each with its own characteristics and feel. The three main categories of switches are:
- Linear switches: Smooth keystroke with no tactile bump or click
- Tactile switches: Distinct bump during the keystroke, but no click
- Clicky switches: Tactile bump and an audible click during the keystroke
Some popular switch brands and models include:
- Cherry MX
- Gateron
- Kailh
- Zealio
Switch Mounting
When designing a keyboard PCB, you must consider the switch mounting method. The two main options are:
- Plate-mounted: Switches are mounted on a separate plate that sits on top of the PCB
- PCB-mounted: Switches are soldered directly onto the PCB
PCB-mounted switches offer a slightly more flexible typing experience, while plate-mounted switches provide a more stable and rigid feel.

Choosing the Microcontroller
Popular Microcontrollers
The microcontroller is the brain of your keyboard, responsible for processing key presses and sending signals to your computer. Some popular microcontrollers used in keyboard PCBs include:
- Arduino Pro Micro
- Teensy 2.0
- STM32
When selecting a microcontroller, consider factors such as the number of I/O pins, processing power, and compatibility with your chosen firmware.
Firmware Options
Firmware is the software that runs on your microcontroller, interpreting key presses and sending the appropriate signals to your computer. There are several firmware options available for keyboard PCBs, including:
- QMK
- TMK
- KLL
QMK is one of the most popular firmware options, offering a wide range of features and customization options.

Designing the PCB
PCB Design Software
To design your keyboard PCB, you’ll need to use specialized PCB design software. Some popular options include:
- KiCad
- Eagle
- Altium Designer
These software packages allow you to create a schematic of your keyboard, lay out the components, and generate the necessary files for manufacturing.
Component Placement
When laying out your PCB, it’s crucial to consider the placement of components. Keep the following factors in mind:
- Switch spacing: Ensure that the switches are properly spaced to accommodate your chosen layout
- Microcontroller position: Place the microcontroller in an easily accessible location for programming and debugging
- Stabilizer placement: If using stabilizers for larger keys, make sure to include the necessary cutouts and mounting points
Trace Routing
Once you’ve placed your components, you’ll need to route the traces that connect them. Consider the following when routing traces:
- Trace width: Use appropriate trace widths to ensure adequate current-carrying capacity and signal integrity
- Trace spacing: Maintain sufficient spacing between traces to avoid crosstalk and short circuits
- Ground planes: Incorporate ground planes to reduce noise and improve signal quality
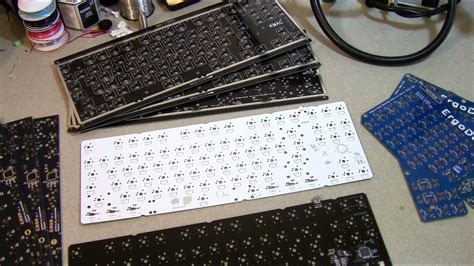
Manufacturing the PCB
PCB Fabrication
After completing your PCB design, you’ll need to have it manufactured. There are several PCB fabrication services available, such as:
- JLCPCB
- PCBWay
- OSH Park
These services will take your design files and produce the physical PCBs based on your specifications.
PCB Assembly
Once you have your PCBs, you’ll need to assemble the components. This process involves:
- Soldering the switches, microcontroller, and other components onto the PCB
- Testing the connections to ensure proper functionality
- Installing the PCB into the keyboard case
Frequently Asked Questions (FAQ)
1. Can I design a keyboard PCB without prior experience?
Designing a keyboard PCB requires some knowledge of electronics and PCB design principles. However, with the right resources and dedication, it is possible to learn the necessary skills. There are numerous online tutorials, forums, and communities dedicated to keyboard PCB design that can help you get started.
2. How much does it cost to design and manufacture a custom keyboard PCB?
The cost of designing and manufacturing a custom keyboard PCB varies depending on factors such as the complexity of the design, the number of PCBs ordered, and the chosen fabrication service. On average, you can expect to spend between $50 and $200 for a small batch of custom keyboard PCBs.
3. What are the advantages of building a custom keyboard PCB?
Building a custom keyboard PCB allows you to create a keyboard that is tailored to your specific needs and preferences. You have complete control over the layout, switch types, and features of your keyboard. Additionally, building your own keyboard can be a rewarding and educational experience.
4. How long does it take to design and manufacture a custom keyboard PCB?
The time required to design and manufacture a custom keyboard PCB depends on your experience level and the complexity of the design. For a beginner, the design process may take several weeks to a few months. Manufacturing times vary depending on the fabrication service, but typically range from 1-4 weeks.
5. Are there any pre-designed keyboard PCBs available?
Yes, there are several pre-designed keyboard PCBs available for purchase. These PCBs are designed for specific layouts and often come with a compatible case and other components. Pre-designed PCBs can be a good option for those who want to build a custom keyboard without designing the PCB from scratch.
Conclusion
Designing and building a custom keyboard PCB is a challenging but rewarding process. By understanding the key factors involved, such as keyboard layouts, switch types, microcontrollers, and PCB design principles, you can create a keyboard that is uniquely tailored to your needs and preferences.
Whether you’re a beginner or an experienced designer, the world of keyboard PCBs offers endless opportunities for customization and experimentation. With the right tools, knowledge, and dedication, you can bring your dream keyboard to life.


Leave a Reply