Introduction to Circuit Board Repair
Circuit boards are the backbone of modern electronic devices. They are responsible for connecting and controlling various components, ensuring the proper functioning of the device. However, like any other electronic component, circuit boards can malfunction or get damaged, leading to the need for repair. In this comprehensive guide, we will discuss the fundamentals of circuit board repair, including common issues, tools required, and step-by-step instructions to help you fix your faulty circuit boards.
Understanding Circuit Boards
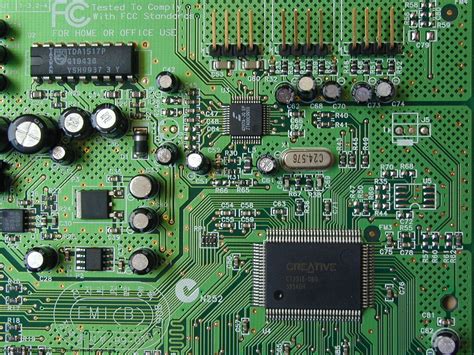
Before diving into the repair process, it is essential to understand the basics of circuit boards. A circuit board, also known as a printed circuit board (PCB), is a flat insulating board with conductive pathways etched onto its surface. These pathways, called traces, connect various electronic components such as resistors, capacitors, and integrated circuits (ICs) to form a complete electrical circuit.
Circuit boards come in different types, depending on their construction and the number of layers:
| Type | Description |
|---|---|
| Single-sided PCB | Conductive traces on one side of the board |
| Double-sided PCB | Conductive traces on both sides of the board |
| Multi-layer PCB | Multiple layers of conductive traces separated by insulating layers |
Common Circuit Board Issues
Circuit boards can experience various issues that may require repair. Some of the most common problems include:
- Broken or damaged traces
- Lifted or missing pads
- Corroded contacts or connectors
- Faulty components (e.g., blown capacitors, damaged ICs)
- Shorts or open circuits
Identifying the specific issue is crucial for determining the appropriate repair approach.
Tools and Materials Required for Circuit Board Repair
To effectively repair a circuit board, you will need the following tools and materials:
- Soldering iron and solder
- Desoldering pump or solder wick
- Flux pen or paste
- Isopropyl alcohol and cleaning swabs
- Tweezers and precision screwdrivers
- Magnifying glass or microscope
- Multimeter
- Replacement components (if necessary)
Ensure that you have a well-ventilated workspace and follow proper safety precautions when handling soldering equipment and cleaning agents.

Step-by-Step Guide to Circuit Board Repair
Step 1: Visual Inspection
Begin by visually inspecting the circuit board for any obvious signs of damage, such as burnt components, lifted pads, or broken traces. Use a magnifying glass or microscope to examine the board closely. Take note of any areas that appear suspicious or require further investigation.
Step 2: Cleaning the Circuit Board
Before proceeding with the repair, clean the circuit board to remove any dirt, dust, or residue that may interfere with the repair process. Use isopropyl alcohol and cleaning swabs to gently clean the affected areas. Be careful not to damage any components or traces during the cleaning process.
Step 3: Testing and Diagnosing
Using a multimeter, test the continuity of the traces and components to identify any shorts or open circuits. Check the resistance and voltage values of the components and compare them with the expected values from the schematic or datasheet. This will help you pinpoint the specific component or area that requires repair.
Step 4: Desoldering and Removing Faulty Components
If a component is identified as faulty, it must be removed from the circuit board. Use a desoldering pump or solder wick to remove the solder from the component’s leads. Apply flux to the solder joints to facilitate the desoldering process. Once the solder is removed, carefully lift the component from the board using tweezers.
Step 5: Repairing Damaged Traces
For broken or damaged traces, you can use one of the following methods to repair them:
- Soldering a jumper wire: Solder a thin wire between the two ends of the broken trace to restore continuity.
- Conductive ink or paint: Apply conductive ink or paint over the damaged trace to re-establish the connection.
- Copper tape: Cut a small piece of copper tape and adhere it over the damaged trace, soldering the ends to ensure a secure connection.
Step 6: Replacing Components
If a component needs to be replaced, ensure that you have the correct replacement part. Pay attention to the component’s orientation and polarity when placing it on the circuit board. Apply a small amount of solder to the component’s leads and the corresponding pads on the board. Use the soldering iron to heat the solder and create a strong bond between the component and the board.
Step 7: Final Testing and Inspection
After completing the repair, thoroughly test the circuit board to ensure that it functions as expected. Use the multimeter to verify the continuity and voltage levels of the repaired areas. Visually inspect the board for any bridged connections or unintended solder joints. If everything checks out, the circuit board repair is complete.

Tips and Best Practices for Circuit Board Repair
- Always wear protective gear, such as safety glasses and gloves, when working with soldering equipment and cleaning agents.
- Use the appropriate temperature setting on your soldering iron for the specific task at hand. Excessive heat can damage components and the circuit board.
- Keep your workspace clean and organized to prevent accidents and ensure efficient repairs.
- Practice proper soldering techniques, such as applying the right amount of solder and ensuring a strong mechanical connection between components and the board.
- Refer to the device’s schematic or datasheet when diagnosing issues and selecting replacement components.

FAQ
-
Can I repair a circuit board without prior experience?
While it is possible to repair a circuit board without prior experience, it is recommended to practice on scrap boards or seek guidance from an experienced technician before attempting repairs on valuable or complex boards. -
How do I identify the polarity of a component?
Most components, such as capacitors and diodes, have polarity markings. For capacitors, the negative lead is usually marked with a “-” sign or a colored stripe. Diodes have a colored band or a notch that indicates the cathode (negative) end. -
What should I do if I accidentally create a solder bridge between two pads?
Use a desoldering pump or solder wick to remove the excess solder. Apply flux to the area and heat the solder bridge with the soldering iron, then quickly use the desoldering tool to remove the molten solder. -
Can I use any type of solder for circuit board repair?
It is recommended to use lead-free solder with a rosin core for circuit board repairs. Lead-free solder is safer for the environment and complies with most modern Electronic Manufacturing standards. -
How do I know if a component is faulty?
A faulty component may show visible signs of damage, such as bulging or leaking capacitors, or burnt resistors. You can also use a multimeter to test the component’s functionality by measuring its resistance, capacitance, or diode forward voltage, and comparing the values with the expected specifications.
Conclusion
Circuit board repair is an essential skill for anyone involved in electronics repair and maintenance. By understanding the basics of circuit boards, identifying common issues, and following the step-by-step repair process, you can successfully fix faulty boards and restore the functionality of electronic devices. Remember to prioritize safety, use the appropriate tools and techniques, and continually practice and refine your skills to become a proficient circuit board repair technician.


Leave a Reply