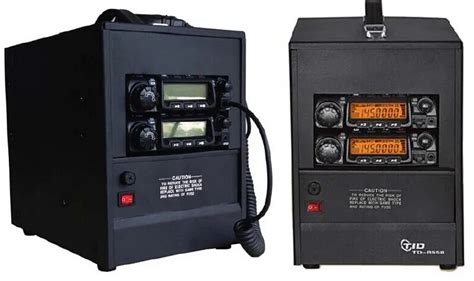
What is a Radio Repeater?
A radio repeater is an electronic device that receives a radio signal and retransmits it at a higher power, allowing the signal to cover a larger area. Repeaters are commonly used in two-way radio systems, such as those used by emergency services, amateur radio operators, and businesses.
Types of Radio Repeaters
There are two main types of radio repeaters:
-
Analog Repeaters: These repeaters work with analog signals and are the most common type. They are simple to set up and maintain, making them a popular choice for many applications.
-
Digital Repeaters: These repeaters work with digital signals and offer advanced features such as improved audio quality, better coverage, and the ability to transmit data. However, they are more complex and expensive than analog repeaters.
Components Needed for Building a Radio Repeater
To build a radio repeater, you will need the following components:
-
Receiver: This component receives the incoming radio signal. It should be compatible with the frequency band you plan to use.
-
Transmitter: This component transmits the amplified radio signal. It should also be compatible with the frequency band you plan to use.
-
Duplexer: This component allows the receiver and transmitter to share the same antenna without interfering with each other.
-
Controller: This component controls the repeater’s functions, such as turning the transmitter on and off, sending ID messages, and managing user access.
-
Power Supply: This component provides power to the repeater. It should be capable of supplying enough power to run all the components.
-
Antenna: This component is used to receive and transmit the radio signal. The type of antenna you need will depend on the frequency band you plan to use and the coverage area you want to achieve.
-
Coaxial Cable: This component connects the antenna to the repeater. It should be of high quality to minimize signal loss.

Tools Needed for Building a Radio Repeater
In addition to the components, you will also need the following tools:
-
Soldering Iron: This tool is used to solder the components together.
-
Multimeter: This tool is used to measure voltage, current, and resistance, which is essential for troubleshooting and ensuring the repeater is working correctly.
-
Oscilloscope: This tool is used to visualize the radio signal and is helpful for debugging and optimizing the repeater’s performance.
-
Frequency Counter: This tool is used to measure the frequency of the radio signal, which is important for ensuring the repeater is operating on the correct frequency.
-
RF Power Meter: This tool is used to measure the power output of the transmitter, which is important for ensuring the repeater is operating within legal limits.

Step-by-Step Guide to Building a Radio Repeater
Step 1: Choose a Frequency Band
The first step in building a radio repeater is to choose a frequency band. The most common frequency bands for repeaters are:
- VHF: 144-148 MHz
- UHF: 430-450 MHz
Choose a frequency band that is compatible with your receiver, transmitter, and antenna.
Step 2: Assemble the Components
Once you have chosen a frequency band, you can start assembling the components. Follow these steps:
- Connect the receiver to the duplexer using a coaxial cable.
- Connect the transmitter to the duplexer using a coaxial cable.
- Connect the controller to the receiver and transmitter using the appropriate cables.
- Connect the power supply to the receiver, transmitter, and controller.
- Connect the antenna to the duplexer using a coaxial cable.
Step 3: Configure the Controller
The next step is to configure the controller. The exact configuration will depend on the specific controller you are using, but in general, you will need to:
- Set the repeater’s callsign and ID message.
- Set the repeater’s operating mode (e.g., carrier-operated relay, time-out timer, etc.).
- Set the repeater’s access control (e.g., CTCSS tone, DCS code, etc.).
- Set the repeater’s courtesy tone and hang time.
Refer to the controller’s manual for specific instructions on how to configure these settings.
Step 4: Test the Repeater
Once you have assembled the components and configured the controller, it’s time to test the repeater. Follow these steps:
- Connect a dummy load to the transmitter’s output to prevent interference with other radio systems.
- Power on the repeater and ensure all components are functioning correctly.
- Use a handheld radio to transmit a signal to the repeater and ensure it is being retransmitted correctly.
- Use an oscilloscope and frequency counter to ensure the repeater is operating on the correct frequency and within legal power limits.
Step 5: Install the Repeater
If the repeater is working correctly, you can now install it at its permanent location. Follow these steps:
- Choose a location that provides good coverage for the area you want to serve.
- Install the antenna at the highest possible point to maximize coverage.
- Run the coaxial cable from the antenna to the repeater, ensuring it is properly grounded and protected from the elements.
- Install the repeater in a weatherproof enclosure and ensure it is properly ventilated.
- Connect the repeater to a reliable power source, such as a battery backup system or generator.

Tips for Maintaining a Radio Repeater
Once your repeater is up and running, it’s important to maintain it properly to ensure reliable operation. Here are some tips:
-
Monitor the repeater regularly: Listen to the repeater’s output regularly to ensure it is working correctly and there are no issues with audio quality or interference.
-
Keep the repeater clean: Regularly clean the repeater and its components to prevent dust and debris from accumulating and causing problems.
-
Check the antenna and coaxial cable: Regularly inspect the antenna and coaxial cable for signs of damage or wear, and replace them if necessary.
-
Perform regular maintenance: Perform regular maintenance on the repeater, such as replacing batteries, checking connections, and updating firmware, to ensure it continues to operate reliably.
FAQs
-
What is the range of a radio repeater?
The range of a radio repeater depends on several factors, including the frequency band, antenna height, and terrain. In general, VHF repeaters can cover distances of up to 50 miles, while UHF repeaters can cover distances of up to 30 miles. -
Can I use any antenna with my repeater?
No, you must use an antenna that is compatible with the frequency band you are using. Using the wrong antenna can result in poor performance or damage to the repeater. -
How much power does a repeater consume?
The power consumption of a repeater depends on the specific components being used, but in general, a VHF or UHF repeater will consume around 50-100 watts of power. -
Do I need a license to operate a repeater?
Yes, in most countries, you need a license to operate a repeater. In the United States, you need an Amateur Radio license to operate a repeater on amateur radio frequencies. -
Can I use a repeater for commercial purposes?
No, in most countries, repeaters operating on amateur radio frequencies cannot be used for commercial purposes. If you need a repeater for commercial use, you will need to obtain a commercial radio license and use commercial frequency bands.
Conclusion
Building a radio repeater can be a complex and challenging project, but with the right components, tools, and knowledge, it is a rewarding and educational experience. By following the steps outlined in this guide and maintaining your repeater properly, you can create a reliable and effective communication system that can serve your community for years to come.
| Component | Description |
|---|---|
| Receiver | Receives the incoming radio signal |
| Transmitter | Transmits the amplified radio signal |
| Duplexer | Allows the receiver and transmitter to share the same antenna |
| Controller | Controls the repeater’s functions |
| Power Supply | Provides power to the repeater |
| Antenna | Receives and transmits the radio signal |
| Coaxial Cable | Connects the antenna to the repeater |
Building a radio repeater is a complex project that requires careful planning, the right components and tools, and a solid understanding of radio technology. However, with the information provided in this guide, you should have a good foundation to start building your own repeater and expanding your communication capabilities.


Leave a Reply