What is a Breadboard and Why is it Important?
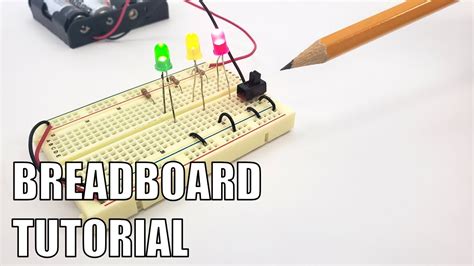
A breadboard is an essential tool for anyone working with electronic circuits. It is a rectangular plastic board with a grid of holes that allows you to quickly and easily prototype and test electronic circuits without the need for soldering. The holes in the breadboard are connected in a specific pattern, allowing you to insert components and wires to create a circuit.
Breadboards are important because they provide a simple and flexible way to build and modify circuits. They allow you to experiment with different components and configurations, and to quickly troubleshoot any issues that may arise. Breadboards are also reusable, which makes them a cost-effective solution for prototyping and testing.
How Does a Breadboard Work?
A breadboard consists of several parts:
-
Terminal Strips: These are the long rows of holes that run along the length of the breadboard. They are typically labeled with letters (A-J) and numbers (1-60). The holes in each row are connected horizontally, allowing you to create connections between components.
-
Power Rails: These are the two rows of holes that run along the top and bottom of the breadboard. They are typically labeled with a red line (+) and a blue line (-), indicating positive and negative power, respectively. The holes in each power rail are connected vertically, allowing you to distribute power to different parts of the circuit.
-
DIP Support: In the center of the breadboard, there is a gap that is designed to accommodate DIP (Dual In-line Package) components, such as integrated circuits (ICs). The holes on either side of the gap are connected vertically, allowing you to connect the pins of the DIP component to other parts of the circuit.
To use a breadboard, you simply insert the leads of your components into the appropriate holes and use jumper wires to make connections between them. For example, if you wanted to connect an LED to a resistor and a battery, you would:
- Insert the positive lead of the LED into a hole in the terminal strip.
- Insert one end of the resistor into a hole in the same row as the LED.
- Insert the other end of the resistor into a hole in the power rail.
- Insert the positive lead of the battery into a hole in the same power rail as the resistor.
- Insert the negative lead of the battery into a hole in the opposite power rail.
- Use a jumper wire to connect the negative lead of the LED to the negative power rail.
| Component | Connection |
|---|---|
| LED | Positive lead in terminal strip, negative lead to negative power rail |
| Resistor | One end in same row as LED, other end in power rail |
| Battery | Positive lead in same power rail as resistor, negative lead in opposite power rail |
By following this process, you can quickly and easily build a basic circuit on a breadboard.
The Benefits of Using a Breadboard
Using a breadboard offers several benefits over other methods of prototyping and testing circuits:
1. Quick and Easy Circuit Building
Breadboards allow you to quickly and easily build circuits without the need for soldering. This means you can prototype and test your circuits much faster than if you were using a permanent soldered board.
2. Reusability
Breadboards are reusable, which means you can use them over and over again for different projects. This makes them a cost-effective solution for prototyping and testing.
3. Flexibility
Breadboards offer a high degree of flexibility when it comes to building circuits. You can easily add, remove, or modify components as needed, which allows you to experiment with different configurations and troubleshoot any issues that may arise.
4. No Soldering Required
Breadboards eliminate the need for soldering, which can be time-consuming and requires specialized equipment. This makes them accessible to a wider range of users, including those who may not have experience with soldering.
5. Ideal for Education
Breadboards are an excellent tool for teaching electronics and circuit design. They provide a hands-on way for students to learn about components, circuits, and troubleshooting in a safe and controlled environment.

Common Breadboard Sizes and Configurations
Breadboards come in a variety of sizes and configurations to suit different needs. Some common sizes include:
-
Half-Size Breadboard: This is a smaller breadboard that typically measures around 3 inches by 2 inches. It is ideal for simple circuits and projects with a limited number of components.
-
Full-Size Breadboard: This is a larger breadboard that typically measures around 6 inches by 2 inches. It offers more space for complex circuits and projects with a larger number of components.
-
Modular Breadboard: This is a larger breadboard that consists of multiple sections that can be connected together to create an even larger prototyping area. It is ideal for very complex circuits and projects that require a lot of space.
In addition to these standard sizes, there are also specialized breadboards available for specific applications, such as breadboards with built-in power supplies or breadboards designed for surface-mount components.

Tips for Using a Breadboard Effectively
To get the most out of your breadboard and ensure successful circuit building, here are some tips to keep in mind:
1. Plan Your Circuit
Before you start building your circuit on the breadboard, take the time to plan it out. Draw a schematic diagram of your circuit and identify the components and connections you will need. This will help you avoid mistakes and ensure a more organized build.
2. Keep Your Connections Short
When making connections on a breadboard, try to keep your jumper wires as short as possible. Longer wires can introduce unwanted resistance and capacitance, which can affect the performance of your circuit.
3. Use Color-Coded Jumper Wires
Using color-coded jumper wires can help you keep track of your connections and make your circuit more organized. For example, you could use red wires for positive connections, black wires for negative connections, and other colors for signal connections.
4. Double-Check Your Connections
Before powering on your circuit, take a moment to double-check all of your connections. Make sure that each component is inserted into the correct holes and that there are no loose or misaligned connections.
5. Test Your Circuit in Sections
If you are building a complex circuit, it can be helpful to test it in sections before connecting everything together. This will allow you to identify and troubleshoot any issues more easily.
By following these tips and taking the time to plan and organize your build, you can ensure a successful and efficient breadboarding experience.

Frequently Asked Questions (FAQ)
1. Can I reuse a breadboard?
Yes, breadboards are designed to be reusable. You can easily remove components and wires from the breadboard and use them for a new project.
2. Do I need to solder components on a breadboard?
No, one of the main advantages of using a breadboard is that it eliminates the need for soldering. Components and wires can be easily inserted and removed from the holes on the breadboard.
3. How many components can I fit on a breadboard?
The number of components you can fit on a breadboard depends on the size of the breadboard and the size of the components. A typical full-size breadboard can accommodate around 30-40 small components, such as resistors and capacitors.
4. Can I use a breadboard for high-voltage circuits?
No, breadboards are not designed for high-voltage circuits. They are intended for low-voltage, low-current applications, typically under 30V and 1A.
5. How do I clean a breadboard?
To clean a breadboard, you can use a soft brush or compressed air to remove any debris or dust from the holes. If the breadboard is particularly dirty, you can use a small amount of isopropyl alcohol on a cotton swab to gently clean the surface. Be sure to let the breadboard dry completely before using it again.
Conclusion
Breadboards are an essential tool for anyone working with electronic circuits. They provide a quick, easy, and flexible way to prototype and test circuits without the need for soldering. By understanding how breadboards work and following best practices for their use, you can ensure a successful and efficient circuit building experience. Whether you are a beginner or an experienced electronics enthusiast, investing in a quality breadboard is a smart choice that will pay off in the long run.


Leave a Reply