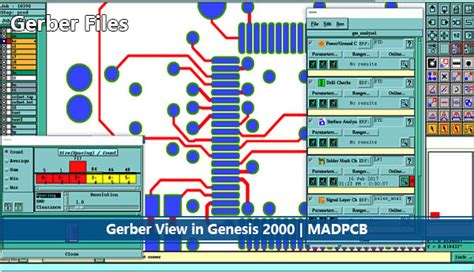
What are Gerber Files?
Gerber files are a standard file format used in the printed circuit board (PCB) industry to describe the layout of a PCB. They contain all the necessary information for PCB fabrication, including the copper layers, solder mask, silkscreen, and drill holes. Gerber files are essential for communicating the design intent to the PCB manufacturer and ensuring that the final product meets the design specifications.
Gerber File Format
The Gerber file format was developed by the Gerber Systems Corp. in the 1960s and has since become the de facto standard for PCB fabrication data exchange. The current version of the Gerber format is known as Extended Gerber or RS-274X.
Gerber files are ASCII text files that use a set of commands to describe the PCB layout. Each command consists of a letter followed by a set of parameters. For example, the command “D01” is used to draw a line, and the parameters specify the start and end points of the line.
Gerber File Extensions
Gerber files use different file extensions to identify the type of data they contain. The most common file extensions are:
| Extension | Description |
|---|---|
| .GTL | Top copper layer |
| .GBL | Bottom copper layer |
| .GTO | Top overlay (silkscreen) |
| .GBO | Bottom overlay (silkscreen) |
| .GTS | Top solder mask |
| .GBS | Bottom solder mask |
| .GML | Mill layer (board outline) |
| .DRL | Drill file |
Why are Gerber Files Important?
Gerber files are critical for PCB fabrication because they provide a standardized way to communicate the PCB design to the manufacturer. Without Gerber files, the manufacturer would have to interpret the design from a variety of different file formats, which could lead to errors and delays in the fabrication process.
Benefits of Using Gerber Files
Using Gerber files offers several benefits, including:
-
Standardization: Gerber files provide a standardized way to describe the PCB layout, which reduces the risk of misinterpretation and errors.
-
Compatibility: Gerber files are compatible with a wide range of PCB design software and manufacturing equipment, making it easy to share the design with different stakeholders.
-
Accuracy: Gerber files contain all the necessary information for PCB fabrication, ensuring that the final product accurately reflects the design intent.
-
Efficiency: Using Gerber files streamlines the PCB fabrication process, reducing lead times and costs.

How to Generate Gerber Files
Generating Gerber files is a straightforward process that can be done using most PCB design software. The specific steps may vary depending on the software you are using, but the general process is as follows:
Step 1: Complete the PCB Design
Before generating Gerber files, you need to complete the PCB design, including the schematic capture, component placement, routing, and design rule checks (DRCs). Make sure that the design meets all the necessary requirements and has been thoroughly reviewed and tested.
Step 2: Set Up the Gerber File Output
In your PCB design software, locate the Gerber file output settings. These settings allow you to specify the parameters for the Gerber files, such as the file format, units, and aperture settings.
Some common settings to consider include:
- File format: Make sure to select the Extended Gerber (RS-274X) format.
- Units: Specify the units for the Gerber files, typically inches or millimeters.
- Aperture settings: Define the aperture list, which specifies the shapes and sizes of the pads and traces.
Step 3: Select the Layers to Output
Next, select the layers that you want to include in the Gerber files. At a minimum, you will need to output the copper layers, solder mask, silkscreen, and drill files. Some PCB manufacturers may require additional layers, such as the board outline or paste mask.
Make sure to assign the appropriate file extensions to each layer (e.g., .GTL for the top copper layer, .GBL for the bottom copper layer, etc.).
Step 4: Generate the Gerber Files
Once you have set up the output settings and selected the layers, you can generate the Gerber files. The software will create a separate file for each layer, which you can then review and verify.
Step 5: Review and Verify the Gerber Files
Before sending the Gerber files to the PCB manufacturer, it’s important to review and verify them to ensure that they accurately represent the PCB design. You can use a Gerber viewer software to open and inspect each file.
Some things to check for include:
- Completeness: Make sure that all the necessary layers are included and have the correct file extensions.
- Accuracy: Check that the copper layers, solder mask, silkscreen, and drill holes match the PCB design.
- Manufacturing constraints: Verify that the design meets the manufacturer’s constraints, such as minimum trace width and spacing, hole sizes, and clearances.
Step 6: Send the Gerber Files to the PCB Manufacturer
Once you have verified the Gerber files, you can send them to the PCB manufacturer for fabrication. Most manufacturers accept Gerber files via email or a web-based upload system.
When sending the files, make sure to include any additional information or specifications that the manufacturer may need, such as the PCB thickness, material, and surface finish.

Best Practices for Generating Gerber Files
To ensure that your Gerber files are accurate and complete, follow these best practices:
-
Use a consistent naming convention: Use a clear and consistent naming convention for your Gerber files to avoid confusion and errors.
-
Include all necessary layers: Make sure to include all the necessary layers in your Gerber files, including the copper layers, solder mask, silkscreen, and drill files.
-
Use the correct file extensions: Assign the appropriate file extensions to each layer to ensure that the manufacturer can identify and process them correctly.
-
Verify the files before sending: Always review and verify the Gerber files before sending them to the manufacturer to catch any errors or discrepancies.
-
Communicate with the manufacturer: If you have any questions or special requirements, communicate them clearly to the manufacturer to avoid misunderstandings and delays.

Frequently Asked Questions (FAQ)
-
What is the difference between Gerber files and ODB++ files?
ODB++ (Open Database Plus Plus) is another file format used for PCB fabrication data exchange. While Gerber files are a collection of separate files for each layer, ODB++ files are a single, unified database that contains all the PCB design data. Some manufacturers prefer ODB++ files because they provide more complete and structured data, but Gerber files are still the most widely used format. -
Can I generate Gerber files from any PCB design software?
Most PCB design software packages, such as Altium Designer, Eagle, and KiCad, support Gerber File Generation. However, the specific steps and settings may vary depending on the software you are using. Consult your software’s documentation or support resources for specific instructions. -
What happens if I send incomplete or incorrect Gerber files to the manufacturer?
If you send incomplete or incorrect Gerber files to the manufacturer, they may not be able to fabricate the PCB correctly. This can result in delays, additional costs, or even a complete redesign. That’s why it’s crucial to review and verify the Gerber files before sending them to the manufacturer. -
How do I know what settings to use when generating Gerber files?
The specific settings for generating Gerber files may vary depending on the PCB manufacturer’s requirements. Most manufacturers provide guidelines or specifications for Gerber file generation on their website or upon request. If in doubt, contact the manufacturer directly to clarify their requirements. -
Can I use Gerber files for PCB assembly?
Gerber files are primarily used for PCB fabrication, not assembly. For PCB assembly, you will typically need to provide additional files, such as the bill of materials (BOM), pick and place file, and assembly drawings. However, the Gerber files are still an essential part of the overall PCB manufacturing process.
Conclusion
Generating accurate and complete Gerber files is a critical step in the PCB fabrication process. By following the steps and best practices outlined in this guide, you can ensure that your Gerber files accurately represent your PCB design and meet the manufacturer’s requirements. This will help you avoid delays, errors, and additional costs in the fabrication process and ensure that your final product meets your design intent.
Remember to always review and verify your Gerber files before sending them to the manufacturer, and don’t hesitate to communicate any questions or special requirements you may have. With a little care and attention to detail, you can generate high-quality Gerber files that will help bring your PCB design to life.


Leave a Reply