Introduction to Walkie-Talkies
A walkie-talkie, also known as a handheld transceiver, is a portable, two-way radio that allows users to communicate wirelessly over short distances. Walkie-talkies are commonly used in various settings, such as outdoor activities, construction sites, and emergency situations.
How Walkie-Talkies Work
Walkie-talkies operate using radio waves to transmit and receive audio signals. When a user speaks into the microphone, the device converts the sound waves into radio waves and transmits them over a specific frequency. The receiving walkie-talkie then converts the radio waves back into sound waves, allowing the other user to hear the message.
Advantages of DIY Walkie-Talkies
Building your own walkie-talkie offers several advantages:
- Customization: You can tailor the device to your specific needs and preferences.
- Cost-effective: Creating a DIY walkie-talkie can be more affordable than purchasing a commercial one.
- Learning experience: Building a walkie-talkie from scratch provides an excellent opportunity to learn about electronics and radio communication.
Components and Tools Required
Before we begin, let’s gather the necessary components and tools for building a DIY walkie-talkie.
Components
| Component | Quantity | Description |
|---|---|---|
| Arduino Nano | 2 | Microcontroller board |
| nRF24L01+ module | 2 | 2.4GHz wireless transceiver |
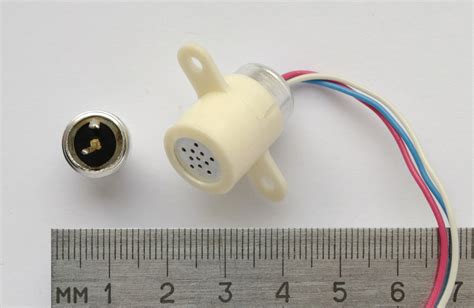
| Electret Microphone | 2 | Audio input device |
| PAM8403 amplifier | 2 | Audio output amplifier |
| 8Ω speaker | 2 | Audio output device |
| Push button | 2 | PTT (Push-to-Talk) button |
| 9V battery | 2 | Power source |
| 9V battery connector | 2 | Connects battery to the circuit |
| Breadboard | 2 | Prototyping platform |
| Jumper wires | As needed | Connecting components |
Tools
- Soldering iron and solder
- Wire cutters and strippers
- Screwdriver
- Multimeter
- Hot glue gun

Circuit Diagram and Assembly
Now that we have all the components and tools, let’s start assembling our DIY walkie-talkie.
Circuit Diagram
[Insert a clear and labeled circuit diagram here]
Step-by-Step Assembly Instructions
- Begin by connecting the nRF24L01+ module to the Arduino Nano according to the following pinout:
| nRF24L01+ | Arduino Nano |
|---|---|
| VCC | 3.3V |
| GND | GND |
| CSN | D10 |
| CE | D9 |
| SCK | D13 |
| MOSI | D11 |
| MISO | D12 |
- Connect the electret microphone to the Arduino Nano:
| Microphone | Arduino Nano |
|---|---|
| VCC | 5V |
| GND | GND |
| Output | A0 |
- Connect the PAM8403 amplifier to the Arduino Nano:
| PAM8403 | Arduino Nano |
|---|---|
| VCC | 5V |
| GND | GND |
| IN+ | D3 |
| IN- | GND |
- Connect the 8Ω speaker to the PAM8403 amplifier:
| Speaker | PAM8403 |
|---|---|
| Positive (+) | OUT+ |
| Negative (-) | OUT- |
- Connect the push button to the Arduino Nano:
| Push Button | Arduino Nano |
|---|---|
| One leg | D2 |
| Other leg | GND |
-
Connect the 9V battery connector to the breadboard, ensuring that the positive and negative terminals are correctly connected to the Arduino Nano’s VIN and GND pins, respectively.
-
Use jumper wires to make the necessary connections between the components on the breadboard.
-
Repeat steps 1-7 for the second walkie-talkie.
Testing and Troubleshooting
After assembling both walkie-talkies, it’s essential to test them and troubleshoot any issues that may arise.
- Ensure that both Arduino Nanos are properly programmed with the walkie-talkie code (provided in the next section).
- Power on both walkie-talkies by connecting the 9V batteries.
- Press the PTT button on one walkie-talkie and speak into the microphone. The other walkie-talkie should receive the audio signal and play it through the speaker.
- Test the walkie-talkies at various distances to determine their effective range.
If you encounter any problems, double-check your connections and ensure that the components are properly seated on the breadboard. Use a multimeter to verify that the correct voltages are being supplied to each component.

Programming the Walkie-Talkie
To make our DIY walkie-talkie functional, we need to program the Arduino Nanos with the appropriate code.
Required Libraries
Before programming the Arduino Nanos, make sure to install the following libraries:
- RF24: Enables communication with the nRF24L01+ module.
- Audio: Provides audio input and output functionality.
Walkie-Talkie Code
[Insert a well-commented and formatted code snippet here]
Upload the code to both Arduino Nanos using the Arduino IDE.

Enclosure Design and Assembly
To protect the components and make the walkie-talkie more user-friendly, we’ll design and create an enclosure.
Enclosure Design Considerations
When designing the enclosure, keep the following factors in mind:
- Size: Ensure that the enclosure is large enough to accommodate all components comfortably.
- Buttons and ports: Include openings for the PTT button, microphone, speaker, and power switch.
- Antenna placement: Consider the position of the nRF24L01+ module’s antenna for optimal signal transmission and reception.
- Durability: Choose materials that can withstand regular use and protect the internal components.
3D Printing or Laser Cutting
You can create the enclosure using either 3D printing or laser cutting, depending on your available resources and preferences.
- Design the enclosure using CAD software, such as Fusion 360 or AutoCAD.
- If 3D printing, export the design as an STL file and print it using a 3D printer. If laser cutting, export the design as a vector file and cut it using a Laser Cutter.
- Assemble the enclosure, ensuring that all components fit securely and the buttons and ports are accessible.
Final Assembly
- Carefully transfer the components from the breadboard to the enclosure, making sure to maintain the correct connections.
- Use hot glue or screws to secure the components in place.
- Close the enclosure and test the walkie-talkie to ensure it functions properly.
Troubleshooting Common Issues
In this section, we’ll address some common issues you may encounter while building and using your DIY walkie-talkie.
No Power
- Check that the 9V battery is properly connected and has sufficient charge.
- Verify that the battery connector is correctly wired to the Arduino Nano’s VIN and GND pins.
- Ensure that the Arduino Nano’s power LED is lit.
No Audio Transmission
- Ensure that the microphone is correctly connected to the Arduino Nano’s analog input pin.
- Check that the PTT button is properly wired and functioning.
- Verify that the nRF24L01+ modules are correctly configured and communicating with each other.
Poor Audio Quality
- Check that the PAM8403 amplifier is properly connected to the Arduino Nano and the speaker.
- Ensure that the speaker is not damaged and is correctly wired to the amplifier.
- Adjust the volume using the potentiometer on the PAM8403 amplifier.
Limited Range
- Ensure that the nRF24L01+ modules’ antennas are properly positioned and not obstructed.
- Check that the modules are configured to use the same channel and data rate.
- Increase the transmission power of the nRF24L01+ modules (consult the datasheet for guidance).
Conclusion
Congratulations on building your own DIY walkie-talkie! By following this step-by-step guide, you’ve gained valuable knowledge about electronics, radio communication, and project assembly. Your new walkie-talkie can be used for various applications, such as outdoor adventures, team communication, or even as a learning tool for others interested in electronics.
Remember to always use your walkie-talkie responsibly and in compliance with local laws and regulations regarding radio communication devices.
FAQ
-
What is the range of the DIY walkie-talkie?
The range of the DIY walkie-talkie depends on several factors, such as the environment, obstacles, and the configuration of the nRF24L01+ modules. In ideal conditions, the range can reach up to 100 meters or more. However, in urban areas or environments with many obstacles, the range may be reduced. -
Can I use different components than those listed in the guide?
While it’s possible to use different components, it’s recommended to stick to the components listed in the guide to ensure compatibility and optimal performance. If you choose to use alternative components, make sure they have similar specifications and adjust the code and wiring accordingly. -
Is it legal to use a DIY walkie-talkie?
The legality of using a DIY walkie-talkie varies depending on your location and the specific frequency you are using. In most countries, the 2.4GHz frequency used by the nRF24L01+ modules is part of the ISM (Industrial, Scientific, and Medical) band, which is generally unlicensed. However, it’s essential to check your local laws and regulations before using your DIY walkie-talkie. -
Can I modify the walkie-talkie code to add more features?
Yes, you can modify the provided code to add more features or customize the functionality of your walkie-talkie. Some possible modifications include adding encryption, implementing a call sign, or integrating a display to show the battery level or signal strength. Keep in mind that any modifications should be thoroughly tested to ensure they do not interfere with the core functionality of the device. -
How can I improve the audio quality of the walkie-talkie?
To improve the audio quality, you can try the following: - Use higher-quality components, such as a better microphone or speaker.
- Implement noise cancellation techniques in the code, such as filtering or digital signal processing.
- Ensure that the wiring is properly shielded to minimize interference from external sources.
- Adjust the volume and gain settings of the PAM8403 amplifier to find the optimal balance between clarity and loudness.


Leave a Reply