Introduction to ESR Meters
An ESR (Equivalent Series Resistance) meter is an essential tool for testing and diagnosing capacitors in electronic circuits. It measures the equivalent series resistance of a capacitor, which is a critical parameter that determines the capacitor’s performance and health. A high ESR value indicates that the capacitor is degrading or has failed, leading to various issues in the circuit, such as power loss, overheating, and signal distortion.
While commercial ESR meters are readily available, building a DIY ESR Meter can be a fun and educational project for electronics enthusiasts. In this article, we will explore everything you need to know about creating your own DIY ESR meter, including its working principle, circuit design, construction, and usage.
Understanding ESR and Its Importance
What is ESR?
Equivalent Series Resistance (ESR) is a measure of the total resistance in series with an ideal capacitor. In reality, capacitors have inherent resistive and inductive components that contribute to their overall impedance. ESR represents the sum of these resistive components, which include:
- The resistance of the capacitor’s leads and terminals
- The resistance of the dielectric material
- The resistance caused by the electrolyte (in electrolytic capacitors)
ESR is frequency-dependent, and its value typically decreases as the frequency increases. However, as capacitors age or degrade, their ESR value tends to increase, leading to poor performance and potential failure.
Why is ESR Important?
Monitoring the ESR of capacitors is crucial for ensuring the proper functioning and reliability of electronic circuits. High ESR values can cause several problems, such as:
- Reduced capacitor efficiency: A high ESR value limits the capacitor’s ability to store and release energy effectively, leading to power loss and reduced circuit performance.
- Increased heat generation: As ESR increases, more energy is dissipated as heat, causing the capacitor and surrounding components to overheat. This can lead to premature failure and reliability issues.
- Voltage ripple and noise: Capacitors with high ESR are less effective at filtering out voltage ripples and noise, which can introduce unwanted disturbances in the circuit’s output.
- Signal distortion: In audio and signal processing circuits, high ESR values can cause signal distortion and loss of fidelity.
By regularly checking the ESR of capacitors, you can identify and replace degraded or failing components before they cause more severe problems in the circuit.

DIY ESR Meter Circuit Design
Basic ESR Meter Circuit
A basic DIY ESR meter circuit typically consists of the following components:
- Signal generator: A sine wave or square wave signal generator is used to apply an AC voltage across the capacitor under test. The frequency of the signal is usually in the range of a few kHz to a few hundred kHz.
- Voltage divider: A voltage divider network, consisting of resistors, is used to measure the voltage drop across the capacitor and a known reference resistor.
- Analog-to-digital converter (ADC): An ADC is used to convert the analog voltage measurements into digital values that can be processed by a microcontroller.
- Microcontroller: A microcontroller, such as an Arduino or PIC, is used to control the signal generator, read the ADC values, and calculate the ESR based on the voltage measurements.
- Display: An LCD or OLED display is used to show the measured ESR value and other relevant information.
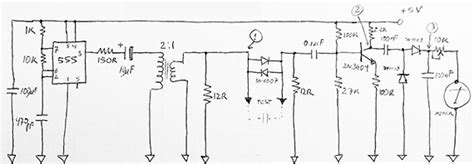
Here’s a simplified schematic of a basic ESR meter circuit:
          +-----------+
          |           |
          |   Signal  |
          |  Generator|
          |           |
          +-----------+
                |
                |
          +-----------+
          |           |
          |  Voltage  |
          |  Divider  |
          |           |
          +-----------+
                |
                |
          +-----------+
          |           |
          |    ADC    |
          |           |
          +-----------+
                |
                |
          +-----------+
          |           |
          |  Micro-   |
          | controller|
          |           |
          +-----------+
                |
                |
          +-----------+
          |           |
          |  Display  |
          |           |
          +-----------+
Advanced ESR Meter Circuit
An advanced DIY ESR meter circuit may include additional features and improvements, such as:
- Automatic frequency selection: The microcontroller can be programmed to automatically select the optimal test frequency based on the capacitor’s value and type.
- Calibration and error compensation: The circuit can include calibration routines and error compensation techniques to improve the accuracy of the ESR measurements.
- Data logging and PC connectivity: The ESR meter can be equipped with a data logging feature and a USB or Bluetooth interface to store and transfer measurement data to a computer for further analysis.
- Battery operation: The circuit can be designed to operate on battery power, making it portable and convenient for field use.

Constructing a DIY ESR Meter
Required Components
To build a DIY ESR meter, you will need the following components:
- Microcontroller (e.g., Arduino Nano or PIC16F series)
- Signal generator IC (e.g., AD9850 or XR2206)
- Analog-to-digital converter (e.g., ADS1115 or built-in ADC in the microcontroller)
- LCD or OLED display (e.g., 16×2 character LCD or SSD1306 OLED)
- Voltage regulator (e.g., LM7805)
- Resistors, capacitors, and other passive components
- PCB or breadboard for circuit assembly
- Enclosure for housing the circuit
Step-by-Step Assembly
- Design the PCB layout or plan the breadboard assembly based on the chosen ESR meter circuit schematic.
- Assemble the voltage regulator circuit to provide a stable power supply for the ESR meter.
- Connect the microcontroller, signal generator, ADC, and display according to the circuit schematic.
- Solder or wire the components together, ensuring proper connections and avoiding short circuits.
- Develop the firmware for the microcontroller, including the signal generation, ADC reading, ESR calculation, and display control routines.
- Upload the firmware to the microcontroller and test the ESR meter’s basic functionality.
- Calibrate the ESR meter using known-value capacitors and adjust the firmware if necessary.
- House the assembled circuit in a suitable enclosure, along with input jacks, switches, and other user interface components.

Using a DIY ESR Meter
Preparing the Capacitor for Testing
Before testing a capacitor with your DIY ESR meter, ensure that the capacitor is properly discharged and removed from the circuit. Follow these steps:
- Disconnect power from the circuit containing the capacitor.
- Use a resistor (e.g., 10kΩ) to discharge the capacitor by connecting it across the capacitor’s terminals for a few seconds.
- Remove the capacitor from the circuit, ensuring that it is not connected to any other components.
Connecting the Capacitor to the ESR Meter
- Identify the positive and negative terminals of the capacitor, if applicable (e.g., for electrolytic capacitors).
- Connect the capacitor to the ESR meter’s test leads, ensuring proper polarity.
- If your ESR meter has a range selection switch or button, set it to the appropriate range based on the capacitor’s value.
Interpreting the Results
Your DIY ESR meter will display the measured ESR value on the LCD or OLED screen. Interpret the results as follows:
- Low ESR (typically less than 1Ω): The capacitor is likely in good condition and suitable for use in the circuit.
- High ESR (typically greater than 10Ω): The capacitor is degraded or faulty and should be replaced to avoid circuit performance issues and potential failures.
Keep in mind that the acceptable ESR range may vary depending on the capacitor’s type, value, and application. Consult the capacitor’s datasheet or reference guides for specific ESR limits.
Troubleshooting and Maintenance
Common Issues and Solutions
- Inaccurate readings:
- Check the calibration of your ESR meter using known-value capacitors and adjust the firmware if necessary.
- Ensure that the test leads are properly connected to the capacitor and the ESR meter.
- Verify that the capacitor is fully discharged before testing.
-
Check for any loose connections or damaged components in the ESR meter circuit.
-
No display or unresponsive ESR meter:
- Check the power supply and ensure that the voltage regulator is providing the correct voltage.
- Verify that all connections between the microcontroller, display, and other components are secure.
-
Review the firmware code for any errors or bugs and re-upload the corrected code.
-
Inconsistent or random readings:
- Ensure that the capacitor is properly connected and not shorted or open.
- Check for any electromagnetic interference (EMI) sources nearby, such as motors or switching power supplies, which may affect the ESR meter’s performance.
- Increase the number of measurement samples and average the results to reduce the impact of noise.
Calibration and Maintenance
To ensure the accuracy and reliability of your DIY ESR meter, perform regular calibration and maintenance:
- Calibrate the ESR meter using known-value capacitors at least once every few months or whenever accuracy is in doubt.
- Clean the test lead probes and connectors periodically to prevent contamination and ensure good electrical contact.
- Store the ESR meter in a dry and dust-free environment to protect the circuit components and display.
- Update the firmware as needed to incorporate any improvements or bug fixes.
FAQ
-
Q: Can a DIY ESR meter be used to test all types of capacitors?
A: DIY ESR meters are generally designed to test electrolytic capacitors, which are most prone to ESR-related issues. While some ESR meters may be able to test other types of capacitors, such as ceramic or film capacitors, the accuracy and reliability may vary. -
Q: How accurate are DIY ESR meters compared to commercial ones?
A: The accuracy of a DIY ESR meter depends on factors such as the quality of components used, the calibration process, and the firmware implementation. With proper design and calibration, a DIY ESR meter can provide sufficiently accurate results for most practical applications. However, commercial ESR meters may offer higher accuracy, reliability, and advanced features. -
Q: Is it safe to test capacitors in-circuit with a DIY ESR meter?
A: It is generally not recommended to test capacitors in-circuit with an ESR meter, as other components in the circuit can affect the measurement results and potentially damage the ESR meter. Always remove the capacitor from the circuit and discharge it before testing. -
Q: Can a DIY ESR meter be used to test high-voltage capacitors?
A: DIY ESR meters are typically designed for low-voltage capacitors (e.g., up to 50V). Testing high-voltage capacitors requires specialized equipment and safety precautions. It is not advisable to use a DIY ESR meter for high-voltage applications. -
Q: How often should I test capacitors with my DIY ESR meter?
A: The frequency of capacitor testing depends on the application and the environment in which the capacitors are used. As a general guideline, test capacitors during routine maintenance, when troubleshooting circuit issues, or if you suspect that a capacitor may be degraded based on visual inspection or circuit performance.
Conclusion
A DIY ESR meter is a valuable tool for electronics enthusiasts, technicians, and engineers who work with capacitors and need to diagnose circuit issues related to capacitor health. By understanding the principles behind ESR measurement, designing and constructing a reliable ESR meter circuit, and following proper testing and maintenance procedures, you can effectively use your DIY ESR meter to identify and replace faulty capacitors, ensuring the optimal performance and longevity of your electronic projects.
Remember to prioritize safety, accuracy, and regular calibration when using your DIY ESR meter, and always refer to the capacitor’s datasheet and application guidelines for specific ESR requirements. With practice and experience, your DIY ESR meter will become an indispensable part of your electronics toolkit, saving you time and effort in troubleshooting and maintaining capacitor-based circuits.


Leave a Reply