Introduction
Summer is a wonderful time of year, but it also brings out pesky flying insects like mosquitoes, flies, and moths. These bugs can ruin outdoor activities and even carry diseases in some cases. One effective way to get rid of flying insects is with a Bug Zapper. You’ve probably seen these devices that attract bugs with a light and then electrocute them when they fly into the electrified grid.
While you can buy commercial bug zappers, it’s also possible to build your own bug zapper circuit as a fun DIY project. In this article, we’ll go over how bug zappers work and provide step-by-step instructions to make your own bug zapping device to eliminate annoying insects around your home or yard.
How Bug Zappers Work
Before we get into building a DIY bug zapper, let’s cover the basics of how these devices function. A bug zapper consists of a few key components:
- Light source (usually UV)
- Wire mesh grid
- High-voltage power supply
- Housing/frame
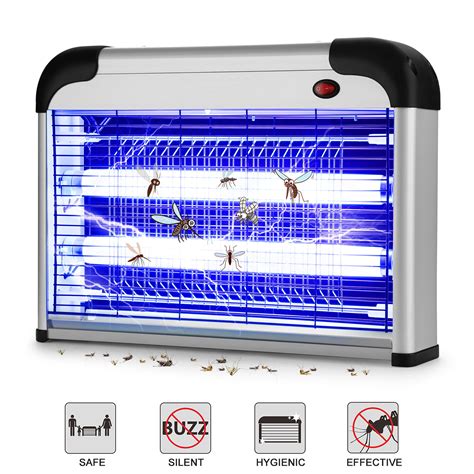
The bug zapper attracts flying insects using a UV light source. Bugs are drawn to the light, thinking it is the moon or sun. When they fly toward the light and touch the electrically charged wire mesh grid that surrounds the light, they are instantly electrocuted, making the iconic “zap” sound.
The wire grid is electrified using a high-voltage transformer or power supply that steps up 120V AC power from an outlet to 2000V or more. This high voltage is needed to generate an electric arc that kills the bugs on contact but is low current so it is not necessarily dangerous to people or pets.

Safety Precautions
Building your own bug zapper involves working with high-voltage electricity, so safety is extremely important. Here are some key precautions to keep in mind:
- Only work on the circuit with the power disconnected
- Use well-insulated wire rated for high voltage
- Discharge any capacitors before handling
- Keep the finished zapper away from children and pets
- Place the zapper in a location where people won’t accidentally touch it
- Regularly clean out dead bugs from the collection tray and ensure it stays dry

Materials Needed
Now that we’ve covered some background and safety tips, let’s go over the components and materials you’ll need to build a simple DIY bug zapper circuit:
| Component | Quantity |
|---|---|
| UV light bulb (20W) | 1 |
| Light bulb socket | 1 |
| High-voltage transformer (7.5kV) | 1 |
| Capacitor (0.1 μF / 1kV) | 1 |
| Diode (1N4005) | 1 |
| Resistor (5.6K / 2W) | 1 |
| Wire mesh (gutter guard) | 1 |
| Extension cord | 1 |
| Project box | 1 |
In addition to the electronic components, you’ll also need some tools and supplies:
- Soldering iron and solder
- Screwdriver
- Drill
- Wire cutters/strippers
- Heat shrink tubing
- Hot glue gun
- Popsicle stick
- Safety glasses

Step-by-Step Build Instructions
Follow these steps to construct your own DIY bug zapper circuit:
-
Cut a hole in the project box for the light socket and mount the socket inside with hot glue.
-
Cut the gutter guard wire mesh to form a square grid that will surround the light. Bend the edges so it can slot into the project box.
-
Wind 40 turns of insulated 22AWG wire around one end of the transformer core. This forms the primary winding. Secure with tape.
-
Wind 2800 turns of 32 awg wire around the opposite end for the secondary. Secure with tape. The total ratio is 70:1.
-
Solder the capacitor, diode, and resistor together following this schematic:
AC input >---||---+---| |---|
                  |        |
                 | |      | |
                  |        |
                 |R|      |S|
                  |        |
                  +--------+
                  |        |
                  +--> Output
-
Solder the primary transformer winding to the extension cord wires. Insulate connections with heat shrink.
-
Solder one end of the secondary to the mesh grid and the other end to the negative side of the capacitor. Insulate connections well.
-
Mount the electronics inside the project box. Use a popsicle stick to keep wires from touching.
-
Install bulb in socket. Secure mesh grid at corners with hot glue.
-
Close project box, plug in, and test! Place a piece of paper near the grid to see if it sparks.
Using Your Bug Zapper
To use your homemade bug zapper, simply plug it in and hang or place it in an outdoor area where flying bugs are a problem at night, at least 4 feet above the ground and away from people and animals. The UV light will attract bugs and zap them when they contact the mesh.
Empty out any dead bugs that accumulate in the housing regularly to keep it working effectively and prevent mold growth. Always unplug the zapper before cleaning it. If the zapper will be exposed to rain, drill a couple small drain holes in the bottom of the housing.
Safety and Maintenance
The high voltage used in bug zappers can pose an electrocution risk, so some common sense precautions are needed:
- Keep the zapper out of reach of kids and pets
- Don’t touch the electrified mesh when plugged in
- Avoid exposure to excessive moisture
- Replace the bulb if it burns out
- Regularly remove dead insects and check that the transformer/electronics are dry
- Store indoors when not in use to prolong life
If the zapper isn’t working, first check for simple issues like a loose connection or dead bulb. Make sure you unplug it and discharge the capacitor before doing any troubleshooting.
FAQ
-
How long do bug zappers last?
A well-made bug zapper should work for at least 5-7 years with proper use and storage. The bulb will likely need replacing every couple seasons. -
What kinds of bugs do zappers kill?
Bug zappers primarily attract and kill light-sensitive flying insects like mosquitoes, flies, moths, and beetles. -
Can you use a bug zapper indoors?
It’s best to avoid using bug zappers indoors, as they are less effective at controlling bugs inside and the zapping noises/smell can be bothersome. -
Do bug zappers pose any fire risk?
The risk is low but it’s best to keep zappers away from flammable materials and liquids. The electrocution of bugs can produce small sparks. -
Are there any environmental concerns with bug zappers?
Bug zappers don’t discriminate and will kill many beneficial insects like pollinators. Consider more targeted options for controlling problem bugs.
Conclusion
With some basic electronics skills, you can build your own bug zapper to help control pesky flying insects around your home. This DIY project can be a fun and affordable alternative to store-bought zappers. Just be sure to follow good safety practices when working with high voltage and using your device.
A bug zapper is most effective as part of an integrated pest management approach along with removing standing water, keeping your yard tidy, and using window screens. While not a total solution for every insect problem, a well-made zapper can definitely help cut down on annoying bugs so you can better enjoy your outdoor spaces on summer nights.


Leave a Reply