Introduction to Arduino UNO ISP Shield
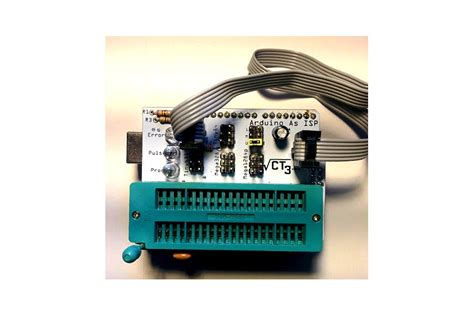
The Arduino UNO ISP Shield is a powerful tool for developers and hobbyists alike, enabling them to program and debug their Arduino projects with ease. This updated PCB version of the shield brings new features and improvements, making it an essential addition to any Arduino enthusiast’s toolkit.
What is an Arduino UNO?
An Arduino UNO is a microcontroller board based on the ATmega328P chip. It has 14 digital input/output pins, 6 analog inputs, a 16 MHz ceramic resonator, a USB connection, a power jack, an ICSP header, and a reset button. The UNO is the most popular and widely used Arduino board, thanks to its versatility and ease of use.
What is an ISP Shield?
An ISP (In-System Programming) Shield is an add-on board that allows you to program and debug your Arduino projects without the need for an external programmer. The shield connects to your Arduino board and provides an ICSP header, which enables you to upload sketches and debug your code directly from your computer.
Features of the Updated Arduino UNO ISP Shield PCB
The updated Arduino UNO ISP Shield PCB comes with several new features and improvements that make it even more versatile and user-friendly. Some of the key features include:
- Improved PCB layout for better signal integrity and reduced noise
- Additional power output options, including 3.3V and 5V
- Integrated USB-to-serial converter for easier programming and debugging
- Compatible with a wide range of Arduino Boards, including the UNO, Mega, and Nano
- Includes a prototyping area for adding custom components and circuits
Comparison with Previous Versions
| Feature | Previous Version | Updated Version |
|---|---|---|
| PCB Layout | Standard | Improved |
| Power Output Options | 5V only | 3.3V and 5V |
| USB-to-Serial Converter | External | Integrated |
| Compatibility | Limited | Wide range |
| Prototyping Area | Not included | Included |
The updated Arduino UNO ISP Shield PCB offers significant improvements over previous versions, making it a more versatile and user-friendly tool for Arduino developers and hobbyists.

Getting Started with the Arduino UNO ISP Shield
To get started with the Arduino UNO ISP Shield, you’ll need the following components:
- Arduino UNO board
- Arduino UNO ISP Shield PCB
- USB cable
- Computer with the Arduino IDE installed
Step 1: Connect the ISP Shield to Your Arduino Board
First, connect the ISP Shield to your Arduino UNO board. The shield should fit snugly on top of the UNO, with the pins aligned correctly. Make sure that the shield is oriented correctly, with the USB port facing the same direction as the UNO’s USB port.
Step 2: Connect the USB Cable
Next, connect the USB cable to the USB port on the ISP Shield and the other end to your computer. The shield’s integrated USB-to-serial converter will handle the communication between your computer and the Arduino board.
Step 3: Open the Arduino IDE
Open the Arduino IDE on your computer. If you don’t have it installed, you can download it from the official Arduino website (https://www.arduino.cc/en/software).
Step 4: Select Your Board and Port
In the Arduino IDE, go to “Tools” > “Board” and select “Arduino UNO.” Then, go to “Tools” > “Port” and select the port that corresponds to your Arduino board. If you’re not sure which port to select, unplug the USB cable and see which port disappears from the list, then plug it back in and select that port.
Step 5: Upload a Sketch
Now that your Arduino UNO ISP Shield is set up and connected, you can start uploading sketches to your Arduino board. You can use one of the built-in examples or create your own sketch. To upload a sketch, click the “Upload” button in the Arduino IDE (the arrow icon in the top-left corner).

Advanced Features and Applications
The Arduino UNO ISP Shield is a versatile tool that can be used for a wide range of applications. Here are some advanced features and applications to explore:
In-Circuit Debugging
One of the most powerful features of the ISP Shield is its ability to perform in-circuit debugging. This allows you to pause the execution of your code at specific points and examine the values of variables and registers. To use this feature, you’ll need to install a debugger, such as the AVR Dragon or the Atmel-ICE.
Custom Circuit Design
The ISP Shield includes a prototyping area that allows you to add custom components and circuits to your Arduino projects. This can be useful for adding sensors, actuators, or other peripherals that aren’t included on the Arduino board itself. To use the prototyping area, simply solder your components to the available pins and connect them to the appropriate pins on the Arduino board.
Multiple Power Output Options
The updated ISP Shield PCB includes multiple power output options, including 3.3V and 5V. This can be useful for powering external components that require different voltage levels than the Arduino board itself. To use these power output options, simply connect your components to the appropriate pins on the shield.
Compatibility with Other Arduino Boards
While the ISP Shield is designed specifically for the Arduino UNO, it is also compatible with a wide range of other Arduino boards, including the Mega and Nano. To use the shield with these boards, simply connect it to the appropriate pins and follow the same setup process as described above.

Troubleshooting and FAQs
1. My Arduino board isn’t recognized by my computer. What should I do?
If your Arduino board isn’t recognized by your computer, try the following steps:
- Make sure that the USB cable is securely connected to both the ISP Shield and your computer.
- Check that you have selected the correct board and port in the Arduino IDE.
- Try using a different USB cable or USB port on your computer.
- Check that your Arduino board is properly powered (either through the USB cable or an external power supply).
2. I’m getting an error message when I try to upload a sketch. What could be causing this?
There are several possible reasons why you might be getting an error message when uploading a sketch:
- Make sure that you have selected the correct board and port in the Arduino IDE.
- Check that your sketch is free of syntax errors and typos.
- Try resetting your Arduino board by pressing the reset button on the board or the ISP Shield.
- Check that your Arduino board is properly powered and connected to your computer.
3. Can I use the ISP Shield with other programming languages besides Arduino?
Yes, the ISP Shield can be used with other programming languages that support serial communication, such as Python or Processing. However, you may need to install additional libraries or drivers to enable communication between your computer and the Arduino board.
4. How do I add custom components to the ISP Shield’s prototyping area?
To add custom components to the ISP Shield’s prototyping area, follow these steps:
- Identify the pins that you want to use for your component.
- Solder your component to the appropriate pins on the prototyping area.
- Connect the other end of your component to the appropriate pins on the Arduino board.
- Update your sketch to use the new component.
5. Can I use the ISP Shield to program other microcontrollers besides the ATmega328P?
While the ISP Shield is designed specifically for the ATmega328P microcontroller used on the Arduino UNO, it can also be used to program other microcontrollers that are compatible with the Arduino IDE. However, you may need to install additional libraries or configure the IDE differently depending on the specific microcontroller you are using.
Conclusion
The Arduino UNO ISP Shield is a powerful and versatile tool that can help take your Arduino projects to the next level. With its improved PCB layout, additional power output options, integrated USB-to-serial converter, and compatibility with a wide range of Arduino boards, the updated ISP Shield PCB is an essential addition to any Arduino enthusiast’s toolkit.
Whether you’re a beginner just getting started with Arduino or an experienced developer looking to explore advanced features like in-circuit debugging and custom circuit design, the ISP Shield has something to offer. So why wait? Get your hands on an Arduino UNO ISP Shield today and start unlocking the full potential of your Arduino projects!


Leave a Reply