What is Arduino?
Arduino is a combination of hardware and software that enables users to create interactive electronic projects. It consists of a physical programmable circuit board (microcontroller) and an Integrated Development Environment (IDE) that runs on your computer, used to write and upload code to the board.
The Arduino platform was designed to be easy to use for beginners, yet flexible enough for advanced users to create complex projects. It has gained immense popularity among hobbyists, students, and professionals due to its simplicity, affordability, and extensive community support.
History of Arduino
The Arduino project was initiated in 2005 by Massimo Banzi and David Cuartielles at the Interaction Design Institute Ivrea in Italy. Their goal was to create a low-cost, easy-to-use tool for students to learn about microcontrollers and interactive design.
The first Arduino board, named “Arduino Uno,” was released in 2005. It was based on the Atmel ATmega168 microcontroller and featured 14 digital input/output pins and 6 analog inputs. Since then, numerous versions and variations of Arduino boards have been released, each with different features and capabilities to cater to various project requirements.

Arduino Hardware
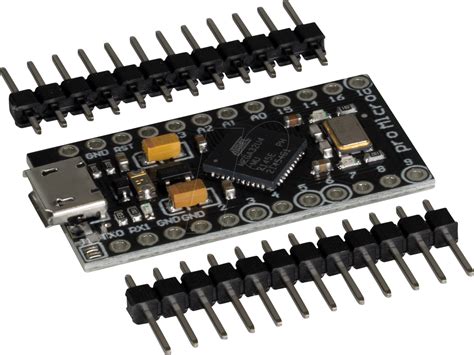
Arduino Boards
Arduino boards are the heart of any Arduino project. They consist of a microcontroller, input/output pins, and other components that allow the board to communicate with the outside world. Some popular Arduino boards include:
| Board Name | Microcontroller | Digital I/O Pins | Analog Input Pins | Flash Memory |
|---|---|---|---|---|
| Arduino Uno | ATmega328P | 14 | 6 | 32 KB |
| Arduino Nano | ATmega328P | 14 | 8 | 32 KB |
| Arduino Mega | ATmega2560 | 54 | 16 | 256 KB |
Shields
Arduino shields are modular circuit boards that can be plugged on top of an Arduino board to extend its capabilities. They provide additional functionalities such as Wi-Fi connectivity, motor control, GPS, and more. Shields make it easy to add complex features to your projects without the need for extensive wiring or soldering.
Sensors and Actuators
Sensors and actuators are essential components in Arduino projects. Sensors allow the Arduino to gather data from the environment, such as temperature, light intensity, or motion. Actuators, on the other hand, enable the Arduino to interact with the physical world by controlling motors, lights, or other devices.
Some commonly used sensors and actuators in Arduino projects include:
- Temperature sensors (e.g., DHT11, DS18B20)
- Light sensors (e.g., LDR, TSL2561)
- Motion sensors (e.g., PIR, ultrasonic)
- Servos and DC motors
- LED lights and displays

Arduino Software
Arduino IDE
The Arduino Integrated Development Environment (IDE) is the software used to write, compile, and upload code to Arduino boards. It provides a simple and intuitive interface for beginners to get started with programming, while also offering advanced features for experienced users.
The Arduino IDE is available for Windows, Mac, and Linux operating systems and can be downloaded for free from the official Arduino website (https://www.arduino.cc/en/software).
Arduino Programming Language
Arduino programs, also known as sketches, are written in a simplified version of C++. The Arduino programming language includes a set of functions and libraries that make it easy to interact with the board’s hardware and perform various tasks.
A typical Arduino sketch consists of two main functions:
-
setup(): This function is called once when the sketch starts. It is used to initialize variables, set pin modes, and perform any other one-time setup tasks. -
loop(): This function is called repeatedly after thesetup()function has completed. It contains the main logic of the sketch and is where most of the program’s functionality is implemented.
Here’s a simple example of an Arduino sketch that blinks an LED connected to pin 13:
void setup() {
  pinMode(13, OUTPUT);
}

void loop() {
  digitalWrite(13, HIGH);
  delay(1000);
  digitalWrite(13, LOW);
  delay(1000);
}
Libraries
Arduino libraries are collections of pre-written code that simplify complex tasks and provide additional functionality to your sketches. They make it easy to interface with various sensors, actuators, and communication protocols without having to write everything from scratch.
Some popular Arduino libraries include:
- LiquidCrystal: For controlling LCD displays
- Servo: For controlling servo motors
- Wire: For I2C communication
- SPI: For SPI communication

Getting Started with Arduino
To get started with Arduino, you will need the following:
- An Arduino board (e.g., Arduino Uno)
- A USB cable to connect the board to your computer
- The Arduino IDE installed on your computer
Once you have these components, follow these steps to create your first Arduino project:
- Connect your Arduino board to your computer using the USB cable.
- Open the Arduino IDE.
- Write your sketch or load an example sketch from the IDE’s built-in examples.
- Select your Arduino board and the correct serial port from the IDE’s “Tools” menu.
- Click the “Upload” button to compile and upload your sketch to the board.
- Observe the results of your sketch on the board or connected components.
Example Arduino Projects
Arduino’s versatility allows you to create a wide range of projects, from simple LED blinkers to complex automation systems. Here are a few example projects to inspire your creativity:
-
Temperature and Humidity Monitor: Use a DHT11 sensor to measure temperature and humidity, and display the readings on an LCD screen.
-
Automatic Plant Watering System: Monitor soil moisture levels using a moisture sensor and control a water pump to automatically water your plants when needed.
-
Remote-Controlled Robot: Build a robot using DC motors and control it remotely using a smartphone or a custom-built remote control.
-
Weather Station: Combine multiple sensors (e.g., temperature, humidity, barometric pressure) to create a comprehensive weather monitoring system.
-
Smart Home Automation: Use Arduino to control lights, appliances, and other devices in your home based on sensor data or user input.
Frequently Asked Questions (FAQ)
-
Do I need prior programming experience to use Arduino?
While prior programming experience can be helpful, it is not necessary to get started with Arduino. The Arduino IDE and programming language are designed to be beginner-friendly, and there are numerous tutorials and resources available to help you learn. -
Can I use Arduino for commercial projects?
Yes, you can use Arduino for commercial projects. The Arduino platform is open-source, which means you are free to use, modify, and distribute the hardware and software for commercial purposes. However, it is essential to adhere to the Arduino trademark guidelines if you plan to sell products based on Arduino. -
What is the difference between Arduino and Raspberry Pi?
Arduino and Raspberry Pi are both popular platforms for DIY electronics projects, but they serve different purposes. Arduino is a microcontroller platform designed for low-level hardware control and interaction, while Raspberry Pi is a single-board computer that runs a full operating system and is more suitable for projects that require higher-level computing, such as web servers or media centers. -
Can I connect multiple sensors and actuators to a single Arduino board?
Yes, you can connect multiple sensors and actuators to a single Arduino board, as long as the board has enough input/output pins and sufficient processing power to handle the required tasks. If you need to connect a large number of components, you may consider using an Arduino board with more pins, such as the Arduino Mega, or using multiplexers to expand the available pins. -
Where can I find help and resources for learning Arduino?
There are numerous resources available for learning Arduino, including: - The official Arduino website (https://www.arduino.cc), which provides tutorials, reference documentation, and a forum for community support.
- Online learning platforms like Coursera, Udemy, and edX, which offer Arduino courses for beginners and advanced users.
- YouTube channels dedicated to Arduino tutorials and projects, such as “Paul McWhorter” and “Andreas Spiess.”
- Arduino project books and magazines, such as “Make: Magazine” and “Arduino Project Handbook.”
Conclusion
Arduino has revolutionized the world of DIY electronics by providing an accessible and versatile platform for creating interactive projects. Its combination of user-friendly hardware and software has empowered individuals from all backgrounds to bring their ideas to life and explore the fascinating world of microcontrollers.
Whether you are a beginner looking to learn about electronics and programming or an experienced maker seeking to create complex projects, Arduino offers endless possibilities for innovation and creativity. With its extensive community support, abundant resources, and ever-expanding ecosystem of boards, shields, and libraries, Arduino is an excellent choice for anyone interested in DIY electronics.
So, grab an Arduino board, dive into the world of microcontrollers, and start building your own innovative projects today!


Leave a Reply