Introduction to Altium Designer
Altium Designer is a powerful electronic design automation (EDA) software that enables engineers and designers to create high-quality printed circuit boards (PCBs). With its user-friendly interface and comprehensive set of tools, Altium Designer has become a popular choice for both beginners and experienced professionals in the electronics industry.
In this tutorial, we will cover the fundamental concepts and features of Altium Designer, providing you with a solid foundation to start designing your own PCBs. Whether you are new to PCB design or looking to switch from another EDA software, this guide will help you navigate through the basics of Altium Designer.
Key Features of Altium Designer
- Schematic Capture
- PCB Layout
- 3D Visualization
- Design Rule Checking (DRC)
- Library Management
- Version Control Integration
Getting Started with Altium Designer
System Requirements
Before installing Altium Designer, ensure that your computer meets the following minimum system requirements:
| Component | Minimum Requirement |
|---|---|
| Operating System | Windows 10 (64-bit) |
| Processor | Intel Core i5 or equivalent |
| RAM | 8 GB |
| Graphics Card | DirectX 11 compatible with 1 GB RAM |
| Hard Drive Space | 10 GB |
Installation Process
- Download the Altium Designer installer from the official website.
- Run the installer and follow the on-screen instructions.
- Agree to the license terms and choose the installation directory.
- Select the components you want to install (e.g., Altium Designer, Altium Vault, etc.).
- Wait for the installation to complete and launch Altium Designer.

Navigating the Altium Designer User Interface
Main Window Layout
The Altium Designer main window consists of several key areas:
- Menu Bar
- Toolbars
- Panels
- Design Window
- Status Bar
Customizing the Interface
Altium Designer allows you to customize the user interface to suit your preferences:
- Rearranging panels by dragging and docking them.
- Showing or hiding toolbars and panels.
- Creating custom keyboard shortcuts.

Creating a New Project
Project Types
Altium Designer supports various project types, including:
- PCB Project
- Schematic Project
- FPGA Project
- Embedded Project
Setting Up a PCB Project
- Click on “File” > “New” > “Project” to open the New Project wizard.
- Select “PCB Project” and choose a project template (e.g., “PCB Project – 2 Layer”).
- Specify the project name, location, and version control settings (if applicable).
- Click “OK” to create the project.

Schematic Design
Creating a New Schematic
- In the Projects panel, right-click on the project name and select “Add New” > “Schematic”.
- Enter a name for the schematic and click “OK”.
Adding Components
- Open the Libraries panel and search for the desired component.
- Drag and drop the component onto the schematic sheet.
- Repeat the process for all required components.
Wiring Components
- Select the “Place Wire” tool from the toolbar or press “P” on the keyboard.
- Click on the first pin to start the wire and click on the second pin to end it.
- Use the “Place Junction” tool or press “J” to create junctions where wires intersect.
Applying Design Rules
- Open the “Design” menu and select “Rules”.
- Create or modify design rules for the schematic, such as component placement, routing, and electrical constraints.
- Validate the schematic against the design rules to identify any violations.
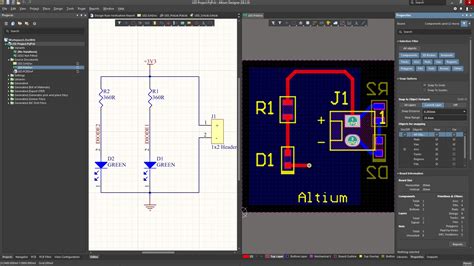
PCB Layout
Creating a PCB from a Schematic
- In the Projects panel, right-click on the schematic and select “Create PCB from Schematic”.
- Configure the layer stack, board shape, and other settings in the PCB Wizard.
- Click “Finish” to generate the PCB layout.
Placing Components
- Use the “Move” tool or press “M” to select and move components on the PCB.
- Rotate and flip components as needed using the “Rotate” and “Flip” commands.
- Arrange components to optimize space and minimize signal paths.
Routing Traces
- Select the “Interactive Routing” tool from the toolbar or press “Shift+R”.
- Click on a pad to start the trace and click on the destination pad to end it.
- Adjust trace width, layer, and other properties using the Properties panel.
Applying Design Rules
- Open the “Design” menu and select “Rules”.
- Create or modify design rules for the PCB, such as clearance, trace width, and via size.
- Run the Design Rule Check (DRC) to verify that the PCB layout complies with the specified rules.
3D Visualization
Generating a 3D Model
- Open the “View” menu and select “3D Layout Mode”.
- Altium Designer will generate a 3D model of the PCB based on the component models and board shape.
- Use the navigation controls to zoom, pan, and rotate the 3D view.
Customizing the 3D View
- Adjust the display settings, such as color scheme and transparency, in the “View Configuration” panel.
- Apply realistic textures and finishes to the components and board surface.
- Export the 3D model in various formats for visualization or manufacturing purposes.
Library Management
Creating Custom Components
- Open the “File” menu and select “New” > “Library”.
- Choose the library type (e.g., Schematic Library, PCB Library) and specify the library name and location.
- Use the symbol and footprint editors to create custom components or modify existing ones.
Managing Libraries
- Use the Libraries panel to organize and manage your component libraries.
- Create library folders to categorize components by type, manufacturer, or project.
- Share libraries with team members using Altium Vault or version control systems.
Collaboration and Version Control
Using Altium Vault
- Set up an Altium Vault server to store and manage design data centrally.
- Check in and check out design files to collaborate with team members and avoid conflicts.
- Use the Vault Explorer to browse and manage design revisions and releases.
Integrating with Version Control Systems
- Configure Altium Designer to work with popular version control systems like Git or SVN.
- Commit changes, create branches, and merge designs to maintain a complete history of your project.
- Resolve conflicts and collaborate effectively with your team members.
Frequently Asked Questions (FAQ)
-
Q: Is Altium Designer available for Mac or Linux?
A: No, Altium Designer is currently only available for Windows operating systems. -
Q: Can I use Altium Designer for free?
A: Altium Designer offers a free trial version that allows you to explore its features for a limited time. For long-term use, you need to purchase a license. -
Q: How can I learn more about Altium Designer?
A: Altium provides extensive documentation, tutorials, and webinars on their website. You can also join the Altium community forums to interact with other users and experts. -
Q: Can I import designs from other EDA software into Altium Designer?
A: Yes, Altium Designer supports importing designs from various formats, including Eagle, KiCad, and OrCAD. -
Q: Does Altium Designer offer simulation capabilities?
A: Yes, Altium Designer includes a mixed-signal circuit simulator called Altium Spice. It allows you to simulate and analyze the behavior of your designs.
Conclusion
Altium Designer is a comprehensive and versatile EDA software that caters to the needs of both novice and experienced PCB designers. With its intuitive interface, powerful features, and extensive library support, Altium Designer streamlines the entire PCB design process from schematic capture to final production.
By following this tutorial, you should now have a solid understanding of the fundamental concepts and workflows in Altium Designer. As you continue to explore and practice, you will discover more advanced features and techniques that will help you create complex and reliable PCB designs.
Remember to take advantage of the rich resources available, including documentation, tutorials, and community support, to further enhance your skills and knowledge in Altium Designer. Happy designing!


Leave a Reply