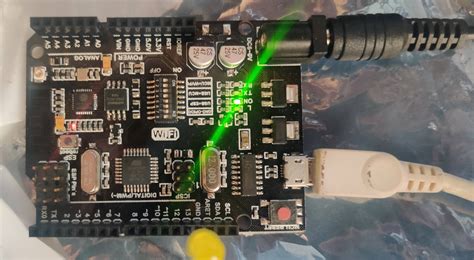
What is the Arduino WiFi Module?
The Arduino WiFi module is a small, low-power device that enables Arduino boards to connect to the internet via WiFi. It is based on the ESP8266 chip, which is a highly integrated WiFi system-on-chip (SoC) that includes a 32-bit microcontroller, WiFi transceiver, and various peripherals. The module communicates with the Arduino board using serial communication and can be easily integrated into Arduino projects.
Features of the Arduino WiFi Module
The Arduino WiFi module offers several key features that make it an attractive choice for IoT projects and other applications that require wireless connectivity:
- WiFi Connectivity: The module supports 802.11 b/g/n WiFi standards, allowing it to connect to most modern WiFi networks.
- Low Power Consumption: The ESP8266 chip is designed for low power consumption, making it suitable for battery-powered projects.
- Integrated TCP/IP Stack: The module includes a built-in TCP/IP stack, which simplifies the process of connecting to the internet and communicating with other devices.
- Serial Communication: The module communicates with the Arduino board using serial communication, making it easy to integrate into existing Arduino projects.
- Programmable: The ESP8266 chip on the module is programmable, allowing you to customize its behavior and add new features.
Choosing the Right Arduino WiFi Module
There are several different Arduino WiFi modules available, each with its own features and specifications. When choosing a module for your project, consider the following factors:
- Compatibility: Ensure that the module is compatible with your Arduino board and any other components you plan to use in your project.
- Range: Consider the range of the module and whether it will be sufficient for your application. Some modules have better range than others.
- Power Consumption: If your project is battery-powered, look for a module with low power consumption to maximize battery life.
- Ease of Use: Some modules are easier to use than others, with better documentation and community support. Consider this when making your choice.
| Module | Compatibility | Range | Power Consumption | Ease of Use |
|---|---|---|---|---|
| ESP8266 | Arduino, NodeMCU | Up to 100m | Low | High |
| ESP32 | Arduino, ESP32 boards | Up to 200m | Low | Medium |
| MKR1000 | Arduino MKR boards | Up to 100m | Low | High |

Getting Started with the Arduino WiFi Module
To get started with the Arduino WiFi module, you’ll need the following:
- An Arduino board
- An Arduino WiFi module
- A USB cable
- A computer with the Arduino IDE installed
Connecting the Module
To connect the Arduino WiFi module to your Arduino board, follow these steps:
- Connect the VCC pin on the module to the 3.3V pin on the Arduino board.
- Connect the GND pin on the module to the GND pin on the Arduino board.
- Connect the TX pin on the module to the RX pin on the Arduino board.
- Connect the RX pin on the module to the TX pin on the Arduino board.
Programming the Module
Once you have connected the module to your Arduino board, you can program it using the Arduino IDE. The process is similar to programming any other Arduino board, but you’ll need to install the necessary libraries and select the correct board and port in the IDE.
Here’s a basic example sketch that connects the module to a WiFi network and prints the IP address:
#include <ESP8266WiFi.h>

const char* ssid = "your_SSID";
const char* password = "your_PASSWORD";

void setup() {
  Serial.begin(115200);
  WiFi.begin(ssid, password);

  while (WiFi.status() != WL_CONNECTED) {
    delay(1000);
    Serial.println("Connecting to WiFi...");
  }

  Serial.println("Connected to WiFi");
  Serial.println(WiFi.localIP());
}

void loop() {
  // your code here
}

Example Projects Using the Arduino WiFi Module
There are countless projects you can create using the Arduino WiFi module. Here are a few examples to get you started:
1. WiFi-Controlled LED
In this project, you’ll use the Arduino WiFi module to control an LED over WiFi. You’ll create a web interface that allows you to turn the LED on and off from any device connected to the same network.
2. Weather Station
Using the Arduino WiFi module and a few sensors, you can create a WiFi-enabled weather station that measures temperature, humidity, and barometric pressure. The data can be sent to a web server or displayed on a local web page.
3. Smart Home Automation
The Arduino WiFi module can be used to create a smart home automation system that allows you to control various devices and appliances remotely. You can use the module to control lights, thermostats, security systems, and more.

Troubleshooting Common Issues
While the Arduino WiFi module is generally easy to use, you may encounter some issues along the way. Here are a few common problems and how to solve them:
- Unable to Connect to WiFi: If the module is unable to connect to your WiFi network, double-check that you have entered the correct SSID and password in your sketch. Also, ensure that the module is within range of your WiFi router.
- Serial Communication Issues: If you’re having trouble communicating with the module over serial, ensure that you have selected the correct board and port in the Arduino IDE. Also, check that the TX and RX pins are connected correctly.
- Unstable Connection: If the module’s connection to your WiFi network is unstable, try moving the module closer to your router or reducing interference from other electronic devices.
Frequently Asked Questions (FAQ)
- Can I use the Arduino WiFi module with any Arduino board?
-
The Arduino WiFi module is compatible with most Arduino boards, but it’s always best to check the specifications of your particular board to ensure compatibility.
-
What is the range of the Arduino WiFi module?
-
The range of the Arduino WiFi module depends on the specific module you are using and the environment in which it is operating. Most modules have a range of around 100 meters in open space, but this can be reduced by obstacles such as walls and other electronic devices.
-
Can I use the Arduino WiFi module to create a web server?
-
Yes, you can use the Arduino WiFi module to create a simple web server that can serve web pages and respond to HTTP requests.
-
How much power does the Arduino WiFi module consume?
-
The power consumption of the Arduino WiFi module varies depending on the specific module and how it is being used. In general, the module consumes around 200mA when transmitting data and 60mA when idle.
-
Can I use the Arduino WiFi module with other programming languages besides Arduino?
- While the Arduino WiFi module is designed to be used with the Arduino programming language, it is possible to use it with other languages such as Python and JavaScript through the use of libraries and frameworks.
Conclusion
The Arduino WiFi module is a powerful tool that opens up a world of possibilities for IoT projects and other applications that require wireless connectivity. By following this comprehensive guide, you should now have a solid understanding of what the module is, how to choose the right one for your needs, and how to get started using it in your projects.
Remember to consider factors such as compatibility, range, power consumption, and ease of use when selecting a module, and don’t hesitate to experiment with different projects and ideas to fully explore the capabilities of this exciting technology.


Leave a Reply