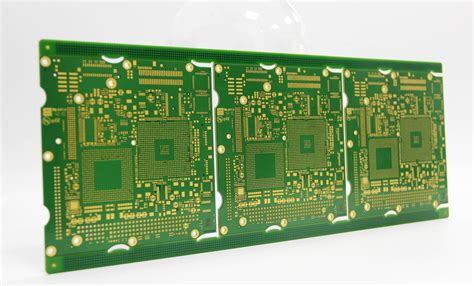
What is PCB Copper Weight?
PCB copper weight refers to the thickness of the copper layer on a printed circuit board (PCB). It is expressed in ounces per square foot (oz/ft²) and represents the amount of copper deposited on the board during the manufacturing process. The copper weight plays a crucial role in determining the electrical and thermal properties of the PCB, as well as its overall durability and reliability.
Standard PCB Copper Weights
The most common PCB copper weights are:
| Copper Weight (oz/ft²) | Thickness (mm) | Thickness (mil) |
|---|---|---|
| 0.5 | 0.0175 | 0.7 |
| 1 | 0.0347 | 1.4 |
| 2 | 0.0694 | 2.8 |
| 3 | 0.1041 | 4.2 |
| 4 | 0.1388 | 5.6 |
1 oz/ft² is the most widely used copper weight for standard PCB applications. However, depending on the specific requirements of the project, other copper weights may be more suitable.
Factors Influencing the Choice of PCB Copper Weight
When selecting the appropriate PCB copper weight for your project, consider the following factors:
Current Carrying Capacity
The current carrying capacity of a PCB is directly proportional to its copper weight. Thicker copper layers can handle higher currents without overheating or suffering from excessive voltage drops. If your design involves high-current applications, such as power electronics or motor control, opt for higher copper weights like 2 oz/ft² or more.
Trace Width and Spacing
The copper weight affects the minimum achievable trace width and spacing on a PCB. Thinner copper layers allow for finer traces and smaller spacing, which is essential for high-density designs with limited board space. However, thinner traces also have higher resistance and may not be suitable for high-current applications.
Signal Integrity
In high-speed digital designs, signal integrity is a critical concern. Thicker copper layers can help reduce signal loss and improve impedance control, leading to better signal quality and reduced electromagnetic interference (EMI). For high-speed applications, consider using higher copper weights or even using a combination of different weights on the same board.
Thermal Management
PCBs with thicker copper layers have better thermal conductivity, which helps dissipate heat more effectively. This is particularly important for power-intensive components like voltage regulators, power transistors, and high-speed processors. By using higher copper weights in these areas, you can improve the overall thermal performance of your PCB and prevent components from overheating.
How to Apply PCB Copper Weight Perfectly
To ensure the optimal application of PCB copper weight in your design, follow these best practices:
1. Determine the Current Requirements
Calculate the maximum current expected to flow through each trace on your PCB. This will help you determine the minimum copper weight required to handle the current safely. Use online calculators or design software to assist with these calculations.
2. Consider the Board Size and Layer Count
The copper weight choice also depends on the overall size of your PCB and the number of layers. For smaller boards with limited space, you may need to use thinner copper layers to accommodate all the necessary traces and components. On the other hand, larger boards or those with multiple layers can benefit from higher copper weights for improved power handling and thermal management.
3. Use Different Copper Weights on the Same Board
In some cases, it may be advantageous to use different copper weights on the same PCB. For example, you can use a higher copper weight for power traces and a lower weight for signal traces. This approach allows you to optimize the board for both current handling and signal integrity while minimizing the overall cost.
4. Collaborate with Your PCB Manufacturer
Work closely with your PCB manufacturer to ensure that your copper weight specifications are feasible and cost-effective. They can provide valuable insights into the manufacturing process and help you make informed decisions based on their experience and capabilities.
5. Test and Validate Your Design
Before finalizing your PCB design, conduct thorough simulations and tests to validate the copper weight choices. Use PCB design software to analyze current density, voltage drops, and thermal performance. If necessary, make adjustments to the copper weight or trace routing to optimize the design.

FAQ
1. What is the most common PCB copper weight?
The most common PCB copper weight is 1 oz/ft², which is suitable for a wide range of applications. It offers a good balance between current handling capacity, trace width, and cost.
2. Can I use different copper weights on the same PCB?
Yes, you can use different copper weights on the same PCB. This approach allows you to optimize the board for various requirements, such as using higher copper weights for power traces and lower weights for signal traces.
3. How does copper weight affect the cost of a PCB?
Generally, PCBs with higher copper weights are more expensive to manufacture due to the increased material cost and processing time. However, the cost difference may be justified if the higher copper weight is necessary for the specific application.
4. What is the minimum copper weight required for high-current applications?
For high-current applications, it is recommended to use a minimum copper weight of 2 oz/ft² or higher. The exact requirement depends on the specific current levels and trace widths involved in the design.
5. How can I determine the appropriate copper weight for my PCB design?
To determine the appropriate copper weight for your PCB design, consider factors such as current requirements, board size, layer count, and signal integrity. Collaborate with your PCB manufacturer and use design software to analyze and validate your choices.
Conclusion
Selecting the appropriate PCB copper weight is crucial for ensuring the optimal performance, reliability, and cost-effectiveness of your electronic device. By understanding the factors that influence copper weight choice and following best practices for application, you can create PCBs that meet your specific requirements while minimizing potential issues. Always work closely with your PCB manufacturer and rely on testing and validation to make informed decisions throughout the design process.


Leave a Reply