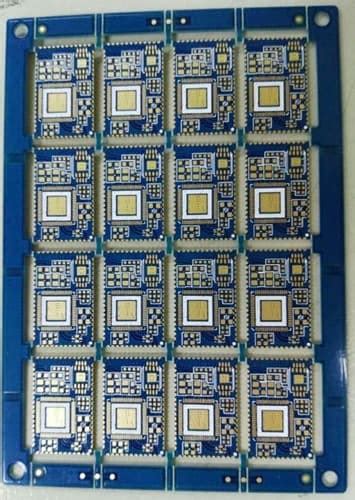
What is PCB cloning?
PCB cloning is the act of creating an identical copy of an existing PCB. This process involves analyzing the original PCB, extracting its design information, and using that information to fabricate a new, identical board. PCB cloning can be done for various reasons, such as:
- Reverse engineering a product to understand its functionality
- Reproducing obsolete or hard-to-find PCBs
- Creating backups of critical PCBs
- Analyzing and improving upon existing designs
Applications of PCB Cloning
PCB cloning finds its applications in various fields, including:
-
Electronics Manufacturing: Companies often use PCB cloning to reproduce boards for legacy systems or to analyze and improve upon competitor products.
-
Aerospace and Defense: In these sectors, PCB cloning is used to create replacements for obsolete or damaged components, ensuring the longevity of critical systems.
-
Research and Development: Engineers and researchers use PCB cloning to study and reverse engineer existing designs, allowing them to learn from and build upon the work of others.
-
Hobby and DIY Projects: Hobbyists and DIY enthusiasts can use PCB cloning to recreate interesting circuits or to replace damaged boards in their projects.

Methods of PCB Cloning
There are several methods to clone a PCB, each with its own advantages and limitations. The choice of method depends on the complexity of the board, the available resources, and the desired level of accuracy. Some common PCB cloning methods include:
1. Visual Inspection and Manual Reproduction
This method involves studying the original PCB using visual inspection tools like magnifiers or microscopes. The observer carefully notes the components, their placement, and the trace routing. They then use this information to manually recreate the PCB design using PCB design software.
Advantages:
– Requires minimal specialized equipment
– Suitable for simple PCBs with large components and wide traces
Limitations:
– Time-consuming and labor-intensive
– Prone to human error, especially for complex designs
– Difficult to accurately reproduce fine details and high-density layouts
2. X-Ray Imaging
X-ray imaging is a non-destructive method that allows for the visualization of the internal layers of a multi-layer PCB. This method uses X-ray machines to capture high-resolution images of the PCB, which can then be used to recreate the design in PCB design software.
Advantages:
– Non-destructive method, leaving the original PCB intact
– Allows for the imaging of internal layers in multi-layer PCBs
– Provides high-resolution images for accurate reproduction
Limitations:
– Requires specialized and expensive X-ray imaging equipment
– May not capture all the necessary details, such as component values or markings
3. Destructive Reverse Engineering
In this method, the original PCB is carefully deconstructed layer by layer. Each layer is then photographed or scanned to create high-resolution images. These images are used to recreate the PCB design in PCB design software.
Advantages:
– Allows for the accurate reproduction of complex, multi-layer PCBs
– Provides detailed information about each layer of the board
Limitations:
– Destructive method, rendering the original PCB unusable
– Requires careful and precise deconstruction to avoid damaging the layers
– Time-consuming and labor-intensive process
4. 3D Scanning
3D scanning involves using specialized scanners to create a detailed, three-dimensional model of the PCB. This model captures the layout, component placement, and trace routing of the board. The 3D model can then be used to generate the necessary files for PCB fabrication.
Advantages:
– Non-destructive method, preserving the original PCB
– Captures intricate details and high-density layouts accurately
– Allows for the creation of a detailed 3D model of the PCB
Limitations:
– Requires specialized and expensive 3D scanning equipment
– May not capture all the necessary information, such as component values or markings
– The resulting 3D model may require additional processing to generate fabrication files

Tools Required for PCB Cloning
To successfully clone a PCB, you’ll need a combination of hardware and software tools. Some essential tools include:
Hardware Tools
- Visual Inspection Tools: Magnifiers, microscopes, and digital cameras for manual reproduction and imaging.
- X-Ray Machines: For capturing high-resolution images of internal layers in multi-layer PCBs.
- Deconstruction Tools: Precision tools like scalpels, tweezers, and pliers for destructive reverse engineering.
- 3D Scanners: Specialized scanners for creating detailed 3D models of the PCB.
Software Tools
- PCB Design Software: Software like KiCad, Eagle, or Altium Designer for recreating the PCB design from the obtained information.
- Image Processing Software: Tools like Photoshop or GIMP for processing and enhancing captured images.
- 3D Modeling Software: Software like SolidWorks or AutoCAD for working with 3D models generated from 3D scanning.

Step-by-Step Guide to PCB Cloning
Now that we’ve covered the basics of PCB cloning, let’s walk through a step-by-step guide on how to clone a PCB using the visual inspection and manual reproduction method.
-
Gather the necessary tools: You’ll need a magnifier or microscope, a digital camera, and PCB design software.
-
Clean the original PCB: Remove any dirt, dust, or debris from the surface of the PCB to ensure a clear view of the components and traces.
-
Photograph the PCB: Use a digital camera to take high-resolution images of the PCB from various angles. Ensure that the images are well-lit and in focus.
-
Inspect the PCB: Use a magnifier or microscope to carefully study the PCB. Note the components, their placement, and the trace routing. Pay attention to any identifying markings on the components.
-
Create a schematic: Using the information gathered from the inspection, create a schematic of the PCB in your PCB design software. This schematic should include all the components and their connections.
-
Design the PCB layout: Using the schematic as a reference, design the PCB layout in your PCB design software. Recreate the component placement and trace routing as closely as possible to the original PCB.
-
Verify the design: Double-check your schematic and PCB layout against the original PCB to ensure accuracy. Make any necessary corrections or adjustments.
-
Generate fabrication files: Once you’re satisfied with your design, generate the necessary fabrication files, such as Gerber files or drill files, for PCB manufacturing.
-
Manufacture the cloned PCB: Send the fabrication files to a PCB manufacturer to produce the cloned PCB.
-
Test and validate: Upon receiving the cloned PCB, assemble the components and test the board to ensure it functions identically to the original PCB.
Challenges and Limitations of PCB Cloning
While PCB cloning is a valuable technique, it does come with its own set of challenges and limitations:
-
Component Identification: Identifying the exact components used on the original PCB can be difficult, especially if they are not clearly marked or labeled.
-
Proprietary or Custom Components: Some PCBs may use proprietary or custom components that are not readily available, making it challenging to create an exact replica.
-
Legal and Ethical Considerations: Cloning a PCB may raise legal and ethical concerns, particularly if the original design is protected by intellectual property rights.
-
Accuracy and Reliability: The accuracy and reliability of the cloned PCB depend heavily on the chosen cloning method and the skill of the person performing the process.
-
Time and Cost: PCB cloning can be a time-consuming and labor-intensive process, especially for complex designs. The cost of specialized equipment and tools can also be a significant barrier.
Best Practices for PCB Cloning
To ensure the best results when cloning a PCB, consider the following best practices:
-
Choose the appropriate cloning method: Select the cloning method that best suits the complexity of the PCB and your available resources.
-
Use high-quality tools and equipment: Invest in reliable and accurate tools and equipment to minimize errors and ensure the best possible results.
-
Document the process: Keep detailed notes and documentation throughout the cloning process, including photographs, schematics, and any observations or measurements.
-
Verify and test extensively: Thoroughly verify your cloned design against the original PCB and perform extensive testing to ensure functionality and reliability.
-
Seek legal advice: If you plan to clone a PCB for commercial purposes, seek legal advice to ensure you are not infringing upon any intellectual property rights.
Frequently Asked Questions (FAQ)
-
Is PCB cloning legal?
The legality of PCB cloning depends on the intended use and the intellectual property rights associated with the original design. Cloning a PCB for personal, educational, or research purposes is generally legal. However, cloning a PCB for commercial purposes without the proper permissions or licenses may be illegal and could result in legal consequences. -
Can I clone a multi-layer PCB using visual inspection?
Visual inspection is not suitable for cloning multi-layer PCBs, as it does not allow for the visualization of internal layers. To clone a multi-layer PCB, you would need to use methods like X-ray imaging or destructive reverse engineering. -
How accurate is PCB cloning?
The accuracy of PCB cloning depends on the chosen method and the skill of the person performing the process. Methods like 3D scanning and destructive reverse engineering can yield highly accurate results, while visual inspection and manual reproduction may be less precise. -
Can I clone a PCB with surface-mounted components?
Yes, PCBs with surface-mounted components can be cloned using various methods. However, the small size and high density of surface-mounted components can make the cloning process more challenging and time-consuming. -
What should I do if I can’t identify a component on the original PCB?
If you cannot identify a component on the original PCB, you may need to consult with experienced engineers or technicians who can help you determine the component’s function and find a suitable replacement. In some cases, you may need to reverse engineer the component or find a compatible alternative.
Conclusion
PCB cloning is a powerful technique that allows for the reproduction of existing PCBs for various purposes, from reverse engineering to obsolete component replacement. By understanding the different methods, tools, and best practices involved in PCB cloning, you can successfully create accurate replicas of PCBs for your projects or applications. However, it’s essential to consider the challenges, limitations, and legal implications of PCB cloning before embarking on the process.
As technology continues to advance, the tools and techniques for PCB cloning will likely evolve, making the process more accessible and efficient. By staying informed about the latest developments in PCB cloning and following best practices, you can unlock the full potential of this valuable technique in your electronics work.


Leave a Reply