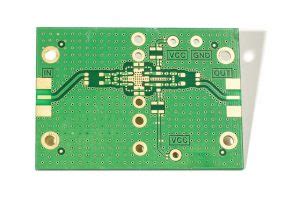
Introduction to 2-Layer PCBs
A 2-layer PCB, also known as a double-sided PCB, is a printed circuit board that consists of two conductive copper layers separated by an insulating substrate material. These layers are referred to as the top layer and the bottom layer. 2-layer PCBs are widely used in various electronic applications due to their simplicity, cost-effectiveness, and reliability.
Advantages of 2-Layer PCBs
- Cost-effective: 2-layer PCBs are less expensive to manufacture compared to multi-layer PCBs, making them an ideal choice for low-complexity designs and budget-constrained projects.
- Easier to design: With only two layers to work with, designing a 2-layer PCB is simpler and faster than designing multi-layer boards.
- Improved signal integrity: 2-layer PCBs offer better signal integrity compared to single-layer boards, as the ground plane helps to reduce electromagnetic interference (EMI) and crosstalk.
- Increased durability: The additional copper layer in a 2-layer PCB provides extra mechanical strength, making the board more durable and less prone to damage.
2-Layer PCB Design Considerations
When designing a 2-layer PCB, there are several important factors to consider to ensure optimal performance and manufacturability.
Component Placement
Proper component placement is crucial for a successful 2-layer PCB design. Follow these guidelines:
- Place components on both sides of the board to maximize space utilization.
- Group related components together to minimize trace lengths and improve signal integrity.
- Consider the component heights and ensure adequate clearance between the top and bottom layers.
- Place sensitive components, such as high-speed devices or analog circuits, away from potential sources of interference.
Routing and Trace Width
Efficient routing and appropriate trace widths are essential for maintaining signal integrity and preventing issues like voltage drops or excessive heat generation.
- Use the top layer primarily for signal traces and the bottom layer for ground and power planes.
- Maintain appropriate trace widths based on the current requirements of the connected components.
- Avoid sharp angles in traces, as they can cause signal reflections and EMI. Use 45-degree angles or curved traces instead.
- Maintain proper spacing between traces to minimize crosstalk and interference.
Vias and Through-Hole Components
Vias and through-hole components are used to connect the top and bottom layers of a 2-layer PCB.
- Use vias strategically to minimize the number of layers changes for signals, reducing the overall board complexity.
- Ensure proper via sizing and spacing to maintain signal integrity and manufacturability.
- Consider the drilling capabilities of your PCB manufacturer when selecting via sizes.
- For through-hole components, ensure the hole sizes are compatible with the component leads and allow for easy soldering.
Ground and Power Planes
Proper design of ground and power planes is essential for minimizing EMI, ensuring stable power delivery, and maintaining signal integrity.
- Use a solid ground plane on the bottom layer to provide a low-impedance return path for signals and reduce EMI.
- Dedicate specific areas of the bottom layer for power planes, ensuring adequate copper pour for current-carrying capacity.
- Use a grid-style ground plane on the top layer, connecting it to the bottom layer ground plane through vias.
- Avoid splitting ground or power planes unnecessarily, as it can create discontinuities and affect signal integrity.

2-Layer PCB Stackup
The stackup of a 2-layer PCB refers to the arrangement of the conductive and insulating layers. A typical 2-layer PCB stackup consists of the following layers:
| Layer | Description |
|---|---|
| Top Layer | Signal traces, components, and solder mask |
| Substrate | Insulating material (e.g., FR-4) |
| Bottom Layer | Ground plane, power planes, and solder mask |
The substrate thickness and the copper weight of the conductive layers can vary depending on the specific application and manufacturing requirements.
Substrate Material
FR-4 is the most commonly used substrate material for 2-layer PCBs. It offers good electrical insulation, mechanical stability, and thermal resistance. Other substrate materials, such as Rogers or Polyimide, may be used for high-frequency or high-temperature applications.
Copper Weight
The copper weight of the conductive layers is typically specified in ounces per square foot (oz/ft²). Common copper weights for 2-layer PCBs include:
- 1 oz/ft² (35 µm): Suitable for low-current applications and general-purpose designs.
- 2 oz/ft² (70 µm): Offers higher current-carrying capacity and improved thermal performance.

2-Layer PCB Manufacturing Process
The manufacturing process for 2-layer PCBs involves several steps:
- CAD Design: The PCB design is created using computer-aided design (CAD) software, generating Gerber files for manufacturing.
- Film Printing: The Gerber files are used to create photographic films or directly expose the PCB layers.
- Etching: The exposed copper layers are chemically etched to remove unwanted copper, leaving only the desired traces and pads.
- Drilling: Holes are drilled through the PCB for vias and component mounting.
- Plating: The drilled holes are plated with copper to establish electrical connections between layers.
- Solder Mask Application: A protective solder mask is applied to the outer layers, exposing only the areas intended for soldering.
- Silkscreen Printing: Component designators, logos, and other markings are printed on the solder mask using silkscreen printing.
- Surface Finish: A surface finish, such as HASL, ENIG, or OSP, is applied to the exposed copper areas to protect them from oxidation and facilitate soldering.
- Electrical Testing: The manufactured PCBs undergo electrical testing to ensure proper functionality and connectivity.

2-Layer PCB Applications
2-layer PCBs find applications in a wide range of electronic devices and systems, including:
- Consumer electronics: Remote controls, toys, calculators, and small appliances.
- Industrial control systems: Sensors, actuators, and control panels.
- Automotive electronics: Lighting systems, infotainment systems, and electronic control units (ECUs).
- Medical devices: Portable monitoring equipment, disposable sensors, and low-complexity medical instruments.
- IoT devices: Simple IoT nodes, sensors, and wearable devices.
Frequently Asked Questions (FAQ)
- What is the minimum trace width and spacing for a 2-layer PCB?
-
The minimum trace width and spacing depend on the PCB manufacturer’s capabilities and the specific design requirements. Typically, a minimum trace width of 0.006 inches (0.15 mm) and a minimum spacing of 0.006 inches (0.15 mm) are achievable for most 2-layer PCB designs.
-
Can I use a 2-layer PCB for high-speed digital designs?
-
While 2-layer PCBs can be used for some high-speed digital designs, they may not be the optimal choice for very high-speed applications. Signal integrity issues, such as crosstalk and EMI, can be more challenging to mitigate in a 2-layer design. For demanding high-speed applications, consider using multi-layer PCBs with dedicated signal and ground layers.
-
How do I choose the right copper weight for my 2-layer PCB?
-
The choice of copper weight depends on the current-carrying requirements of your design and the desired thermal performance. For low-current applications, 1 oz/ft² copper weight is usually sufficient. If your design demands higher current-carrying capacity or improved thermal dissipation, consider using 2 oz/ft² copper weight.
-
What are the limitations of 2-layer PCBs compared to multi-layer PCBs?
-
2-layer PCBs have some limitations compared to multi-layer PCBs:
- Limited routing space and layer count, which can restrict the complexity of the design.
- Reduced signal integrity and EMI performance due to the absence of dedicated signal and ground layers.
- Limited power and ground plane options, which can affect power distribution and noise reduction.
- Reduced thermal dissipation capacity compared to multi-layer boards with internal copper layers.
-
Can I mix surface-mount and through-hole components on a 2-layer PCB?
- Yes, you can mix surface-mount and through-hole components on a 2-layer PCB. This is known as a mixed-technology PCB. When designing a mixed-technology PCB, ensure proper component placement, clearances, and soldering considerations for both types of components.
Conclusion
2-layer PCBs are a cost-effective and reliable solution for a wide range of electronic applications. By understanding the design considerations, stackup, manufacturing process, and limitations of 2-layer PCBs, you can create successful designs that meet your specific requirements.
When designing a 2-layer PCB, pay close attention to component placement, routing, trace widths, vias, and ground and power planes. Choose the appropriate substrate material and copper weight based on your application needs.
While 2-layer PCBs have some limitations compared to multi-layer boards, they remain a popular choice for low-complexity designs and budget-constrained projects. By following best design practices and collaborating with a reputable PCB manufacturer, you can ensure the optimal performance and reliability of your 2-layer PCB.


Leave a Reply