Introduction to SMT Stencils
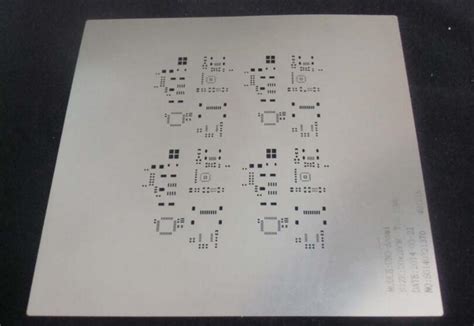
Surface Mount Technology (SMT) has revolutionized the electronics manufacturing industry by enabling the production of smaller, faster, and more efficient electronic devices. One of the critical components in the SMT process is the stencil, which is used to apply solder paste onto the printed circuit board (PCB) pads. The stencil is a thin sheet of metal, usually stainless steel, with laser-cut openings that correspond to the PCB pads. The openings, or holes, in the stencil allow the solder paste to be deposited onto the PCB pads in a precise and consistent manner.
The Importance of SMT Stencil Holes
The quality of the solder paste deposition is directly related to the quality of the stencil holes. If the holes are too small, too large, or misaligned, the solder paste may not be deposited correctly, leading to poor solder joints and potential defects in the final product. Therefore, it is crucial to ensure that the stencil holes are made accurately and consistently.
Methods for Making SMT Stencil Holes
There are several methods for making holes in SMT stencils, each with its own advantages and disadvantages. The most common methods are:
- Laser Cutting
- Chemical Etching
- Electroforming
Laser Cutting
Laser cutting is the most widely used method for making SMT stencil holes. It involves using a high-powered laser to precisely cut the openings in the stencil material. The process is fast, accurate, and can produce complex hole shapes and sizes.
Advantages of Laser Cutting
- High precision and accuracy
- Fast turnaround times
- Ability to create complex hole geometries
- Minimal wear on the stencil material
Disadvantages of Laser Cutting
- Higher initial investment in equipment
- Requires skilled operators
- Limited by the thickness of the stencil material
Chemical Etching
Chemical etching is another method for making SMT stencil holes. It involves using a chemical solution to dissolve the unwanted areas of the stencil material, leaving behind the desired hole pattern. This process is slower than laser cutting but can be more cost-effective for low-volume production.
Advantages of Chemical Etching
- Lower initial investment in equipment
- Can produce fine details and complex hole geometries
- Suitable for thicker stencil materials
Disadvantages of Chemical Etching
- Slower process compared to laser cutting
- Requires careful control of the etching process
- Can be more expensive for high-volume production
Electroforming
Electroforming is a less common method for making SMT stencil holes. It involves creating a master pattern of the desired hole layout and then using it to grow a metal stencil around it through an electroplating process. The master pattern is then removed, leaving behind the stencil with the desired hole pattern.
Advantages of Electroforming
- Can produce very fine details and complex hole geometries
- Suitable for thicker stencil materials
- Durable stencils with long lifespans
Disadvantages of Electroforming
- Slow and expensive process
- Requires specialized equipment and skilled operators
- Not suitable for high-volume production

Factors Affecting SMT Stencil Hole Quality
Several factors can affect the quality of SMT stencil holes, regardless of the manufacturing method used. These factors include:
- Stencil Material
- Stencil Thickness
- Hole Size and Shape
- Hole Placement and Alignment
Stencil Material
The choice of stencil material can significantly impact the quality of the holes and the overall performance of the stencil. The most common materials used for SMT stencils are:
- Stainless Steel: Durable, long-lasting, and suitable for high-volume production
- Nickel: Offers better mechanical properties and corrosion resistance than stainless steel
- Polyimide: A polymer material that is more flexible and suitable for specialized applications
The material selection depends on factors such as the required durability, hole size and shape, and the specific application of the stencil.
Stencil Thickness
The thickness of the stencil directly affects the amount of solder paste deposited onto the PCB pads. Thicker stencils deposit more solder paste, while thinner stencils deposit less. The optimal stencil thickness depends on the specific requirements of the PCB design and the components being used.
Common stencil thicknesses range from 0.1 mm to 0.2 mm (4 to 8 mils). Thinner stencils are suitable for fine-pitch components and smaller hole sizes, while thicker stencils are better for larger components and hole sizes.
Hole Size and Shape
The size and shape of the stencil holes are critical factors in ensuring the proper deposition of solder paste. The hole size must be carefully calculated based on the size of the PCB pads and the desired amount of solder paste.
Common hole shapes include:
- Square: The most common shape, suitable for most SMT applications
- Circular: Used for specialized applications or where better solder paste release is required
- Oblong: A combination of square and circular shapes, used for fine-pitch components
The hole size and shape must be optimized to ensure good solder paste release and to avoid issues such as bridging or insufficient solder paste deposition.
Hole Placement and Alignment
Proper hole placement and alignment are essential for ensuring that the solder paste is deposited accurately onto the PCB pads. Misaligned holes can lead to solder paste bridging or insufficiently filled pads, resulting in poor solder joints and potential defects.
To ensure accurate hole placement and alignment, the stencil design must be carefully created using specialized software tools. The design must take into account factors such as the PCB layout, component placement, and any special requirements for the specific application.

Best Practices for Making SMT Stencil Holes
To ensure the best possible quality of SMT stencil holes, consider the following best practices:
- Use high-quality stencil materials suitable for the specific application
- Choose the appropriate stencil thickness based on the PCB design and component requirements
- Optimize hole sizes and shapes for good solder paste release and deposition
- Ensure accurate hole placement and alignment through careful stencil design
- Work with experienced stencil manufacturers who use state-of-the-art equipment and processes
- Regularly inspect and maintain stencils to ensure consistent performance over time
By following these best practices, you can ensure that your SMT stencils have high-quality holes that contribute to the overall success of your SMT assembly process.

Frequently Asked Questions (FAQ)
- What is the most common method for making SMT stencil holes?
-
The most common method for making SMT stencil holes is laser cutting, which offers high precision, fast turnaround times, and the ability to create complex hole geometries.
-
What factors should I consider when selecting a stencil thickness?
-
When selecting a stencil thickness, consider the size of the PCB pads, the components being used, and the desired amount of solder paste deposition. Thinner stencils are better for fine-pitch components, while thicker stencils are better for larger components.
-
How can I ensure accurate hole placement and alignment in my stencil design?
-
To ensure accurate hole placement and alignment, use specialized software tools to carefully create the stencil design. Take into account factors such as the PCB layout, component placement, and any special requirements for the specific application.
-
What are the advantages of using electroforming to make SMT stencil holes?
-
Electroforming can produce very fine details and complex hole geometries, and is suitable for thicker stencil materials. It also results in durable stencils with long lifespans. However, it is a slow and expensive process that requires specialized equipment and skilled operators.
-
How often should I inspect and maintain my SMT stencils?
- It is recommended to regularly inspect and maintain your SMT stencils to ensure consistent performance over time. The frequency of inspection and maintenance depends on factors such as the volume of production, the complexity of the stencil design, and the specific application. Work with your stencil manufacturer to develop an appropriate maintenance schedule for your stencils.
Conclusion
Making high-quality holes in SMT stencils is a critical aspect of the SMT assembly process. The choice of manufacturing method, stencil material, thickness, hole size and shape, and hole placement and alignment all contribute to the overall quality of the stencil and the success of the solder paste deposition.
By understanding the various methods and factors involved in making SMT stencil holes, and by following best practices for stencil design and maintenance, you can ensure that your SMT assembly process produces high-quality, reliable electronic devices.
As the electronics industry continues to evolve and demand smaller, more complex devices, the importance of SMT stencils and the quality of their holes will only continue to grow. By staying informed and working with experienced stencil manufacturers, you can stay ahead of the curve and ensure the success of your SMT assembly operations.
| Method | Advantages | Disadvantages |
|---|---|---|
| Laser Cutting | High precision, fast turnaround, complex hole geometries | Higher initial investment, requires skilled operators |
| Chemical Etching | Lower initial investment, fine details, thicker materials | Slower process, requires careful control, can be expensive |
| Electroforming | Fine details, thicker materials, durable stencils | Slow and expensive, requires specialized equipment |


Leave a Reply