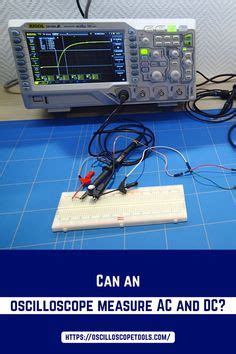
What is an Oscilloscope?
An oscilloscope is an electronic test instrument that graphically displays varying signal voltages as a function of time. It allows you to observe the change of an electrical signal over time, showing signal amplitude, frequency, and other properties. Oscilloscopes are used in various fields, including electronics, engineering, telecommunications, and scientific research.
Key Components of an Oscilloscope
- Display Screen: This is where the waveform is displayed. Modern oscilloscopes often feature color LCD or LED screens.
- Vertical Controls: These controls adjust the vertical scale (voltage) of the displayed waveform.
- Horizontal Controls: These controls adjust the horizontal scale (time) of the displayed waveform.
- Trigger Controls: These controls determine when the oscilloscope starts to display the waveform based on a specified condition.
- Input Channels: These are the connectors where you attach the probes to measure the signals.
Types of Oscilloscopes
There are two main types of oscilloscopes: analog and digital.
Analog Oscilloscopes
Analog oscilloscopes use a cathode-ray tube (CRT) to display the waveform. They directly apply the measured signal voltage to the vertical deflection plates, while the horizontal sweep is controlled by a sawtooth voltage. Analog oscilloscopes are less common today due to the advantages of digital oscilloscopes.
Digital Oscilloscopes
Digital oscilloscopes convert the measured analog signal into digital form using an analog-to-digital converter (ADC). The digitized signal is then processed and displayed on a digital screen. Digital oscilloscopes offer several advantages over analog oscilloscopes, including:
- Higher bandwidth and sampling rates
- Storage and analysis of waveforms
- Automatic measurements and advanced triggering options
- Portability and smaller size

Setting Up an Oscilloscope
Before you start using an oscilloscope, you need to set it up properly. Follow these steps to get started:
- Power on the oscilloscope and allow it to warm up for a few minutes.
- Connect the probe to one of the input channels. Most oscilloscopes come with passive probes, which have a high input impedance to minimize circuit loading.
- Compensate the probe by attaching it to the oscilloscope’s calibration output (usually a square wave signal) and adjusting the probe’s capacitive compensation until the displayed waveform has flat tops and sharp edges.
- Set the vertical scale (volts/div) and horizontal scale (time/div) to appropriate values for the signal you want to measure. Start with a larger scale and adjust as needed.
- Set the trigger level and mode to stabilize the displayed waveform. The trigger determines when the oscilloscope starts to display the waveform based on a specified condition, such as a rising or falling edge.

Interpreting Waveforms
Once you have set up the oscilloscope and connected it to the circuit you want to measure, you’ll see a waveform displayed on the screen. To interpret the waveform correctly, you need to understand the following parameters:
- Amplitude: The vertical height of the waveform, measured in volts. Use the vertical scale (volts/div) to determine the amplitude.
- Period: The time it takes for the waveform to complete one cycle, measured in seconds. Use the horizontal scale (time/div) to determine the period.
- Frequency: The number of cycles per second, measured in hertz (Hz). Frequency is the reciprocal of the period (f = 1/T).
- Shape: The overall shape of the waveform can provide insights into the nature of the signal, such as whether it’s a sine wave, square wave, or triangle wave.
Common Waveform Shapes
- Sine Wave: A smooth, repetitive oscillation that represents a pure tone or frequency.
- Square Wave: A waveform that alternates between two levels, typically used in digital circuits.
- Triangle Wave: A waveform that linearly ramps up and down, often used in audio synthesis and signal generation.
- Sawtooth Wave: A waveform that ramps up linearly and then abruptly drops to its starting level, used in scanning and deflection circuits.

Making Measurements with an Oscilloscope
Oscilloscopes allow you to make various measurements on the displayed waveform. Most digital oscilloscopes have built-in automatic measurement functions, but it’s essential to understand how to make manual measurements as well.
Voltage Measurements
To measure the voltage of a signal:
- Set the vertical scale (volts/div) so that the waveform fills a significant portion of the screen vertically.
- Count the number of divisions from the zero-volt reference to the point you want to measure.
- Multiply the number of divisions by the volts/div setting to determine the voltage.
For example, if the vertical scale is set to 2 volts/div and the waveform peak is 3 divisions above the zero-volt reference, the peak voltage is 3 × 2 = 6 volts.
Time and Frequency Measurements
To measure the period or frequency of a signal:
- Set the horizontal scale (time/div) so that at least one complete cycle of the waveform is displayed.
- Count the number of divisions for one complete cycle of the waveform.
- Multiply the number of divisions by the time/div setting to determine the period.
- Calculate the frequency by taking the reciprocal of the period (f = 1/T).
For example, if the horizontal scale is set to 1 millisecond/div and one complete cycle of the waveform spans 5 divisions, the period is 5 × 1 = 5 milliseconds, and the frequency is 1 / 0.005 = 200 Hz.
Pulse Width Measurements
To measure the pulse width of a digital signal:
- Set the vertical scale and horizontal scale so that the pulse is clearly visible and spans several divisions.
- Adjust the trigger level to stabilize the waveform.
- Count the number of divisions between the rising and falling edges of the pulse at the 50% amplitude level.
- Multiply the number of divisions by the time/div setting to determine the pulse width.
Advanced Oscilloscope Features
Modern digital oscilloscopes offer several advanced features that can greatly enhance your ability to analyze and debug circuits. Some of these features include:
Persistence Display
Persistence display mode allows the oscilloscope to accumulate and display multiple waveforms over time, making it easier to spot intermittent or infrequent events. This mode is particularly useful for identifying glitches, jitter, or other transient phenomena.
Spectrum Analysis
Some oscilloscopes have built-in spectrum analyzers or fast Fourier transform (FFT) functions that allow you to view the frequency content of a signal. This is useful for analyzing the harmonic content of a waveform, detecting noise or interference, or measuring the frequency response of a system.
Waveform Math
Many digital oscilloscopes allow you to perform mathematical operations on the captured waveforms, such as addition, subtraction, multiplication, or even more complex functions like integration or differentiation. This can be useful for comparing signals, removing DC offsets, or calculating power or energy.
Triggering Options
Advanced triggering options allow you to capture specific events or conditions in the signal. Some common triggering modes include:
- Edge triggering: Triggers on the rising or falling edge of a signal.
- Pulse width triggering: Triggers on pulses that are wider or narrower than a specified duration.
- Logic triggering: Triggers based on the logical combination (AND, OR, XOR) of multiple input channels.
- Delay triggering: Triggers a specified time after the initial trigger event.
These advanced triggering modes can help you isolate and analyze specific portions of a waveform that may be of interest.
Oscilloscope Safety and Best Practices
When working with oscilloscopes, it’s essential to follow proper safety and handling procedures to protect yourself and the equipment. Some key considerations include:
- Always use the appropriate probe for the signal you’re measuring. Make sure the probe’s voltage rating and bandwidth are suitable for the application.
- Be aware of the maximum input voltage of the oscilloscope and probes. Exceeding these limits can damage the equipment and pose a safety hazard.
- Use the shortest possible ground lead on the probe to minimize ringing and signal distortion.
- Avoid touching exposed conductors or live circuits while measuring. Use insulated tools and probes whenever possible.
- Be cautious when measuring high voltages or currents. Use appropriate personal protective equipment (PPE) and follow safe working practices.
- Regularly calibrate and maintain your oscilloscope to ensure accurate measurements and reliable operation.
By following these guidelines and gaining hands-on experience with your oscilloscope, you’ll be well-equipped to tackle a wide range of electronic measurement and debugging tasks.
FAQ
- What is the difference between an analog and a digital oscilloscope?
-
Analog oscilloscopes use a cathode-ray tube (CRT) to directly display the measured signal, while digital oscilloscopes convert the signal to digital form using an analog-to-digital converter (ADC) and then process and display the waveform on a digital screen. Digital oscilloscopes offer advantages such as higher bandwidth, storage and analysis of waveforms, and automatic measurements.
-
How do I choose the right oscilloscope for my needs?
-
When selecting an oscilloscope, consider factors such as bandwidth (the maximum frequency the oscilloscope can accurately measure), sample rate (the number of samples per second the oscilloscope can acquire), number of input channels, memory depth, and available features like advanced triggering or spectrum analysis. Your choice should be based on the specific requirements of your applications and budget.
-
What is the purpose of the trigger function in an oscilloscope?
-
The trigger function in an oscilloscope determines when the oscilloscope starts to display the waveform based on a specified condition, such as a rising or falling edge of the signal. Proper triggering helps to stabilize the displayed waveform, making it easier to analyze and measure. Advanced triggering options allow you to capture specific events or conditions in the signal.
-
How do I compensate an oscilloscope probe?
-
To compensate a probe, attach it to the oscilloscope’s calibration output (usually a square wave signal) and adjust the probe’s capacitive compensation until the displayed waveform has flat tops and sharp edges. This process ensures that the probe’s capacitance matches the oscilloscope’s input capacitance, minimizing signal distortion and measurement errors.
-
What safety precautions should I take when using an oscilloscope?
- Always use the appropriate probe for the signal you’re measuring, and be aware of the maximum input voltage of the oscilloscope and probes. Use the shortest possible ground lead on the probe to minimize ringing and signal distortion. Avoid touching exposed conductors or live circuits while measuring, and use insulated tools and probes whenever possible. Be cautious when measuring high voltages or currents, and use appropriate personal protective equipment (PPE) and follow safe working practices.
| Vertical Scale (volts/div) | Waveform Peak (divisions) | Peak Voltage |
|---|---|---|
| 2 | 3 | 6 |
| Horizontal Scale (time/div) | Waveform Cycle (divisions) | Period (ms) | Frequency (Hz) |
|---|---|---|---|
| 1 | 5 | 5 | 200 |
By mastering the use of an oscilloscope and understanding its various features and capabilities, you’ll be well-equipped to tackle a wide range of electronic measurement, testing, and debugging tasks. With practice and experience, you’ll develop the skills and intuition needed to efficiently analyze and interpret waveforms, helping you to design, troubleshoot, and optimize electronic circuits with confidence.


Leave a Reply