Introduction to PCB Assembly
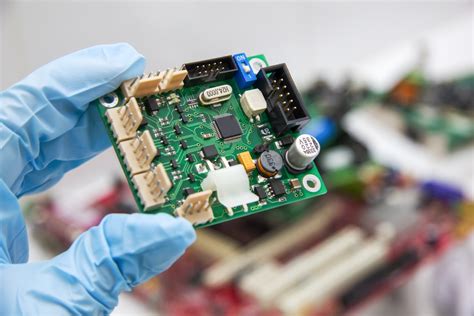
Printed Circuit Board (PCB) assembly is the process of attaching electronic components to a PCB to create a functional electronic device. The PCB serves as the foundation for the electronic components, providing both mechanical support and electrical connectivity. Low volume PCB assembly refers to the production of a small number of PCBs, typically ranging from a few prototypes to several hundred boards.
In this ultimate guide, we will delve into the various aspects of low volume PCB assembly, covering the process, techniques, and best practices to ensure a successful outcome.
The Importance of Low Volume PCB Assembly
Low volume PCB assembly plays a crucial role in the electronics industry, particularly in the following scenarios:
-
Prototyping: When developing a new electronic product, low volume PCB assembly allows for the creation of prototypes to test and validate the design before moving to mass production.
-
Small batch production: Some electronic devices may have a limited market demand, making low volume PCB assembly an economically viable option for production.
-
Customization: Low volume PCB assembly enables the creation of customized electronic devices tailored to specific customer requirements.

PCB Assembly Techniques
There are two primary techniques used in PCB assembly: Through-Hole (THT) and Surface Mount Technology (SMT). Let’s explore each technique in detail.
Through-Hole Technology (THT)
THT is the traditional PCB assembly method, where component leads are inserted through drilled holes in the PCB and soldered onto the opposite side. THT is known for its strong mechanical bonds and is suitable for components that require high reliability or are subject to mechanical stress.
Advantages of THT:
– Strong mechanical bonds
– Suitable for large components
– Easy to inspect and repair
Disadvantages of THT:
– Larger PCB size compared to SMT
– Higher assembly costs
– Slower assembly process
Surface Mount Technology (SMT)
SMT is a more modern PCB assembly technique, where components are placed directly onto the surface of the PCB and soldered using a reflow oven. SMT allows for smaller component sizes, higher component density, and faster assembly speeds compared to THT.
Advantages of SMT:
– Smaller PCB size
– Higher component density
– Faster assembly process
– Lower assembly costs
Disadvantages of SMT:
– Requires specialized equipment
– More difficult to inspect and repair
– Not suitable for components with high mechanical stress

Low Volume PCB Assembly Process
The low volume PCB assembly process typically involves the following steps:
- PCB Design and Fabrication
- Solder Paste Application
- Component Placement
- Reflow Soldering
- Inspection and Testing
- Cleaning and Finishing
Let’s discuss each step in more detail.
1. PCB Design and Fabrication
The first step in low volume PCB assembly is to design the PCB using Electronic Design Automation (EDA) software. The design should consider factors such as component placement, routing, and manufacturability. Once the design is finalized, the PCB is fabricated using a PCB manufacturer.
2. Solder Paste Application
Solder paste, a mixture of tiny solder balls and flux, is applied to the PCB’s surface where the components will be placed. This is typically done using a stencil and a solder paste printer. The stencil ensures that the solder paste is applied accurately and consistently.
3. Component Placement
The electronic components are then placed onto the PCB’s surface, aligning with the solder paste deposits. This process can be done manually for low volume assembly or using automated pick-and-place machines for higher volumes.
4. Reflow Soldering
The PCB with the placed components is then sent through a reflow oven, which heats the solder paste to its melting point. As the solder melts, it forms a strong electrical and mechanical bond between the components and the PCB. The reflow process is carefully controlled to ensure proper solder joint formation and to prevent component damage.
5. Inspection and Testing
After the reflow soldering process, the assembled PCBs are inspected visually and tested electrically to ensure proper functionality. Inspection methods may include automated optical inspection (AOI) or X-ray inspection for hidden solder joints. Electrical testing may involve in-circuit testing (ICT) or functional testing.
6. Cleaning and Finishing
Finally, the assembled PCBs are cleaned to remove any residual flux or contaminants. Additional finishing processes, such as conformal coating or potting, may be applied depending on the application requirements.

Best Practices for Low Volume PCB Assembly
To ensure a successful low volume PCB assembly process, consider the following best practices:
-
Design for Manufacturing (DFM): Incorporate DFM principles during the PCB design stage to ensure that the board is easy to manufacture and assemble.
-
Component Selection: Choose components that are readily available and suitable for the chosen assembly technique (THT or SMT).
-
Solder Paste Selection: Select a solder paste that is compatible with the components and the reflow profile.
-
Reflow Profile Optimization: Optimize the reflow profile to achieve proper solder joint formation while minimizing component damage.
-
Quality Control: Implement a robust quality control process, including inspection and testing, to identify and address any defects early in the assembly process.
Low Volume PCB Assembly Services
For companies that do not have in-house PCB assembly capabilities, there are many low volume PCB assembly services available. These services offer a range of options, from prototype assembly to small batch production.
When selecting a low volume PCB assembly service, consider the following factors:
- Technical capabilities
- Quality control processes
- Turnaround time
- Pricing
- Customer support
Frequently Asked Questions (FAQ)
- What is the minimum number of PCBs that can be assembled in low volume?
-
The minimum number of PCBs for low volume assembly can vary depending on the service provider, but it typically ranges from 1 to 100 pieces.
-
Is low volume PCB assembly more expensive than high volume production?
-
Yes, low volume PCB assembly is generally more expensive per unit compared to high volume production due to the setup costs and manual labor involved.
-
How long does low volume PCB assembly take?
-
The turnaround time for low volume PCB assembly can range from a few days to several weeks, depending on the complexity of the board and the service provider’s workload.
-
Can low volume PCB assembly accommodate both THT and SMT components?
-
Yes, low volume PCB assembly can typically accommodate both THT and SMT components, although it may require additional processing steps.
-
What files are needed for low volume PCB assembly?
- To begin the low volume PCB assembly process, you will typically need to provide the following files: Gerber files, Bill of Materials (BOM), and assembly drawings.
Conclusion
Low volume PCB assembly is an essential process for prototyping, small batch production, and customized electronic devices. By understanding the techniques, process steps, and best practices involved in low volume PCB assembly, you can ensure a successful outcome for your electronic projects.
When considering low volume PCB assembly, it is important to select the appropriate assembly technique (THT or SMT), work with reliable PCB assembly services, and implement a robust quality control process. By following the guidelines outlined in this ultimate guide, you can navigate the low volume PCB assembly process with confidence and achieve the desired results for your electronic devices.


Leave a Reply